8-5
8 LAYOUT
8.1.3 Setting Occupied Point
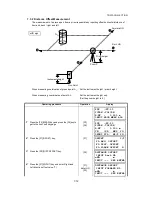
Occupied point can be set by two setting methods as follow.
1) Setting from the coordinate data stored in the internal memory.
2) Direct key input of coordinate data.
●
Example setting :Setting the occupied point from the internal coordinate data file
Operating procedure
Operation
Display
1
Press the [F1](OCC.PT INPUT) key from the
Layout menu 1/2.
The previous data is shown.
[F1]
2
Press the [F1] (INPUT) key and enter PT#. *1)
Press the [F4](ENT) key.
[F1]
Enter PT#
[F4]
3
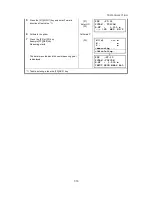
Enter INS.HT in the same way.
[F1]
Enter
INS.HT
[F4]
The display returns to layout menu 1/2.
*1) Refer to Section 2.6 “How to Enter Alphanumeric characters”.
OCC.PT
PT#:
INPUT LIST NEZ ENTER
OCC.PT
PT#=PT-01
1234 5678 90.– [ENT]
INSTRUMENT HEIGHT
INPUT
INS.HT: 0.000 m
INPUT ––– ––– [ENT]
1234 5678 90.– [ENT]
LAYOUT 1/2
F1:OCC.PT INPUT
F2:BACKSIGHT
F3:LAYOUT P
↓
Summary of Contents for GPT-3000 Series
Page 1: ...GPT 3000 SERIES GPT 3002 GPT 3003 GPT 3005 GPT 3007 PULSE TOTAL STATION INSTRUCTION MANUAL...
Page 2: ......
Page 137: ...12 4 12 SETTING ATMOSPHERIC CORRECTION...
Page 138: ...12 5 12 SETTING ATMOSPHERIC CORRECTION...
Page 179: ......

