1-8
1 NOMENCLATURE AND FUNCTIONS
●
Adjustment the contrast (0 to 9 ) of the display (CONT)
This enable you to adjust the contrast of the display.
Press the up or down arrow keys to adjust the contrast.
●
Adjustment the reticle illumination (1 to 9 ) (RTCL)
This enable you to adjust the reticle illumination.
Press the right or left arrow keys to adjust the reticle illumination.
The switch of reticle illumination will be interlocked with the switch of display backlight.
●
Turn the display backlight ON/OFF
To turn the backlight ON, press the [F1] key. Press [F1] again to turn the backlight OFF.
●
Switching the non-prism mode/prism mode
To switch the non-prism /prism mode, press the [F2](NP/P) key. For more information, see Chapter
4 “DISTANCE MEASUREMENT” .
●
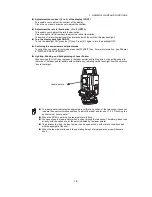
Lighting, Blinking, and Extinguishing of Laser Pointer
Whenever the [F3] (L.P.) key is pressed, the laser pointer will light up, blink, or be extinguished, in
that order. The laser pointer assists with collimation by radiating visible laser light from the objective
lens to the target.
●
The laser pointer indicates the approximate collimation position of the telescope. It does not
indicate the exact collimation position. To adjust the laser pointer, see 17.2.2 “ Checking the
optical axis of Laser pointer”.
●
When the EDM is working, the laser pointer will blink.
●
You cannot see the laser pointer when looking through the telescope. Therefore, please look
directly, with the naked eye, at the point indicated by the laser pointer.
●
The distance to which the laser pointer can be used will vary with climatic conditions and
with the eyesight of the user.
●
When the laser pointer is used, the operating time of internal power source will become
short.
Laser aperture
Summary of Contents for GPT-3000W Series
Page 2: ......
Page 140: ...12 4 12 SETTING ATMOSPHERIC CORRECTION...
Page 141: ...12 5 12 SETTING ATMOSPHERIC CORRECTION...
Page 181: ...APPENDIX 5...
Page 183: ......


