42
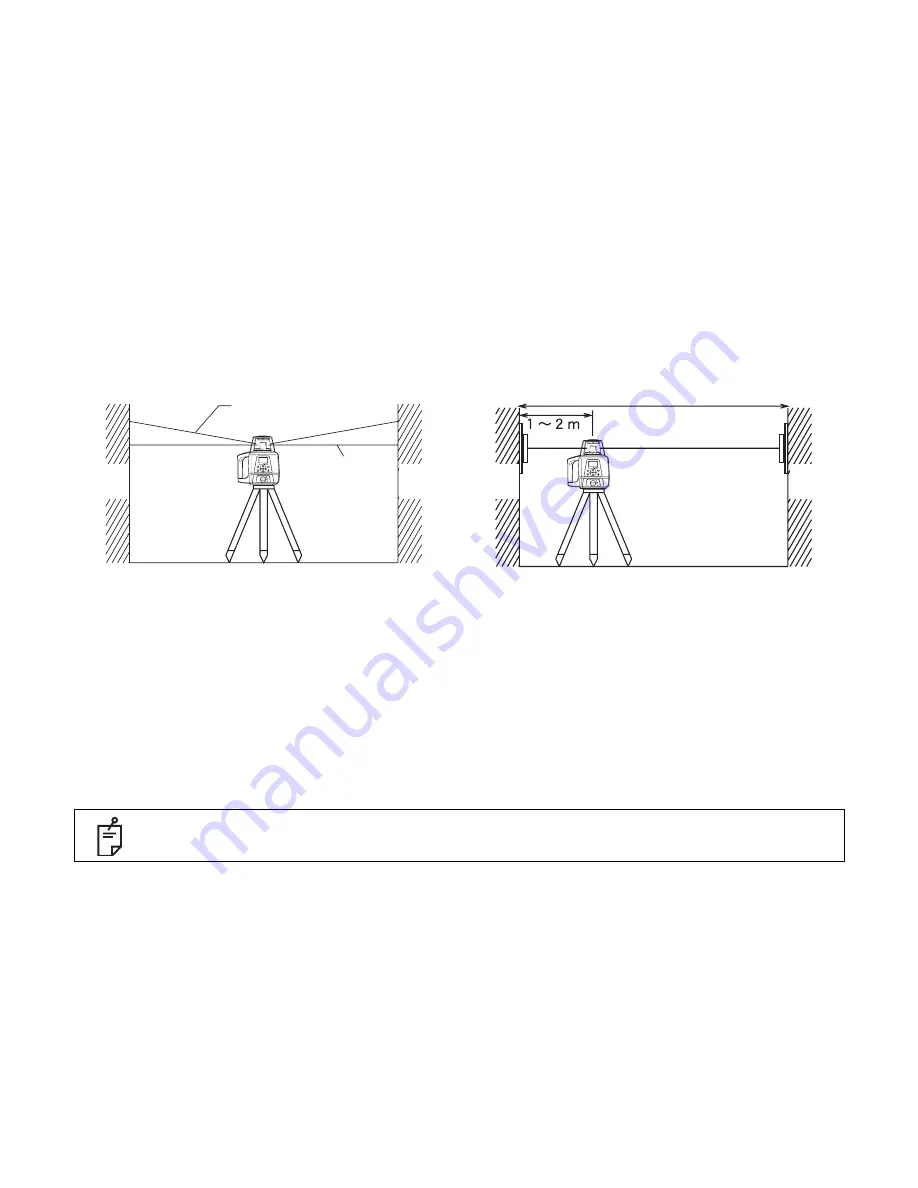
Horizontal Rotation Cone Error
Perform the following check after completing “Horizontal Calibration” on the previous
page.
1
Set up the laser centered between two walls approximately 50 m (164 ft) apart. Orient the
instrument so one axis, either X or Y, is facing the walls. Grade should be set to 0.00% in both
axes.
2
Locate and mark the position of the rotating laser beam on both walls using the level sensor.
3
Turn off the instrument and move the instrument closer to wall A (1 m to 2 m /3 ft to 6 ft).
Do not change the axis orientation of the instrument. Turn the instrument on.
4
Again locate and mark the position of the rotating laser beam on both walls using the level
sensor.
5
Measure the distance between the first and second marks on each wall.
6
If the difference between each set of marks is less than ±5 mm (±7/32 of an inch), no error
exists.
If the difference between [wall A]-side and [wall B]-side exceeds ±5 mm (±7/32 of an
inch), contact your dealer or Topcon.
Minimum about 50 m/164 ft
Cone error
Datum position
Wall
A
Wall
A
Wall
B
Wall
B


