background image

7

Chapter 2

Setup

2.1

Unpacking

Before going any further, check that you have received the
following items with your digital receiver.

• Remote control unit

• Two batteries for the remote control (AAA 1.5 V)

• One HDMI cable

• One component cable (RCA cable)

• A copy of this user guide

NOTE

Accessories may vary according to your local area.

2.2

Safety precautions

Please read carefully the following safety precautions.

• The mains power must be 90 to 250 volts. Check it before

connecting the digital receiver to the mains socket. For

Summary of Contents for TF 7050 HDRt

Page 1: ...TOPFIELD TF 7050 HDRt User Guide High Definition Digital Terrestrial Receiver Personal Video Recorder...

Page 2: ......

Page 3: ...gerous voltage within the product s enclosure that may be of sufficient magnitude to constitute a risk of electric shock to a person The exclamation point within an equilateral triangle is intended to...

Page 4: ...tions 9 2 4 Connecting up your digital receiver 10 2 4 1 Connecting the antenna 10 2 4 2 Connecting to your television set 10 2 5 Inserting batteries in the remote control 12 2 6 Switching on for the...

Page 5: ...ting subtitle tracks 28 5 2 6 Viewing teletext 28 5 3 Viewing electronic programme guide 28 5 4 Using time shift 29 6 Listing Services 32 6 1 Editing the favourite list 32 6 2 How to use on screen key...

Page 6: ...45 7 3 2 To play in slow motion 46 7 3 3 To play in fast motion 46 7 3 4 To make a bookmark 47 7 3 5 To play back a recording repeatedly 47 7 4 Formatting the hard disk 48 8 Firmware Update 49 8 1 Che...

Page 7: ...requency However unlike analogue broadcasts digital broadcasts are not all as signed to their own frequencies instead multiple television broadcasts are transmitted through a single frequency The fre...

Page 8: ...on the TF 7050 HDRt You can pause the programme you are watching and resume it again at a later time Then you can quickly go to any part of the current programme by fast forward or backward search 1...

Page 9: ...ont display displays the current time in standby mode and displays the current service in operation mode MENU button displays the main menu It is also used to return to the previous menu from a submen...

Page 10: ...n to switch it back on 5 P P buttons switch to previ ous or next service They are also used to navigate in menus and in teractive screens 6 switches between the current service and the previously view...

Page 11: ...so used to return to the previous menu from a submenu 21 EXIT is used to exit a menu or to hide on screen info 22 is used to start recording 23 is used to stop playback to stop recording or to jump ba...

Page 12: ...back 31 is used to jump to end of recording during a playback 32 has different functions per menu 33 is used to make a bookmark during playback or time shift 34 is used to jump to next bookmark positi...

Page 13: ...atteries for the remote control AAA 1 5 V One HDMI cable One component cable RCA cable A copy of this user guide NOTE Accessories may vary according to your local area 2 2 Safety precautions Please re...

Page 14: ...e digi tal receiver When placed in a cabinet make sure there is a minimum space of 10 centimetres around it For the physical specification of the digital receiver refer to Table 2 2 Protect the power...

Page 15: ...cket through the ANT IN socket for another digital receiver 3 USB USB port for firmware update and data trans fer 4 HDMI Audio and video output socket for the high definition television set 5 S PDIF D...

Page 16: ...ly to your television and other appliances If you have any problem with your setup or need help contact your dealer 2 4 1 Connecting the antenna Whatever sort of connection you have be tween the digit...

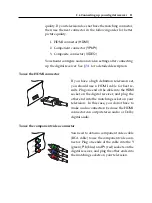
Page 17: ...definition television set you should use a HDMI cable for best re sults Plug one end of the cable into the HDMI socket on the digital receiver and plug the other end into the matching socket on your t...

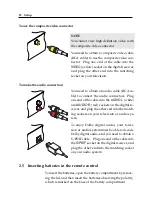
Page 18: ...the cable into the AUDIO L white and AUDIO R red sockets on the digital re ceiver and plug the other end into the match ing sockets on your television or audio sys tem To enjoy Dolby digital audio yo...

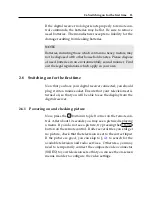
Page 19: ...hould plug it into a mains socket Ensure that your television set is turned on so that you will be able to see the display from the digital receiver 2 6 1 Powering on and checking picture Now press th...

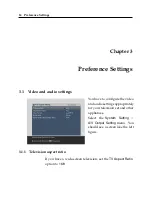
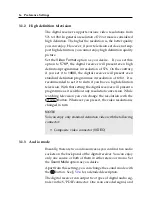
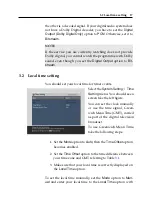
Page 20: ...nfigure the video and audio settings appropriately for your television set and other appliances Select the System Setting A V Output Setting menu You should see a screen like the left figure 3 1 1 Tel...

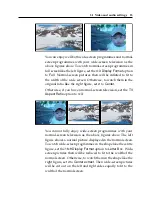
Page 21: ...if you have a normal screen television set the TV Aspect Ratio option to 4 3 You cannot fully enjoy wide screen programmes with your normal screen television as the above figures show The left figure...

Page 22: ...et it to Auto if you have a high definition television With that setting the digital receiver will present a programme as it is without any resolution conversion While watching television you can chan...

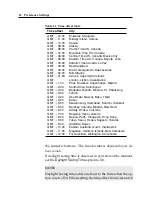
Page 23: ...timer events Select the System Setting Time Setting menu You should see a screen like the left figure You can set the clock manually or use the time signal Green wich Mean Time GMT carried as part of...

Page 24: ...Riyadh Moscow St Petersburg GMT 3 30 Tehran GMT 4 00 Abu Dhabi Muscat Baku Tbilisi GMT 4 30 Kabul GMT 5 00 Ekaterinburg Islamabad Karachi Tashkent GMT 5 30 Bombay Calcutta Madras New Delhi GMT 6 00 A...

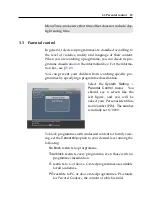
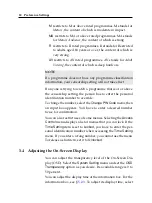
Page 25: ...ying a programme classification Select the System Setting Parental Control menu You should see a screen like the left figure and you will be asked your Personal Identifica tion Number PIN The number i...

Page 26: ...o enter the personal identification number to override To change the number select the Change PIN Code menu then an input box appears You have to enter a desired number twice for confirmation You can...

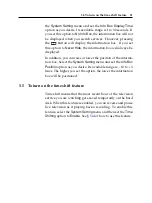
Page 27: ...r the position of the informa tion box Select the System Setting menu and set the Info Box Position option as you desire Its available range is 10 to 3 lines The higher you set the option the lower th...

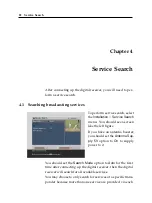
Page 28: ...should see a screen like the left figure If you have an antenna booster you should set the Antenna Sup ply 5V option to On to supply power to it You should set the Search Mode option to Auto for the f...

Page 29: ...item then a list box appears in which found services will be listed When it has completed press the OK button to save found services To stop at any time or to exit without saving press the EXIT butto...

Page 30: ...e button Press it again to restore the sound to previous level 5 2 Watching television To change services press the P or P button Pressing the button switches to the previously viewed service In ad di...

Page 31: ...by pressing the button Pressing the button displays the additional options with which you can do the following By setting the Show Provider option to On you can view service entries by groups of broa...

Page 32: ...services belong ing to the highlighted group are listed on the right box For how to edit the favourite lists refer to 6 1 To select a favourite service put the hightlight bar on a desired group and p...

Page 33: ...wing programme information Pressing the button displays the information box on which you can see all of the following Service number and name Signal level and quality Programme name Programme classifi...

Page 34: ...le symbol will be marked on the infor mation box Pressing the button displays available subtitle tracks Once you select a subtitle track it will be displayed 5 2 6 Viewing teletext On some services su...

Page 35: ...next days with the button To see the programme guide for radio broadcasts press the button To switch it back press the button again Pressing the button displays the programme guide in the form of spre...

Page 36: ...change to another service With time shift enabled the following operations are possible To go back in time hold down the button to go for ward hold down the button The progress bar is displayed moment...

Page 37: ...ive pro gramme will be presented When the time shift feature is disabled and a pause is kept for more than 10 seconds the time shift feature will be enabled for saving the missing part of the programm...

Page 38: ...Favorites menu You should see a screen like the left figure There are three columns Group list left Favourites list centre Services list right The services list contains all available services whereas...

Page 39: ...in the group list and press the OK button to select it The high light bar then moves to the services list 2 To add a service to the selected group put the highlight bar on a desired service entry and...

Page 40: ...er put the cursor to the right of the desired letter on the input line and then select the Del key You must select the Save key to complete naming otherwise if you press the EXIT button it will not be...

Page 41: ...digital receiver 2 Turn on the source digital receiver 3 Select the Installation Transfer Firmware Transfer Data to Other IRD menu then you get asked for confirmation select Yes 4 To start the data t...

Page 42: ...t move the digital receiver nor pull out the plug while it is running It may cause damage to recorded programmes Note that Topfield is not responsible for damages inflicted on files that are stored on...

Page 43: ...Duration option as you desire with the V and V buttons and press the OK button the recording will end at the specified time If the information about the next programme is provided by the electronic pr...

Page 44: ...me list press the button or alter natively select the File List menu See 7 2 for detailed description about the recorded pro gramme list 7 1 2 Timer recording You can set a service to be recorded at a...

Page 45: ...ase 2 If you want a radio programme set the Type option to Radio otherwise set it to TV 3 Set the Service option to the service which provides the programme you want Pressing the OK button on this opt...

Page 46: ...the on screen keyboard 8 To set a timer recording with the above settings select the OK item otherwise it will not be saved and will not occur You can also edit or delete timer events in the timer li...

Page 47: ...P and P buttons 4 To make a timer event without recording press the OK button the letter P is displayed To make a timer event with recording press it once more or alternatively press the button then t...

Page 48: ...size In addition you can make a new folder 7 2 1 To delete a recording To delete a recording put the highlight bar on it and press the button then you get asked for confirmation If you select Yes it...

Page 49: ...bar on a desired recording 2 Press the button to display the additional options 3 Select the Rename option and the on screen keyboard appears Change the name and save it See 6 2 for how to use the on...

Page 50: ...bar on a desired file and press the button then the list of folders gets displayed 4 To copy a file to the USB storage select the USB Storage External folder To copy a file to the internal hard disk...

Page 51: ...ck press the button During a playback you can enjoy the following tricks To see the detailed information about the currently played recording press the button then the information box appears and show...

Page 52: ...n slow motion during a playback press the button If you press it repeatedly the playback speed changes in 3 steps 1 2 1 4 and 1 8 times To resume normal speed press the button 7 3 3 To play in fast mo...

Page 53: ...n you will see a small dot appear above the progress bar like in the picture above 3 To jump forward to next bookmark press the button 4 To jump to first bookmark press the button then the button 5 To...

Page 54: ...7 4 Formatting the hard disk You can delete all contents stored in the hard disk drive by formatting it If you wish to do that select the Installation Format Hard Disk menu then you get asked for con...

Page 55: ...tool which runs on most versions of Windows from the Topfield web site http www i topfield com 8 1 Checking the firmware information You have to check up the firmware information of your digital rece...

Page 56: ...50 Firmware Update NOTE It is only allowed to update with the firmware of which system identification is identical to that of yours Otherwise you will fail in firmware update...

Page 57: ...ted 5 Place the highlight bar on the right firmware file and press the OK button then a countdown will be displayed on the front display of the digital receiver 6 When the END message appears restart...

Page 58: ...able to your digital receiver from the Topfield web site 2 Turn off the digital receiver 3 Plug one end of a RS 232 cable 9 pin D sub cable into the RS 232 port on the dig ital receiver and the other...

Page 59: ...end of a RS 232 cable 9 pin D sub cable into the RS 232 port on the dig ital receiver and the other end into the matching port on the other digital receiver 3 Turn on the source digital receiver if n...

Page 60: ...n 4 Censorship 19 Center 15 Center extract 15 Change PIN Code 20 Channel 23 Date 40 Daylight Saving Time 18 Delete 26 Digital Output Dolby Digital Only 17 download 52 Duration 37 40 DVB 1 Electronic P...

Page 61: ...ode 22 23 Service 39 Service Search 22 services list 24 Show Provider 25 Size 42 Sorting 42 Sound Mode 16 specifications 8 10 Start Search 23 Start Time 40 stereo 16 subtitle 28 System ID 49 System Se...

Page 62: ......

Page 63: ......

Page 64: ...e reuse of material resources Household users should contact either the retailer where they purchased this product or their local government office for details of where and how they can dispose this p...

Reviews: