GTalarm3 User manual V-2022-05-24
55 |
E N
5
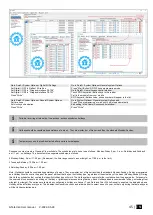
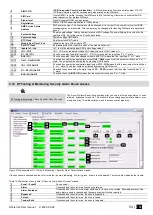
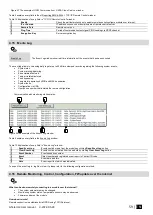
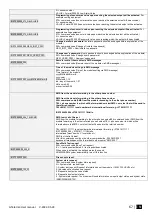
Tamper Shutdown
If checked and the color is red tamper shutdown for the zone is activated. Allowable number of the
same tamper shutdown events is reached and the same events will not be reported.
8
System State
Indication that at the moment the module is in waiting ARM, ARM, DISARM, SLEEP or STAY mode
9
DISARM
After pressing the button DISARM, disarm mode should be entered
10
ARM
After pressing the button ARM, arm mode should be entered
11
SLEEP
After pressing the button SLEEP, sleep mode should be entered
12
STAY
After pressing the button STAY, arm mode should be entered
13
System Voltage
If the checkbox is checked and the color is red the trouble with system voltage is indicating. If color
is green, there is no trouble with system voltage.
14
RTC Clock
If the checkbox is checked and the color is red RTC clock is not set. If color is green, RTC clock is
set.
15
Module Real Time Clock
Real time and date is indicating.
17
iButton Read
The number of iButton Maxim iButton key DS1990A - 64 Bit ID code that is arming the system.
18
Incoming call
The number of users phone that is calling to the module’s SIM.
19
Wiegand RFID Card Key
The number of Wiegand RFID Key Card that is arming the system.
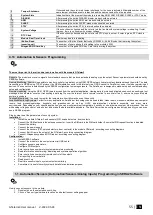
4.13 Automation & Sensors Programming
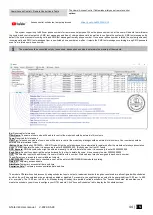
The most important information due to automation with the module GTalarm3
Sensors
. The module can receive signals from standard sensors that produce a standard analog or pulse output. Sensor’s parameters should be set by
SERA2 software.
Remote Monitoring, Control It is possible to monitor, control or log data by using GSM GPRS network from almost any location around the world. The data
transmitting via GPRS using TCP/IP protocol; the GSM module connects to the internet via a GPRS cannel to SeraServer server tool who registering all
devices. The connection is established by the SERA2 configuration tool using unique id. The SeraServer is designed to make setup and use fast and easy
setup and configuration.
Remote monitoring. Using the GSM, GPRS remote access from the simplest application, viewing data to more sophisticated uses, such as sending a text
message when an alarm occurs or transmitting a data log file over the internet from a remote location to a central office. A user can access this data
anytime, anywhere.
Testing & Monitoring. You need to monitor the temperature, humidity maybe even the security
Localized Monitoring Systems.
Perfect for many applications, SeraServer technology can be used in labs, clean rooms, museums, warehouses, computer
rooms, food processing/storage, hospitals, and greenhouses, as well as HVAC, pharmaceutical, electronic assembly, and many more
environments.
Depending on your specific application, you can monitor ambient temperature, humidity, or use a thermocouple or other process. Sensor
with analog voltage/current or pulse output, and make the data available anywhere. The Sera Server can be configured quickly and easily you can even
use a SERA2 program.
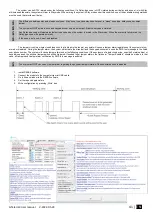
Step by step to set the parameters of security system:
Installation:
Install the module GTalarm3 and sensors (PIR, smoke detectors, door contacts
Connect the GSM antenna to the antenna connector. Insert the SIM card in the SIM card holder. Ensure that PIN request function is disabled.
Connect the battery
Connect the power supply
Connect the sensors (PIR, smoke detectors, door contacts) to the module GTalarm3, according connecting diagrams
Connect Bell, Siren to the output of the GTalarm3, according connecting diagram
Connect Wiegand keypad and RFID reader, according connecting diagram
Configuration:
Install SERA2 software
Connect the module to the computer via mini USB cable.
Configure sensors parameters
Configure PGM outputs
Enter user phone numbers for system parameters monitoring
Read information about arming/ disarming and systems operation algorithm
Enter user phone numbers for remote control of the outputs
Set reporting to server details
Read event Log
Real time sensors inputs, system outputs monitoring
Sometimes it is useful security system’s details for automation purpose:
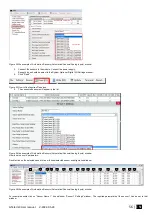
1.1. Automation/Sensors (Automation/Sensors/Analog Inputs) Programming in SERA2 Software
How to connect sensor’s to the module:
1.
Double click on the selected sensor’s line.
2.
Click on “Sensor type/ hardware location” and default sensor settings appear.

