- 11 -
C. FILLING THE WATER TRAY AND DRAINING
1.
Fill
the tray with water through the cutting slot. Don't add chemicals or detergents to the water.
2.
Be
sure that the water is enough so that the diamond blade turns through appropriate water. This is
necessary to cool the blade in a correct way.
3.
If
the machine is not used, water should be drained. Take out the bigger table piece, loose the jam on
the bottom of the tray, the water will flow out.
4.
After
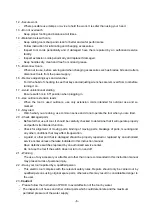
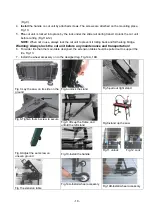
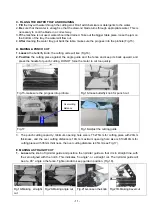
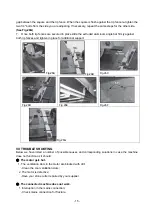
cleaning the water tray, put back the table, make sure the pin goes into the pinhole (Fig.15).
D. MAKING A PUNCH CUT
1. Loosen
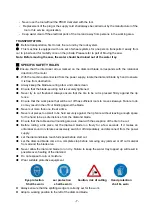
the butterfly knob, the cutting unite will rise (Fig.16).
2. Position
the cutting piece against the angle guide and the fence and keep its back upward, and
press the handle for punch cutting. DO NOT force the motor to cut too quickly.
Fig.15-make sure the pin goes into pinhole.
Fig.16-loose butterfly knob for punch cut
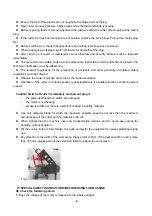
Fig.17
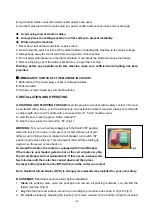
Fig.18-Adjust the cutting guide
3. The punch cutting capacity: minimum opening hole size is 75 x75mm for cutting piece with 20mm
thickness, and the over cutting distance is 19mm; maximum opening hole size is 610x610mm for
cutting piece with 35mm thickness, the over cutting distance is 45mm (see Fig.17)
E. MAKING A STRAIGHT CUT
1. Loosen
the knob of rip/miter guide and position the rip/miter guide so that it is in straight line, with
the zero aligned with the notch. This indicates “no angle”, or a straight cut. The rip/miter guide will
be at a 90
º
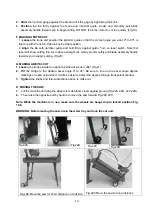
angle o the fence. Tighten knob to keep guide in position. (Fig.18).
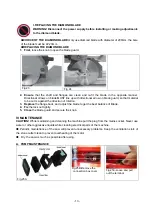
Fig.19-Making straight
cut
Fig.20-Making angle cut
Fig.21A-Loosen the knob
Fig.21B-Making bevel cut
Overcutting
distance


