background image

4

213906-00 Rev. 3A 6/14

INSTALLATION

Energy Star Home Certification

If installing the media air cleaner into an application 

that is going to have the ducts leakage tested 

for compliance with 2011 Energy Star Home 

Certification, Energy Efficient Mortgage (EEM), 

or Energy Improvement Mortgage (EMI) rating 

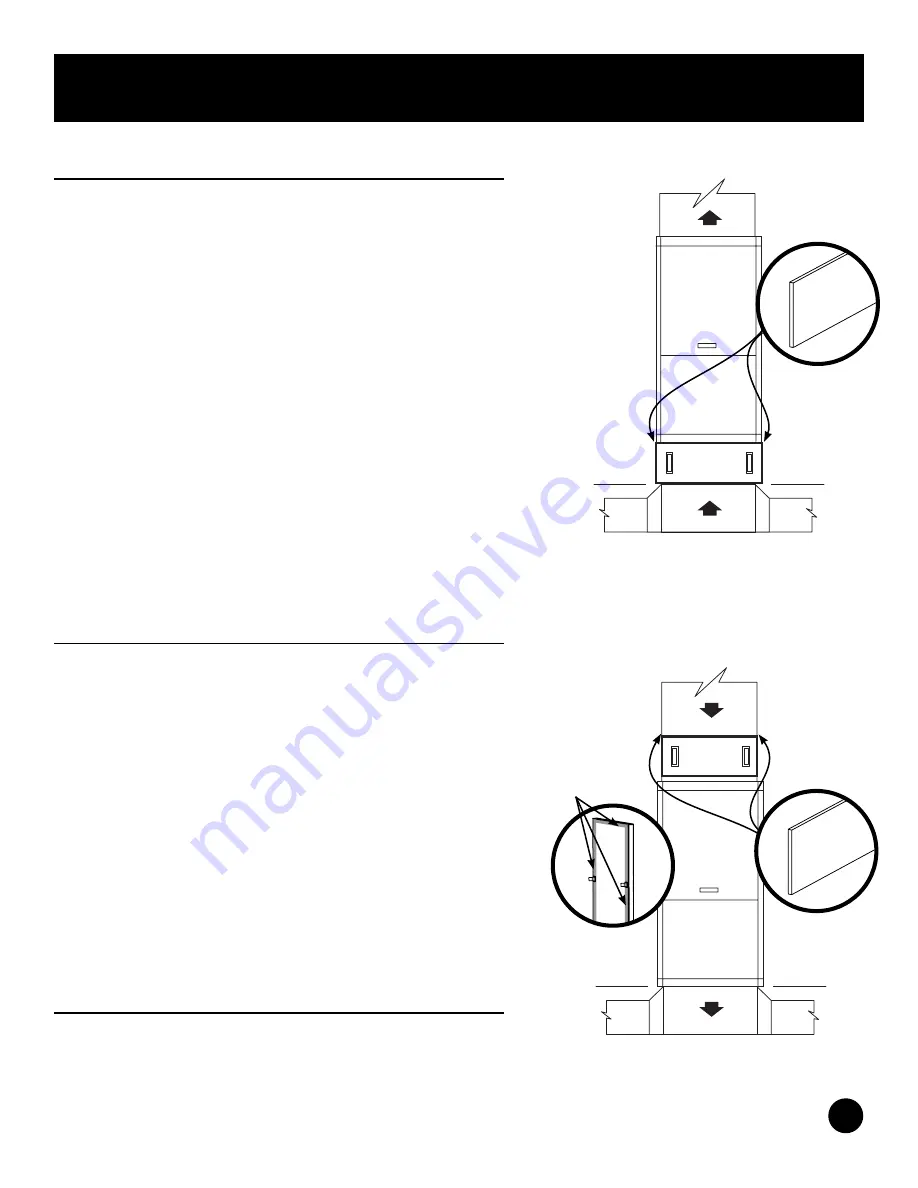
requirements, then cut the provided roll of gasket 

material to length and apply to the inner door flanges 

that meet up with the front access panel of the media 

air cleaner to reduce the air leakage between the 

door and the air cleaner.
More information about the Energy Star Home 

Certification, EEM, and EMI requirements can be 

found at http://www.texenergyaudit.org/facts.htm

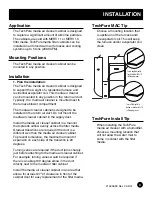
Installing the Filter media

The arrow on the filter media must point in the 

direction of the air flow. If the media cabinet is 

installed in the return air side of the duct work, 

the arrow will typically point toward the blower 

compartment.

Installation (continued)

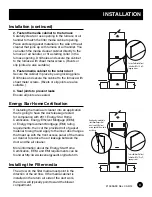
2. Fasten the media cabinet to the furnace


Carefully create or use opening in the furnace or air 

handler to match the filter media cabinet opening. 

Place enclosed gasket material on the side of the air 

cleaner that joins up with furnace or air handler. You 

can attach the media cleaner cabinet directly to the 

furnace or air handler, or fit a starting collar in the 

furnace opening. Drill holes and secure the cabinet 

to the furnace with sheet metal screws. (Rivets or 

slip joints are also suitable.) 

3. Fasten media cabinet to the return duct

Secure the cabinet in place by using locking pliers. 

Drill holes and secure the cabinet to the furnace with 

sheet metal screws. (Rivets or slip joints are also 

suitable.)

4. Seal joints to prevent leaks


Ensure all joints are sealed.

Secure flat bracket front 

to back with 8x1/2 self-

tapping screws.

Secure flat bracket front 

to back with 8x1/2 self-

tapping screws.

Apply gasket material to 

inner door flanges that 

meet up with the front 

access panel of the media 

air cleaner.

Summary of Contents for Technology series

Page 1: ...if you fail to follow these instructions Need Help For assistance with this product please visit http www toptechparts com or call customer care at 1 866 239 4440 during normal business hours Table of Contents Page Features and Specifications 2 Installation 3 Installation continued 4 Pressure Drop Data 5 Final Check and Contact Info 6 High performance media air cleaner Air cleaner cabinet is fully...

Page 2: ...75 D x 14 25 W x 6 H Repl Media TT FM 1425 TT FM15 1425 TT MAC 1729 29 D x 17 25 W x 6 H Repl Media TT FM 1625 TT FM15 1625 TT MAC 2129 29 D x 21 25 W x 6 H Repl Media TT FM 2025 TT FM15 2025 TT MAC 2429 29 D x 24 25 W x 6 H Repl Media TT FM 2424 TT FM15 2424 TT MAC 1722 22 125 D x 17 W x 6 H Repl Media TT FM 1620 TT FM15 1620 TT MAC 2122 22 125 D x 21 W x 6 H Repl Media TT FM 2020 TT FM15 2020 TT...

Page 3: ...aner can be mounted in any position in the return air duct Typically the media air cleaner is mounted next to the furnace blower compartment The media air cleaner cabinet is designed to be installed in the return air duct Do not mount the media air cleaner cabinet in the supply duct Install the media air cleaner cabinet in a manner that spreads airflow evenly across the filter media Gradual transi...

Page 4: ...ically point toward the blower compartment Installation continued 2 Fasten the media cabinet to the furnace Carefully create or use opening in the furnace or air handler to match the filter media cabinet opening Place enclosed gasket material on the side of the air cleaner that joins up with furnace or air handler You can attach the media cleaner cabinet directly to the furnace or air handler or f...

Page 5: ... mm Fractional Efficiency 0 3 0 4 15 7 15 1 21 2 26 3 34 2 38 5 15 1 0 4 0 55 19 9 19 5 25 9 36 3 42 9 51 2 19 5 0 55 0 7 28 0 30 6 39 8 52 3 57 6 65 8 28 6 0 7 1 0 42 0 45 3 52 6 65 9 71 2 79 3 43 0 1 0 1 3 53 4 57 8 63 7 74 8 81 4 86 6 53 4 1 3 1 6 61 5 65 9 72 0 81 5 85 9 91 3 61 5 1 6 2 2 69 1 74 8 80 3 86 9 90 9 95 0 69 1 2 2 3 0 77 0 82 9 88 2 93 2 95 0 97 2 77 0 3 0 4 0 81 7 88 0 92 2 95 7 ...

Page 6: ... least once a year in all circumstances Final Checks Check installation 1 TechPure air cleaner cabinet is installed securely on the return side of the system 2 The arrow on the filter media points in the direction of the air flow 3 If used turning vanes and transitions are installed properly 4 All joints in ductwork and between TechPure air cleaner and furnace air handler are properly sealed to pr...

Reviews: