13
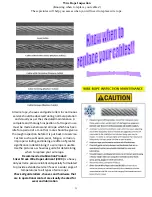
POST TENSION CONCRETE
DO NOT CUT OR DRILL THROUGH A POST TENSION CABLE
.
Do not disturb, bolt up, or apply load to adhesive anchors prior to the full cure of the adhesive.
Metal anchors and fasteners will corrode and may lose load-carrying capacity when installed in corrosive
environments or exposed to corrosive materials. There are many environments and materials which may cause
corrosion including ocean salt air, fire-retardants, fumes, fertilizers, preservative-treated wood, dissimilar
metals, and other corrosive elements.
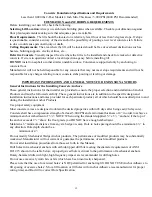
Finished Diameters for Rotary and Rotary Hammer Carbide Tipped Concrete Drills per ANSI B212.15
(Locate any post tension cables before you drill)
Detailed Installation Instruction for Expansion Anchors.
CAUTION: Anchors must be at least 6” from the edge of the slab or any seam.
1. Measure Lift Placement.
(see figure
?) (Recommended use columns as template before drilling and
mark holes.)
2. Keep the drill in a perpendicular line while drilling.
Let the drill do the work. Do not apply excessive pressure. Lift the drill up and down occasionally to remove
residue to reduce binding.
3. Drill the hole to depth equal to the length of anchor. Note: Drilling thru concrete (recommended) will allow
the anchor to be driven thru the bottom of foundation if the threads are damaged or if the lift will need to be
relocated.
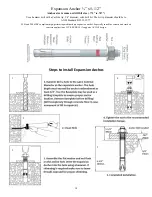
(Example A.1)
4.For better holding power blow dust from the hole.
(Example A.2)
6. Repeat Steps 4 thru 5 ( Qty x 10 )
.
7. Move column into place carefully.
8. Place flat washer and hex nut over threaded end of 3/4” x 5 1/2” wedge anchor, leaving approximately 1/16
inch of thread exposed carefully tap anchor
(use a hammer Example A.3)
. Do not damage threads. Tap anchor
into the concrete until nut and flat washer are against base plate. Tighten the nut, two or three turns on
average concrete (28-day cure). Check each anchor bolt with torque wrench set to 100 foot pounds torque.
(Example A.4)
8.1 Using the horseshoe shims provided, shim each column base as required until each column is plumb. If one
column has to be elevated to match the plane of the other column, add shim plates. Torque anchors to 100 ft-lbs.
Shim thickness MUST NOT exceed ½” when using the 5 ½” long anchors provided with the lift. Adjust the
column extensions plumb.
8.2 Mechanical Anchors: Expansion anchors that have been set to the required installation torque in concrete
will experience a reduction in pre-tension (due to torque) within several hours Re-torque the anchor to the
initial installation torque is not recommended, or necessary.
8.3 For mechanical anchors that require a specific installation torque: Failure to apply the recommended
installation torque can result in excessive displacement of the anchor under load or premature failure of the
anchor. These anchors will lose pre-tension after setting due to pre-load relaxation.
8.4
If anchors do not tighten to 100 ft-lbs. installation torque, replace the concrete under each column
base with a 4’ x 4’ x 6” thick (Recommended 4,000 PSI) 3000psi minimum concrete pad keyed under and
flush with the top of existing floor. Allow concrete to cure before installing lifts and anchors (typically 28
days).
See pictures below.
Summary of Contents for QJY240C
Page 9: ...9...
Page 23: ...23 Fig 12 Fig 12...
Page 32: ...34 Parts Diagram...
Page 33: ...35 Parts List...
Page 34: ...36 COMPANY INFO BACK PAGE...


