background image

9

     daylight savings dates noted by ON . To remove 

     daylight savings time setting, press 

DEL

 to 

     change screen to show OFF . DST may be activated 

     again by pressing 

DEL

 . Press 

ENTER

 to save 

     changes . To change from the standard DST month/

     week/day setting press 

HOUR

 and refer to step 4 .1 .

     6 . 

CYCLE MODE

: To change duty cycle timing, press 

     either the 

HOUR, MIN

, or 

SEC

 keys . Press 

ENTER

 to 

     save changes .

     7 . 

SCH MODE

: To change schedule, press 

ENTER

  to      

     advance to desired event . Press 

HOUR

MIN

EVENT

     and 

DAY

 to modify time settings . Press 

DEL

 to delete . 

     Press 

ENTER

 after each modification to save changes .

     NOTES

:

     1 . Unit has a look back feature . Press the 

EVENT

  key      

     once to activate current schedule then 

EVENT


     key again to return to the time (run) screen . Unit will 

     automatically pick up the last schedule . 

     2 . To clear date and time only and provide unit with  

     a soft reboot, press and release the reset button that is 

     recessed under the small hole to right side of LCD   

     screen .

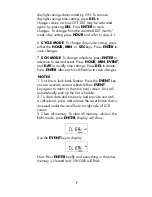
     3 . Clear all memory . To clear all memory, while in the 

     RUN mode, press 

ENTER

, display will show:


     Use the 

EVENT

 key to display:

     
     Now Press 

ENTER

 briefly and everything in the timer 

     memory is cleared and 12HOUR will flash .

Summary of Contents for DGS100A

Page 1: ...INSTRUCTION MANUAL MLI 198 B DIGITAL TIME SWITCH 7 DAY DGS100A DGS100A 12 DGS100A 24 FOR TECHNICAL SUPPORT 888 500 4598 LISTED 888 500 4598 www nsiindustries com...

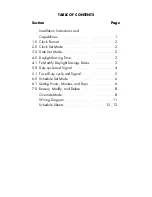
Page 2: ...et Mode 2 3 0 Date Set Mode 2 4 0 Daylight Saving Time 3 4 1 To Modify Daylight Savings Dates 3 5 0 Duty cycle and Signal 4 5 1 To set Duty cycle and Signal 5 6 0 Schedule Set Mode 6 6 1 Setting Hours...

Page 3: ...eye level using screws or other suitable fastening device Bring supply and load wires in through or side knockouts DO NOT USE TOP 3 Reinstall unit by reversing step 1 above and connecting wires to un...

Page 4: ...ormat user selectable Multi Voltage Input 120 277VAC 1 0 CLOCK FORMAT The first time unit is powered up it will display a flashing 12 Hour Use HOUR key to set clock format to either 12 Hour AM PM or 2...

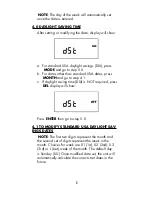
Page 5: ...nd go to step 4 1 c If daylight saving time DSt is NOT required press DEL display will show Press ENTER then go to step 5 0 4 1 TO MODIFY STANDARD USA DAYLIGHT SAV INGS DATES NOTE The first two digits...

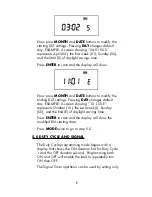
Page 6: ...DAY changes default day EXAMPLE A screen showing 10 L SU E represents October 10 the Last week L Sunday SU and the End E of daylight savings time Press ENTER to save and the display will show the modi...

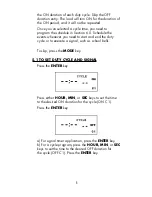
Page 7: ...eed to start and end the duty cycle or to execute a signal such as school bells To skip press the MODE key 5 1 TO SET DUTY CYCLE AND SIGNAL Press the ENTER key Press either HOUR MIN or SEC keys to set...

Page 8: ...A schedule is needed for each event If a typical ON OFF pair is required use SCH 01 for the ON event and SCH 02 for the OFF event Press the HOUR and MIN keys to set the desired time Press EVENT to set...

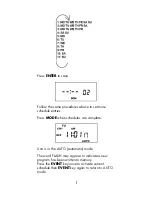
Page 9: ...schedule entries Press MODE when schedules are complete Unit is in the AUTO automatic mode The word FLASH may appear to indicate a new program has been written to memory Press the EVENT key once to ac...

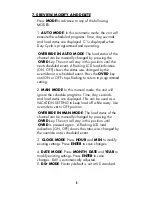
Page 10: ...ng to return to programmed setting 2 MAN MODE In this manual mode the unit will ignore the schedule programs Time day seconds and load status are displayed This can be used as a VACATION SETTING to ke...

Page 11: ...d DAY to modify time settings Press DEL to delete Press ENTER after each modification to save changes NOTES 1 Unit has a look back feature Press the EVENT key once to activate current schedule then EV...

Page 12: ...to operate The time and date are protected for 7 days by the super cap The program is retained in permanent memory 5 A Lo on the display indicates that the super cap has run low and the unit needs to...

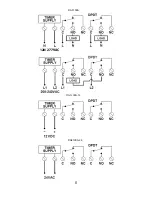
Page 13: ...11 DGS100A DGS100A 12 DGS100A 24 120 277VAC...

Page 14: ...12...

Page 15: ...13...

Page 16: ...888 500 4598 www nsiindustries com...

Reviews: