INSTALLATION
Install the Enclosure Splice Plate
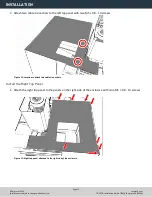
1. Find the three installed M5 × 0.8 - 10 screws on the right side of the electrical cabinet.
2. Remove and set aside the three M5 × 0.8 - 10 screws.
3. Attach the right rear side panel to the electrical cabinet with the three M5 × 0.8 - 10 screws that you set
aside in Step 2.
Install the Right Rear Panel
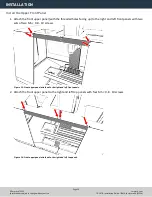
1. Find the three installed M5 × 0.8 - 10 screws along the top of the electrical cabinet.
2. Remove and set aside the three M5 × 0.8 - 10 screws.
3. Attach the right rear top panel to the electrical cabinet with the three M5 × 0.8 - 10 screws that you set
aside in Step 2.
Install the Right Side Panel
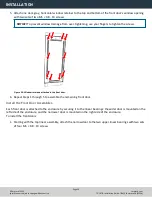
1. Attach the right side panel to the enclosure splice plate with four M5 × 0.8 - 10 screws.
2. Attach the right side panel to the right chip pan with four M6 × 1.0 - 12 screws.
Install the Right Side Window Retainers
Note:
To make it easier to install all components, don't install the side windows yet. Wait until later in
the procedure.
1. Push a strip of rubber window trim on to the edges of:
l
Two vertical window retainers
l
One horizontal window retainer
When finished, use shears or a knife to cut the excess trim.
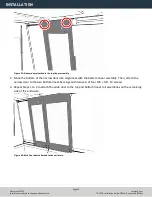
2. Loosely install two vertical window retainers on both sides of the right side panel's window opening with two
sets of three M5 × 0.8 - 10 screws.
Don't fully tighten the screws. Leaving the window retainers loose makes it easier to install the side
windows.
Page 8
©Tormach® 2022
Specifications subject to change without notice.
tormach.com
TD10712: Installation Guide: 770MX Enclosure Kit (0522A)


