INSTALL THE VFD
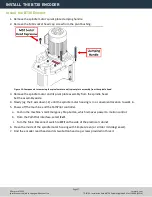
19. Install the disc spring guide and disc springs. Install disc spring compression nut, jam nut, and any shim
washers. Verify that the drawbar preload witness marks are aligned.
Figure 30: Disc spring guide and disc springs installed.
Note:
If the witness marks rubbed off during the installation, tighten the disc spring compression
nut until it's snug, secure it with the jam nut, and make further adjustments after completing the
Power Drawbar upgrade and/or installation. For information, see"Machining Operations are Loud
("Chattery")" (page 41) (refer to the section regarding insufficient preload of drawbar springs).
20. Install the provided 250 Poly-V belt in high belt position, and then apply tension with the belt tensioner.
21. Reconnect the motor quick-connect fitting.
Install the VFD
WARNING!
Electrical Shock Hazard: You must power off the machine before making any electrical
connections. If you don't, there's a risk of electrocution or shock.
1. Power off the machine and the PathPilot controller.
a. Push in the machine's red Emergency Stop button, which removes power to motion control.
b. From the PathPilot interface, select
Exit
.
c. Turn the Main Disconnect switch to
OFF
on the side of the electrical cabinet.
2. Open the electrical cabinet door and identify the variable frequency drive (VFD).
3. Remove the lower wire trough cover from the electrical cabinet and set it aside.
4. Remove the access panel from the VFD with a flat-blade screwdriver and set it aside.
Page 29
©Tormach® 2021
Specifications subject to change without notice.
tormach.com
TD10705: Installation Guide: BT30 Spindle Upgrade Kit for 1100M+ (0521A)


