

Tormach, Inc.
P: 608.849.8381 / F: 209.885.4534
tormach.com
TECHNICAL DOCUMENT
Page 8
©Tormach® 2020. All rights reserved.
Specifications subject to change without notice.
TD10487_PCNC440_ATC_Install_1220A
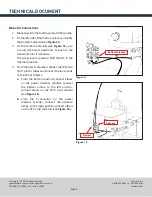
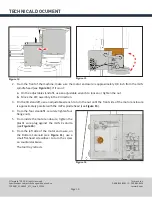
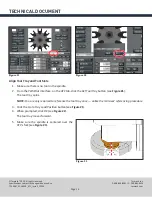
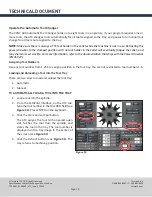
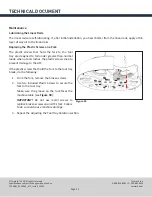
Make Air Connections
1.
Manually slide the tool tray toward the spindle.
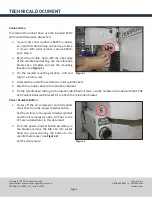
2.
On the left side of the motor enclosure, identify
the Bottom Solenoid (see
Figure 11
).
3. On the Bottom Solenoid (see
Figure 11
), use
a small, flat-head screwdriver to push in the
screw and turn it clockwise.
The screw locks in place to hold the ATC in the
tray load position.
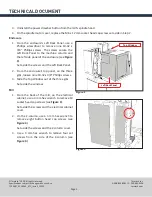
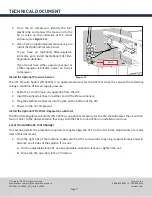
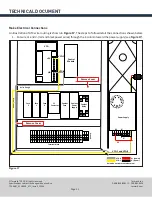
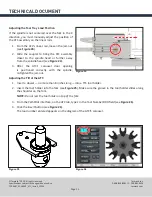
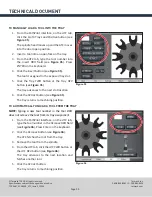
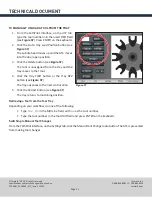
4.
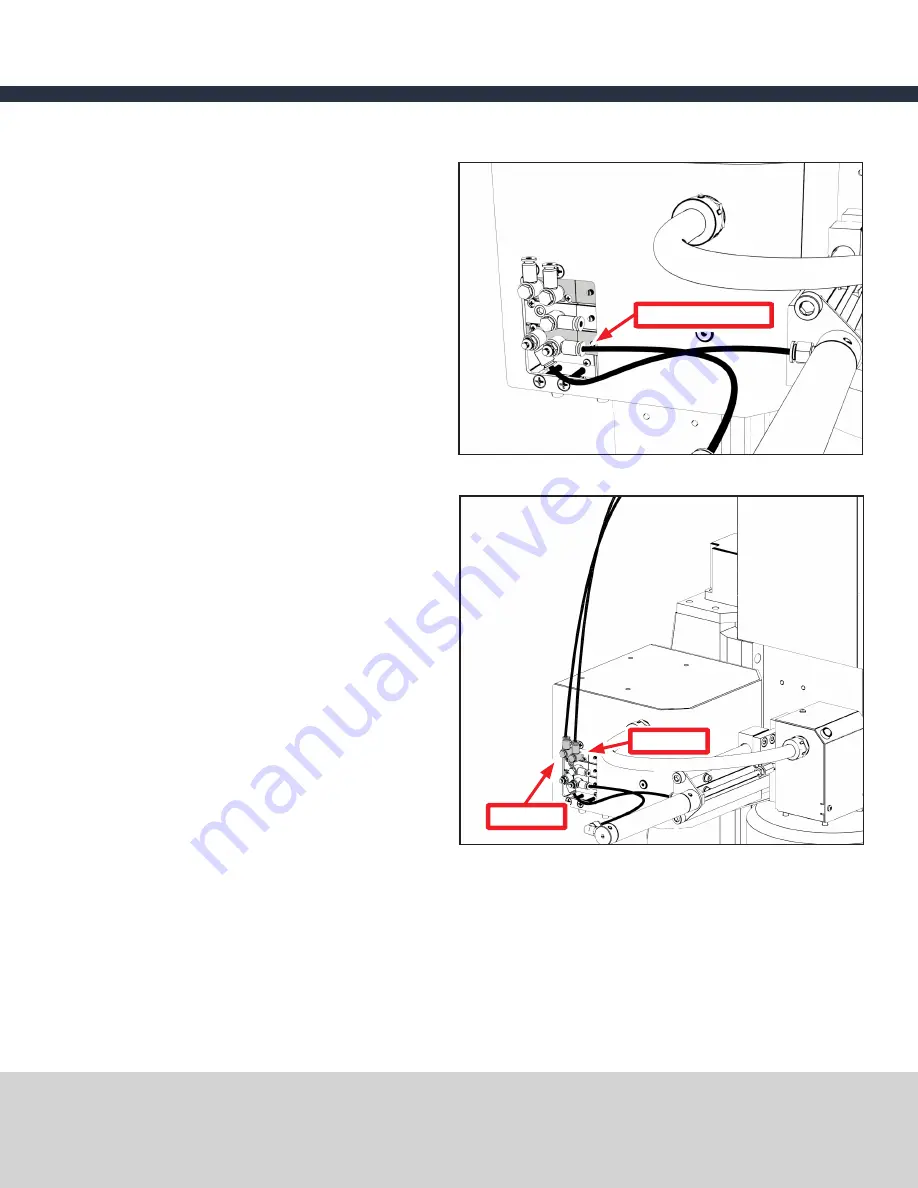
From the power drawbar cylinder, identify two
5/32” plastic tubes and connect the loose ends
to the ATC as follows:
a.
From the bottom push-to-connect elbow
on the power drawbar cylinder, connect
the Retract airline to the left push-to-
connect elbow on the ATC’s top solenoid
(see
Figure 12
).
b.
From the T-connector on the power
drawbar cylinder, connect the Advance
airline to the right push-to-connect elbow
on the ATC’s top solenoid (see
Figure 12
).
Figure 12
Advance
Retract
Figure 11
Bottom Solenoid