Tormach, Inc.
P: 608.849.8381 / F: 209.885.4534
tormach.com
TECHNICAL DOCUMENT
Page 9
©Tormach® 2020. All rights reserved.
Specifications subject to change without notice.
TD10487_PCNC440_ATC_Install_1220A
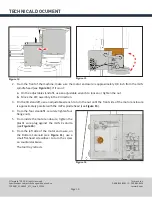
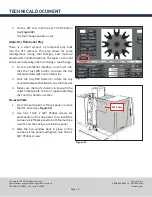
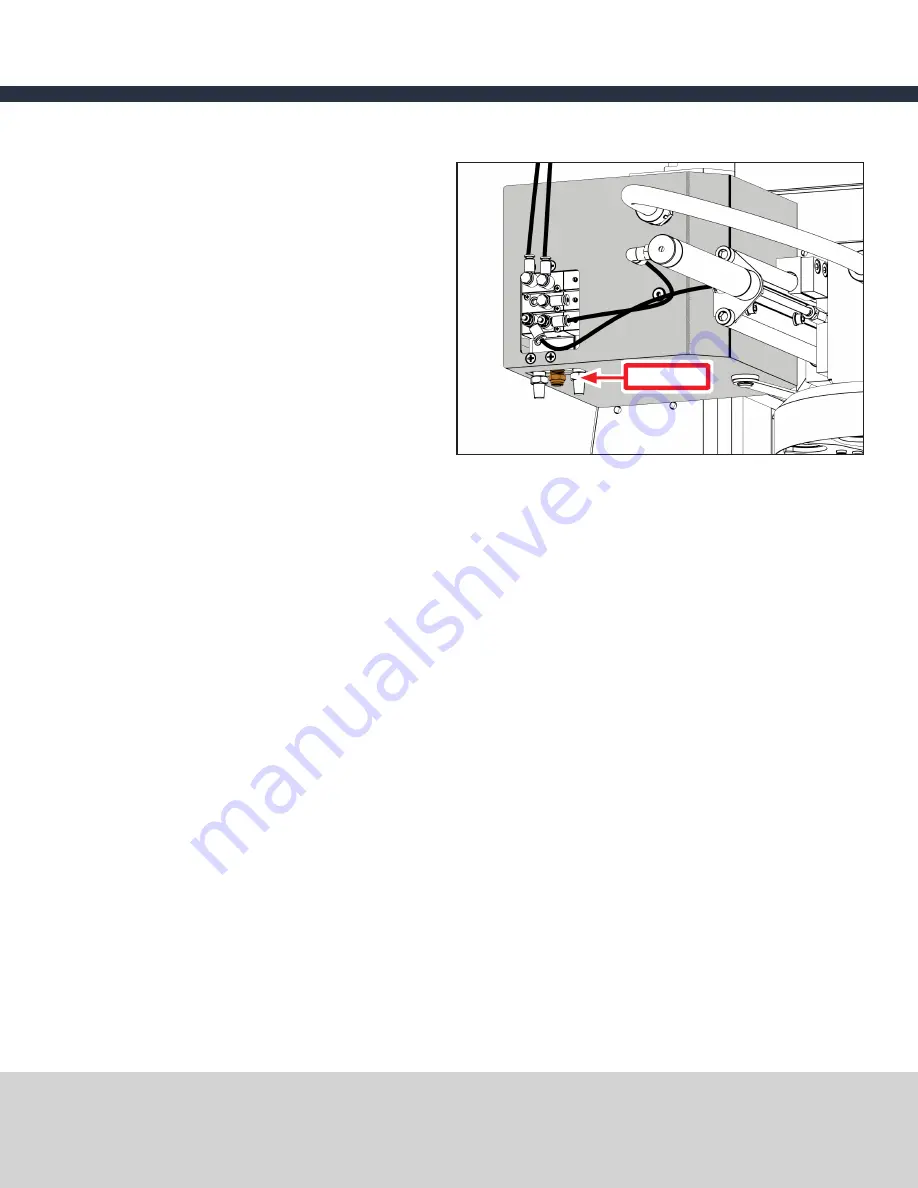
5. From the air compressor, identify the 1/4”
plastic tube and connect the loose end to the
Air In valve on the underside of the motor
enclosure (see
Figure 13
).
6. If you have an (optional) pressure sensor, go to
Install the Optional Pressure Sensor
.
If you have an (optional) filter-regulator-
lubricator, go to
Install the Optional FRL Filter-
Regulator-Lubricator
.
If you do not have either a pressure sensor or
a filter-regulator-lubricator, power on the air
compressor.
Install the Optional Pressure Sensor
The ATC Pressure Sensor (PN 32329) is an optional accessory for the ATC that stops the carousel from starting
during a condition of low air supply pressure.
1.
Splice the 1/4 inch main air supply line from the ATC.
2.
Insert the spliced air lines into either end of the Pressure Sensor.
3. Plug the electrical connector into the jack on the bottom of the ATC.
4.
Power on the air compressor.
Install the Optional FRL Filter-Regulator-Lubricator
The FRL Filter-Regulator-Lubricator (PN 32457) is an optional accessory for the ATC that lubricates the air with air
tool oil. Refer to the documentation that ships with the FRL for information on installation and use.
Level the Automatic Tool Changer
This section details the procedure required to roughly align the ATC on the mill. More adjustments are made
later in this document.
1.
From the right side of the machine, make sure the ATC’s carousel door opening is approximately equal in
distance on all sides of the spindle. If it is not:
a.
On the adjustable standoffs, use an adjustable wrench to loosen or tighten the nut.
b.
Move the ATC assembly in the Y direction.
Figure 13
Air In


