


7
- If the machine does not work properly, check
by conducting simple maintenance procedures.
Otherwise, ask for technical advice an authorized
assistance centre.
- Where parts are required, ask for ORIGINAL
spare parts to an authorized dealer.
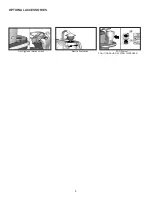
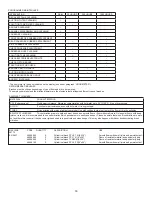
- Use only ORIGINAL brushes indicated in the
paragraph “RECOMMENDED BRUSHES”.
- For any cleaning and/or maintenance operation
take off the power supply from the machine.
- Do not take off the protections which require the
use of tools to be removed.
- Do not wash the machine with direct water jets
or with high water pressure nor with corrosive
material.
- Every 200 working hours have a machine check
through an authorized service department.
- In order to avoid scales on the solution tank
filter, do not fill the detergent solution many hours
before the machines’ use.
- Before using the machine, check that all panels
and coverings are in their position as indicated in
this use and maintenance catalogue.
- Restore all electrical connections after any
maintenance operation.
- Provide for the scrapping of the material of nor-
mal wear following strictly the respective rules.
- When, your machine has to stop activity,
provide for the appropriate waste disposal of its
materials, especially oils, batteries and electronic
components, and considering that the machine
itself has, where possible, been constructed us-
ing recyclable materials.
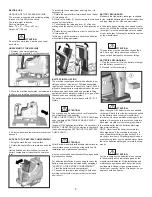
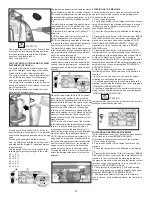
SYMBOLOGY
Symbol denoting the switch for
the water opening and the
signal lamp that the water is open.
Symbol denoting the functioning of the
solution valve adjusting the flow of the
detergent solution.
Indication of the maximum temperature
of the detergent solution. It is placed
near the charging hole of the solution
tank.
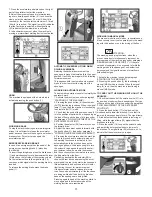
Symbol denoting the push button
and the signal lamp of the connection
mode in manual.
Symbol denoting the push
button and the signal lamp of the con
nection mode in automatic.
Symbol denoting the push
button and the signal lamp of the con
nection mode break washing.
Symbol denoting the signal lamp of the
starting of the brushes rotation.
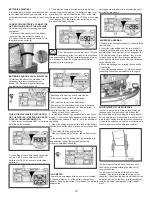
Symbol denoting the push button to
visualize on the display the brushes
pressure set.
Symbol denoting the functioning of the
adjustment knob of the brushes pres
sure.
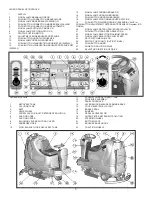
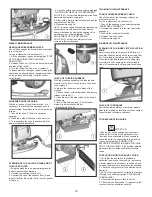
INTRODUCTORY COMMENT
Thank you for having chosen our machine.
This floor cleaning machine is used for the in-
dustrial and civil cleaning and is able to clean
any type of floor. During its advance move-
ment, the combined action of the brushes and
the detergent solution removes the dirt which
is aspirated through the rear suction assem-
bly, giving a perfectly dry surface.
The machine must be used only for such
purpose. It gives the best performance if it
is used correctly and maintained in perfect
efficiency. We therefore ask you to read this
instruction booklet carefully whenever difficul-
ties arise in the course of the machine’s use.
In case of need, we ask you to contact our
service department for all advice and servic-
ing as may prove necessary.
GENERAL RULES OF SECURITY
The rules below have to be followed carefully
in order to avoid damages to the operator and
to the machine.
- Read the labels carefully on the machine.
Do not cover them for any reason and replace
them immediately if damaged.
- The machine must be used exclusively by
authorized staff that has been instructed for
its use.
- During the working of the machine, pay
attention to other people and especially to the
children.
- In case of danger act immediately upon the
emergency brake.
- Leaving the machine in parking position,
take off the key and act upon the parking
brake.
- Do not mix different detergents, avoiding
harmful odours.
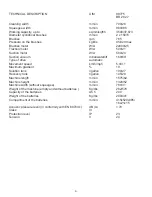
- Storage temperature: between -25°C and
+55°C (-13°F and 131°F).
- Perfect operating temperature: between 0°C
and 40°C (32°F and 104°F)..
- The humidity should be between 30 and
95%.
- Do not use the machine in explosive atmo-
sphere.
- Do not use the machine as a means of
transport.
- Do not use acid solutions in such concentra-
tions that could damage the machine and/or
the persons.
- Do not use the machine on surfaces cov-
ered with inflammable liquids or dusts (for
example hydrocarbons, ashes or soot).
- In case of fire, use a powder fire-extinguish-
er.
Do not use water.
- Do not strike shelvings or scaffoldings,
where there is danger of falling objects.
- Adapt the working speed to the adhesion
conditions: particularly, slow down before nar-
row curves have to be faced.
- Do not use the machine on areas having a
higher gradient than the one stated on the
number plate.
- The machine has to carry out simultane-
ously the operations of washing and drying.
Different operations must be carried out in
restricted areas prohibited to non-authorized
personnel. Signal the areas of moist floors
with suitable signs.
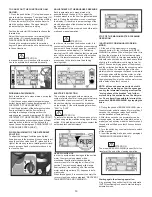
Symbol denoting the push button
and the signal lamp up / down of the
squeegee.
Symbol denoting the switch and the
signal lamp of the suction motor.
Symbol denoting the charge level of the
batteries.
Symbol denoting the push button to visualize
the hour meter on the display.
Symbol denoting the push button and the
signal lamps for the selection of the operation
speed.
Symbol denoting the drive selector forwards/
backwards.
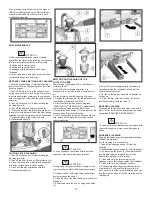
Symbol denoting the signal lamp of the
parking brake switched on.
Symbol denoting the lever position for the
connection of the parking brake.
Symbol denoting the open book.
Indicates that the operator has to read the
manual before the use of the machine.
Warning symbol.
Read carefully the sections marked with this
symbol, for the security of both the operator
and the machine.
Summary of Contents for BR 28/27
Page 2: ...2...
Page 3: ...3 NOTES...


