background image

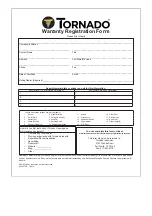
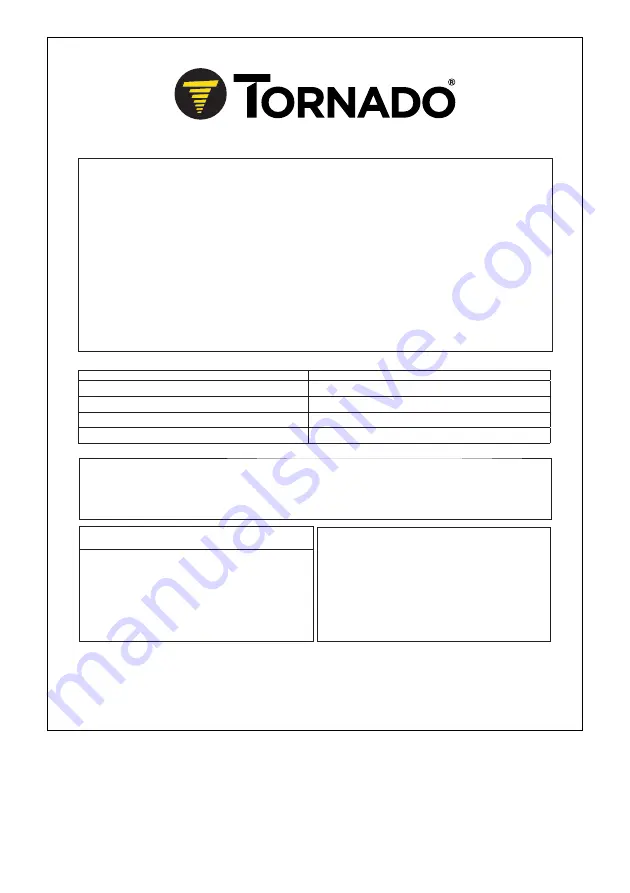
Warranty Registration Form

________________________________________________________________________________________________
Company/Institution 

___________________________________________ ___________________________________________________
Contact 

Name 

     Title

___________________________________________ ___________________________________________________
Address      City/State/Zip 

Code

___________________________________________ ___________________________________________________
Phone 

      Fax

___________________________________________ ___________________________________________________
Date 

of 

Purchase 

    Email 

Selling Dealer:(Required)_____________________________________________________________________________

Please Print Clearly

See white metal plate or sticker on unit for this information.

MACHINE TYPE/MODEL NUMBER:

MACHINE SERIAL NUMBER:

1.

1.

2.

2.

3.

3.

4.

4.

+RZGLG\RX¿UVWOHDUQDERXW7RUQDGRFOHDQLQJDQG

maintenance equipment?

o

&RQWDFWHGE\ORFDOGHDOHU

o

Previous experience with Tornado products

o

Reputation/Recommendation

o

Advertising

o

Direct mail

o

:HEVLWHBBBBBBBBBBBB

o

Blog: _______________

o

Other

'DPDJHRUGHIHFWDULVLQJIURPDEXVHQHJOHFWRURWKHUPLVXVHLVH[FOXGHGIURPWKLVZDUUDQW\2WKHULWHPVPD\RUPD\QRWDSSO\EDVHG
RQ\RXUVSHFL¿FPDFKLQH,IDQ\GHIHFWRFFXUVDQGVHUYLFHLVDWWHPSWHGE\QRQ$XWKRUL]HG7RUQDGR6HUYLFH&HQWHUVWKHZDUUDQW\ZLOO
EHYRLG

©2018 Tornado Industries. All rights reserved.

;725

          Facility Description (please circle all that apply)

1. 

School

6. Manufacturing

11. Airport

16. Other Govt.

2. 

Retail Store

7. College/University

12. Warehouse

17. Auto Service

3. 

Restaurant

8. Hospital

13. Apartment/Condo

1RQ3UR¿W

4. 

2I¿FH%XLOGLQJ

9. Nursing Home

14. Supermarket

19. Other (specify)

5. 

Contract Cleaning

10. Religious Institution

15. U.S. Govt

You can complete this form online at 

www.tornadovac.com/services/warranty-registration-form.aspx

7KLVIRUPPD\DOVREHUHWXUQHGWR

Tornado Industries

3101 Wichita Court

)RUW:RUWK7;

)D[

Summary of Contents for CVD 30/1

Page 1: ...CVD 30 1 CVD 38 1 59685770 11 18 English 5 Français 13 Español 22 ...

Page 2: ...2 ...

Page 3: ...3 ...

Page 4: ...4 ...

Page 5: ...CORD AWAY FROM HEAT AND OIL Do not leave cord lying around after job is complete It can become a tripping hazard 6 DO NOT RUN VACUUM OVER CORD 7 TURN SWITCH TO OFF before unplug ging power supply cord 8 DO NOT UNPLUG BY PULLING CORD To unplug grasp plug not cord 9 DO NOT GRASP PLUG WITH WET HANDS 10 A DAMAGED CORD OR PLUG should only be replaced by an authorized ser vice center representative DO N...

Page 6: ... into an appro priate outlet that is properly installed and grounded in accordance with all local codes and ordinances WARNING Improper connection of the equipment grounding conductor can result in a risk of electric shock Check with a qualified electrician or ser vice person if you are in doubt as to whether the outlet is properly grounded Do not modify the plug provided with the appliance If it ...

Page 7: ... the device can be damaged and dangers could arise for users and other persons Notify the dealer immediately in the case of shipping damage Check the package contents when un packing for missing accessories or for damage Environmental protection The packing materials can be recy cled Please dispose of packaging in accordance with the environmental regula tions Electrical and electronic appliances ...

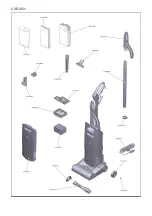
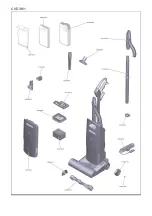
Page 8: ...ag lock 14 Filter bag 15 Motor protection filter 16 Filter casing 17 Exhaust filter 18 Suction hose at brush head 19 Handle adjustment 20 Cable hook rotating 21 Upholstery nozzle 22 Crevice nozzle 23 Filter indicator lamp 24 Indicator tuft 25 Roller brush Installation Install the loose parts for handle provided with the device before using the device for the first time See page 4 for illustrations...

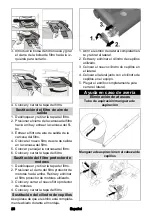
Page 9: ... Vacuum with the crevice nozzle and uphol stery nozzle See page 4 for illustrations 1 Pull the suction pipe out of the mount 2 Remove the desired accessory from the storage compartment and plug it onto the suction pipe 3 Perform cleaning Suction pipe operation ATTENTION Risk of damage Do not set the brush head with the rotating roller to the deep pile carpet setting when vacuuming using the suctio...

Page 10: ...sors and remove them Changing the filter bag 1 Unlock and remove the filter cover 2 Turn the filter bag lock to the right to un lock Close the filter bag remove and dispose of it 3 Insert a new filter bag and turn the filter bag lock to the left to lock 4 Fit and lock the filter cover Replacing the exhaust filter 1 Unlock and remove the filter cover 2 Push the filter casing locking mecha nism upwa...

Page 11: ...acuuming result Check the roller brush for blocking ob jects and remove these if present Remove blockages from the brush head suction pipe and suction hose Replace the filter bag Replace the exhaust filter or motor pro tection filter Set the carpet height selection knob to the correct setting Replace the roller brush Filter indicator lamp lights up orange Remove blockages from the brush head sucti...

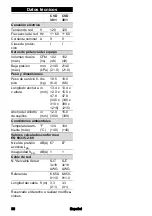
Page 12: ...mensions and weights Typical operating weight lbs kg 18 5 8 4 19 0 8 6 Length x width x height in mm 13 4 x 12 0 x 47 8 340 x 310 x 1215 13 4 x 15 5 x 47 8 340 x 390 x 1215 Width of roller brush in mm 12 0 300 15 0 380 Ambient conditions Ambient tempera ture max F C 104 40 104 40 Determined values in acc with EN 60335 2 69 Sound level LpA dB A 67 67 K uncertaintypA dB A 1 1 Main cable Power cord t...

Page 13: ...U SECTEUR 4 NE PAS TIRER NI PORTER L ASPIRA TEUR PAR LE CABLE SECTEUR Ne pas coincer le câble dans une porte ni le tirer sur des bords acérés 5 MAINTENIR LE CABLE DE BRANCHE MENT AU SECTEUR ELOIGNE DE LA CHALEUR ET DE L HUILE Ne pas lais ser traîner le câble de branchement au secteur une fois les travaux terminés Il peut être source de trébuchement 6 NE PAS LAISSER L ASPIRATEUR ROULER SUR LE CABLE...

Page 14: ...bé endommagé a été soumis à certaines conditions climatiques ou est tombé dans l eau 24 PORTER SYSTEMATIQUEMENT DES LUNETTES DE PROTECTION lors de l utilisation de l aspirateur 25 ETRE PARTICULIEREMENT ATTEN TIF lors de l utilisation dans des esca liers 26 RESTER ATTENTIF Ne pas utiliser l aspirateur en cas de fatigue ni sous l in fluence de drogues d alcool ou de médi caments INSTRUCTIONS DE MISE...

Page 15: ...us longue Figure B 1 Socle de prise de courant 2 Moyens de mise à la terre 3 Adapteur Remarque Au Canada conformément au Canadian Electrical Code l utilisation d un adaptateur provisoire n est pas autorisée Maintenance d appareils à double isola tion Les appareils à double isolation sont équi pés de deux systèmes d isolation en place de la liaison à la terre L appareil à double isolation ne présen...

Page 16: ...forme 몇 AVERTISSEMENT Risque pour la santé Inhalation de poussières nocives Ne pas utiliser l appareil pour l aspiration de poussières nocives ATTENTION Endommagement de l appareil Court circuit dû à une humidité de l air éle vée Utiliser et stocker l appareil uniquement en intérieur Cet aspiro brosseur pour moquettes est conçu pour le nettoyage à sec de sur faces de sols et murales L appareil n e...

Page 17: ...filtre 2 Tourner le verrouillage du sac aspirateur vers la droite pour ouvrir 3 Insérer le sac aspirateur et tourner le verrouillage du sac aspirateur vers la gauche pour fermer 4 Insérer et verrouiller le couvercle de filtre Raccorder le câble secteur à l appareil 1 Ouvrir le porte câble sur la poignée 2 Brancher le câble secteur fourni dans le raccordement sur l appareil 3 Bloquer la connexion a...

Page 18: ... bloquer contre le glis sement et le basculement suivant les normes en vigueur Stockage 몇 PRÉCAUTION Non observation du poids Risque de blessure et d endommagement Tenir compte du poids de l appareil pour le stockage L appareil ne peut être exploité qu en es pace intérieur Entretien et maintenance Intervalles de maintenance ATTENTION Risque d endommagement Respecter les intervalles de maintenance ...

Page 19: ...errouiller et retirer le couvercle de filtre 2 Appuyer le verrouillage du filtre de pro tection moteur vers le haut Retirer et éli miner le filtre de protection moteur usagé 3 Insérer et verrouiller le nouveau filtre de protection moteur 4 Insérer et verrouiller le couvercle de filtre Remplacement de la brosse rouleau Pendant le montage veiller à ce que l étrier soit toujours entièrement ouvert 1 ...

Page 20: ...iltre de protection moteur Contrôler le bon réglage du bouton de réglage pour la hauteur de fil Remplacer la brosse rouleau Le témoin de contrôle du filtre est allu mé en orange Enlever les obstructions du sabot du tube d aspiration et du tuyau d aspira tion Remplacer le sac aspirateur Service après vente Si le défaut ne peut pas être éliminé l ap pareil doit être contrôlé par le service après ven...

Page 21: ... 0 Dimensions et poids Poids opérationnel typique lbs kg 18 5 8 4 19 0 8 6 Longueur x largeur x hauteur in mm 13 4 x 12 0 x 47 8 340 x 310 x 1215 13 4 x 15 5 x 47 8 340 x 390 x 1215 Largeur de la brosse rouleau in mm 12 0 300 15 0 380 Conditions ambiantes Température am biante max F C 104 40 104 40 Valeurs déterminées selon EN 60335 2 69 Niveau de pression acoustique LpA dB A 67 67 Incertitude KpA...

Page 22: ...supervisión si el conector está conectado 3 COMPROBAR siempre si hay daños o síntomas de envejecimiento en EL CA BLE DE CONEXIÓN DE RED antes de cada utilización 4 NO TIRAR O SOSTENER LA ASPIRA DORA EN EL CABLE DE RED No apri sionar el cable con una puerta o exten der alrededor de bordes afilados 5 MANTENER EL CABLE DE CONE XIÓN DE RED ALEJADO DEL CALOR Y EL ACEITE No dejar tirado el cable de cone...

Page 23: ... bar una aspiradora que se haya caído se haya dañado se haya expuesto a de terminadas condiciones climáticas o se haya caído al agua 24 LLEVAR SIEMPRE GAFAS DE PRO TECCIÓN al usar la aspiradora 25 TENER ESPECIAL CUIDADO con las escaleras durante el uso 26 ESTAR ATENTO No utilizar la aspirado ra cansado o bajo la influencia de dro gas alcohol o medicamentos INSTRUCCIONES DE PUESTA A TIERRA Este equ...

Page 24: ...a a tierra es la más larga de las 3 Figura B 1 Caja de toma de corriente con puesta a tierra 2 Medios de toma a tierra 3 Adaptador Nota En Canadá no está permitido usar un adaptador temporal según el Canadian Electrical Code Código Canadiense de Electricidad Mantenimiento de equipos con doble aislamiento Los equipos con doble aislamiento están equipados con dos sistemas de aislamien to en lugar de...

Page 25: ...de producir daños materiales Uso previsto 몇 ADVERTENCIA Riesgos para la salud Aspiración de polvos perjudiciales para la salud No usar el equipo para la aspiración de pol vos perjudiciales para la salud CUIDADO Daño del equipo Cortocircuito debido a la elevada humedad del aire Usar y almacenar el equipo solamente en interiores Esta aspiradora para alfombras está di señada para la limpieza en seco ...

Page 26: ...to Montaje de la bolsa de filtro 1 Desbloquear y retirar la tapa del filtro 2 Girar el cierre de la bolsa de filtro hacia la derecha para abrirlo 3 Introducir la bolsa de filtro y girar el cie rre de la bolsa de filtro hacia la izquierda para cerrarlo 4 Colocar y cerrar la tapa del filtro Conexión del cable de red al equipo 1 Abrir el portacables del asa 2 Introducir el cable de red suministrado e...

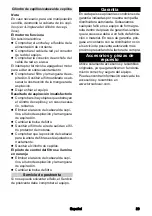
Page 27: ...ara evitar que resbale y vuelque conforme a las directrices vi gentes Almacenamiento 몇 PRECAUCIÓN Inobservancia del peso Peligro de lesiones y daños Tenga en cuenta el peso del equipo para su almacenamiento El equipo solo se puede almacenar en inte riores Conservación y mantenimiento Intervalos de mantenimiento CUIDADO Peligro de daños Tenga en cuenta los intervalos de manteni miento para evitar d...

Page 28: ...uear y retirar la tapa del filtro 2 Presionar el cierre del filtro protector de motores hacia arriba Retirar y eliminar el filtro protector de motores utilizado 3 Colocar y cerrar el nuevo filtro protector de motores 4 Colocar y cerrar la tapa del filtro Sustitución del cilindro de cepillos Asegúrese de que el estribo está completa mente abierto durante el montaje 1 Abrir el estribo del lateral co...

Page 29: ...ltro de aire de salida o el fil tro protector de motores Comprobar que la posición del cabezal para la altura de fibras esté ajustado co rrectamente Sustituir el cilindro de cepillos El piloto de control del filtro se ilumina en naranja Eliminar el atasco del cabezal de cepi llos el tubo de aspiración y la manguera de aspiración Cambiar la bolsa de filtro Servicio de postventa Si no se puede solve...

Page 30: ...y dimensiones Peso de servicio tí pico lbs kg 18 5 8 4 19 0 8 6 Longitud x anchura x altura in mm 13 4 x 12 0 x 47 8 340 x 310 x 1215 13 4 x 15 5 x 47 8 340 x 390 x 1215 Ancho del cilindro de cepillos in mm 12 0 300 15 0 380 Condiciones ambientales Temperatura am biente máx F C 104 40 104 40 Valores calculados conforme a EN 60335 2 69 Nivel de presión acústica LpA dB A 67 67 Inseguridad KpA dB A 1...

Page 31: ...CVD 30 1 ...

Page 32: ...CVD 38 1 ...

Page 33: ......

Page 34: ......

Page 35: ......

Page 36: ... RX UVW OHDUQ DERXW 7RUQDGR FOHDQLQJ DQG maintenance equipment o RQWDFWHG E ORFDO GHDOHU o Previous experience with Tornado products o Reputation Recommendation o Advertising o Direct mail o HEVLWH BBBBBBBBBBBB o Blog _______________ o Other DPDJH RU GHIHFW DULVLQJ IURP DEXVH QHJOHFW RU RWKHU PLVXVH LV H FOXGHG IURP WKLV ZDUUDQW 2WKHU LWHPV PD RU PD QRW DSSO EDVHG RQ RXU VSHFL F PDFKLQH I DQ GHIHF...

Reviews: