background image

9

Strictly follow manufacturer/distributor 
indications for the maintenance and daily 
recharge of the batteries. All installation and 
maintenance operations must be executed 
by specialized staff, using suitable protection 
accessories.

BATTERY RECHARGER

Be sure that the battery recharger is suitable 
for the installed batteries both for their 
capacities and type (lead/acid or GEL and 
equivalent).

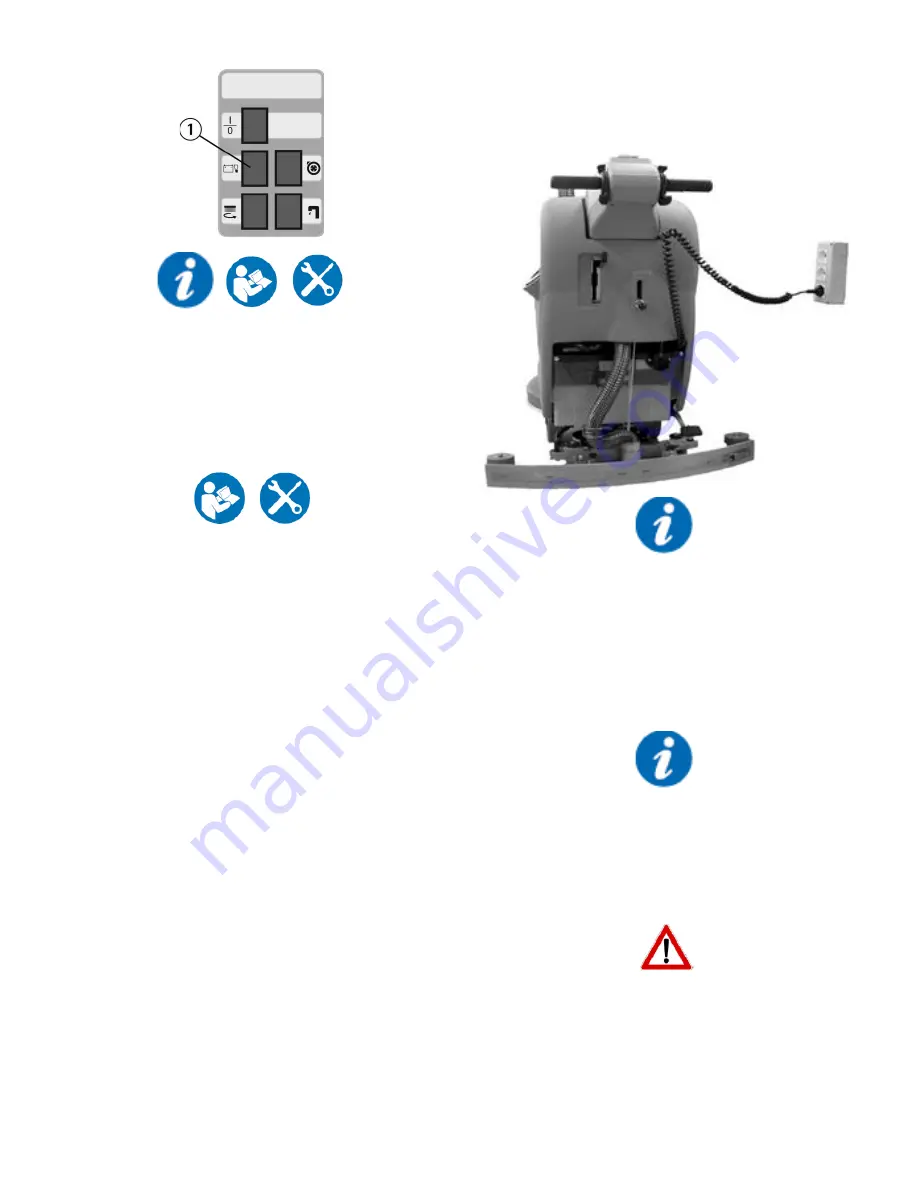
ON-BOARD BATTERY RECHARGER

The machine is equipped with the on-
board battery recharger.  Please refer to the 
manufactures instructions on the use of the 
charger.  The battery recharger is connected 
directly to the battery poles.  During the 
recharging operations a device is activated 
which does not permit the machine's 
functioning.  The main cable of the battery 
recharger has a maximum length of two meters 
and must be connected to a single-phase 
socket type CEE 7/7.

BATTERIES RECHARGING 

Bring the machine on a leveled surface near to 
a single-phase 120V 60 HZ socket (within 2 m), 
nominal current 10A.  Switch off the machine 
and proceed as follows.
1. Insert the plug into the mains socket.
2. Proceed with the recharging keeping the 
recovery tank lifted (see under paragraph 
“ACCESS TO THE BATTERY COMPARTMENT” 
in “BEFORE USE”).

Never charge a GEL battery with a non suitable 
recharger. Strictly follow the instructions 
supplied by the batteries and recharger 
manufacturer.  In order not to cause permanent 
damages to the batteries, it is necessary to 
avoid their complete discharge, providing 
for the recharging within a few minutes after 
batteries discharge signal starts blinking.

Never leave batteries completely discharged 
even if the machine is not used. In case of 
traditional batteries, please check the
electrolyte level every 20 recharging cycles and 
eventually fill them up with distilled water after 
having carried out a complete recharge.

Danger of gas exhalations and emission of 
corrosive liquids. Fire danger: do not approach 
with free flames.

BATTERIES DISPOSAL

It is compulsory to hand over exhaust batteries, 
classified as dangerous waste, to an authorized 
institution according to the current laws.

3. Do not take off the plug from the mains 
socket until the end of charge. At the end of 
the recharging, remove the plug from the mains 
socket.

Summary of Contents for TS120-S53-U

Page 1: ...TH TX 76140 PHONE 800 VACUUMS FAX 817 551 0719 WWW TORNADOVAC COM Operations Maintenance Manual For Commercial Use Only Form No T OM680LT 05 21 Tornado Industries LLC All rights reserved AUTOMATIC SCR...

Page 2: ...2 NOTES For warranty information go to www tornadovac com Within 30 days to activate the warranty go to https tornadovac com services warranty registration form aspx...

Page 3: ...ction of the batteries to the machine 12 Starting of the machine 12 Overflow device 13 Emptying detergent solution 13 Forward movement 13 Stop 13 STOP OF THE MACHINE AFTER CLEANING OPERATION 14 DAILY...

Page 4: ...the conditions particularly slow down before narrow curves have to be faced STORAGE AND DISPOSAL Storage temperature between 32 F and 131 F 0 C and 55 C Perfect operating temperature between 32 F and...

Page 5: ...tection level IP X3 Tension V 24 Do not take off the protections which require the use of tools for their removal Do not wash the machine with direct water jets or with high water pressure nor with co...

Page 6: ...ymbol denoting the open book Indicates that the operator has to read the manual before the use of the machine Symbol that indicates the obligation of wearing safety glasses Symbol denoting the open bo...

Page 7: ...QUEEGEE HOSE 9 BATTERIES 10 INLET OPENING SQUEEGEE HOSE 11 SUCTION COVER 12 SOLUTION TANK 13 WHEELS 14 SQUEEGEE ASSEMBLY 15 CASTOR WHEELS INSTRUMENT BOARD AND CONTROLS 1 IGNITION SWITCH 2 BATTERIES CH...

Page 8: ...quipment due to weight and coupling system The batteries must be in accordance with CEI 21 5 Norms The connection of the batteries cables has to be carried out by specialized staff because the inversi...

Page 9: ...and proceed as follows 1 Insert the plug into the mains socket 2 Proceed with the recharging keeping the recovery tank lifted see under paragraph ACCESS TO THE BATTERY COMPARTMENT in BEFORE USE Never...

Page 10: ...eight Note The wheels of the squeegee support must be adjusted through the registers 5 at the same height so that the squeegee works parallel to the floor ADJUSTMENT OF THE SQUEEGEE INCLINATION In cas...

Page 11: ...nsert the brush into its plate seat underneath the brush base turning it until the three metal buttons are properly seated in their slots rotate quickly the brush to push the button towards the coupli...

Page 12: ...or 1 to the machine connector 2 placed in the rear part of the machine STARTING OF THE MACHINE 1 Press the switch ignition 1 0 1 2 Check the charge level on the display or on the signal lamp battery c...

Page 13: ...o appropriate containers according to the standard norms for the liquid disposal EMPTYING DETERGENT SOLUTION To empty the detergent solution remained in the solution tank 1 Bring the machine to an app...

Page 14: ...ANK CLEANING 1 Hold the drain hose placed in the front part of the machine 2 Take off the drain plug acting upon its lever and empty the recovery tank into appropriate containers see under OVERFLOW DE...

Page 15: ...e and sliding the stud bolts 1 in their slots up to their release 3 Clean with care the internal part of the squeegee inlet eliminating dirt residue 4 Clean with care the squeegee rubbers 5 Reassemble...

Page 16: ...Unscrew the solution tank cap 1 3 Unscrew the solution filter 2 being careful not to lose or to damage the gasket 4 Rinse with a water jet the solution tank 5 Rinse the solution tank filter placed in...

Page 17: ...s and follow the assembling instructions at SPLASH GUARD ASSEMBLY paragraph With the brush assembled the splash guard must slightly touch the floor TROUBLESHOOTING GUIDE The checking of all the other...

Page 18: ...rized technical assistance 2 The brush has worn bristles Check the brush wear condition and eventually replace it the brush has to be replaced when the bristles have reached a height of about 15mm To...

Page 19: ...mark the floor or ruin the polishing BRISTLES THICKNESS Thicker bristles are more rigid and must be used on smooth floor or floor with small joints On irregular floors with deep joints or relieves it...

Page 20: ...20...

Reviews: