1
Installing the Roll Bar
Parts needed for this procedure:
1
Roll bar
4
Bolt (1/2 x 3-3/4 inches)
4
Flange nut (1/2 inch)
Procedure
1.
Remove the top crate support from the crate.
2.
Remove the roll bar from the crate.
3.
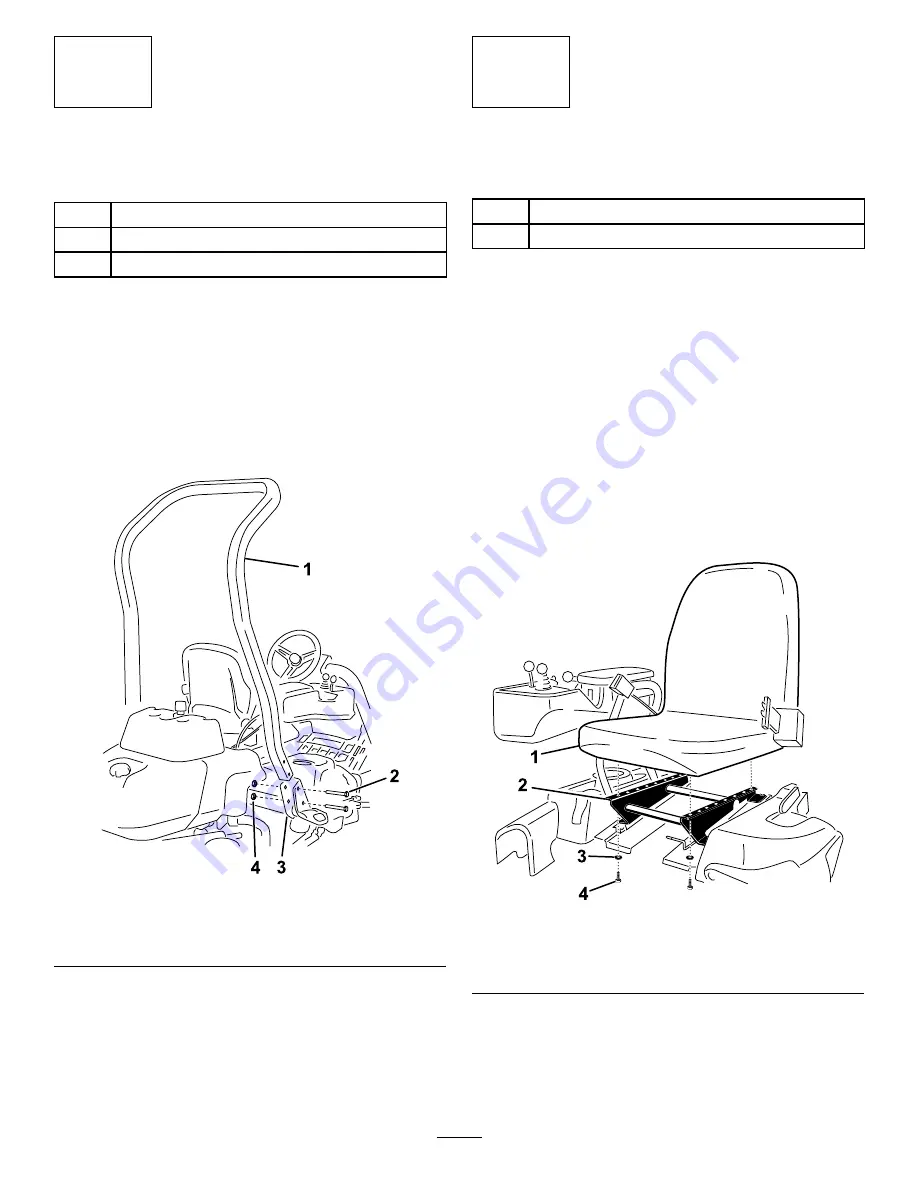
Use 4 bolts (1/2 x 3-3/4 inches) and 4 flange
nuts (1/2 inch) to install the roll bar into the
ROPS brackets on each side of the machine as
shown in
.
g233739
Figure 3
1.
Roll bar
3.
ROPS bracket
2.
Bolt (1/2 x 3-3/4 inches)
4.
Flange nut (1/2 inch)
4.
Torque the fasteners to 136 to 149 N∙m (100 to
110 ft-lb).
2
Installing the Seat
Parts needed for this procedure:
1
Seat
1
Seat wire harness
Procedure
Note:
Mount the seat in the front set of mounting
holes to gain an additional 7.6 cm (3 inches) in the
forward adjustment, or in the rear mounting holes
for an additional 7.6 cm (3 inches) in the rearward
adjustment.
1.
Remove and discard the lag bolts securing the
seat slides and cut the shipping straps.
2.
Remove the 4 bolts (5/16 x 3/4 inch) and
washers from the shipping bracket and discard
the bracket.
3.
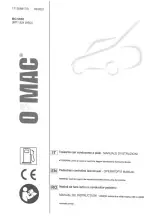
Secure the seat to the seat base with 4 bolts
and washers removed previously (
).
g193736
Figure 4
1.
Seat
3.
Washer
2.
Seat base
4.
Bolt (5/16 x 3/4 inch)
4.
Locate the open connector on the main wiring
harness to the right of the seat and connect it to
the wire harness that came with the seat.
5.
Route the seat wiring harness around the seat
slides, ensuring that it is not pinched when the
10


