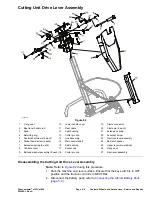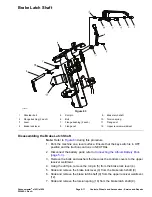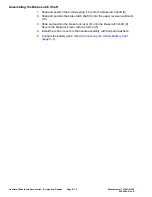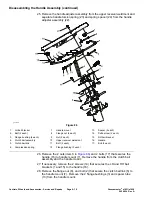
Cutting Unit Drive Lever Assembly
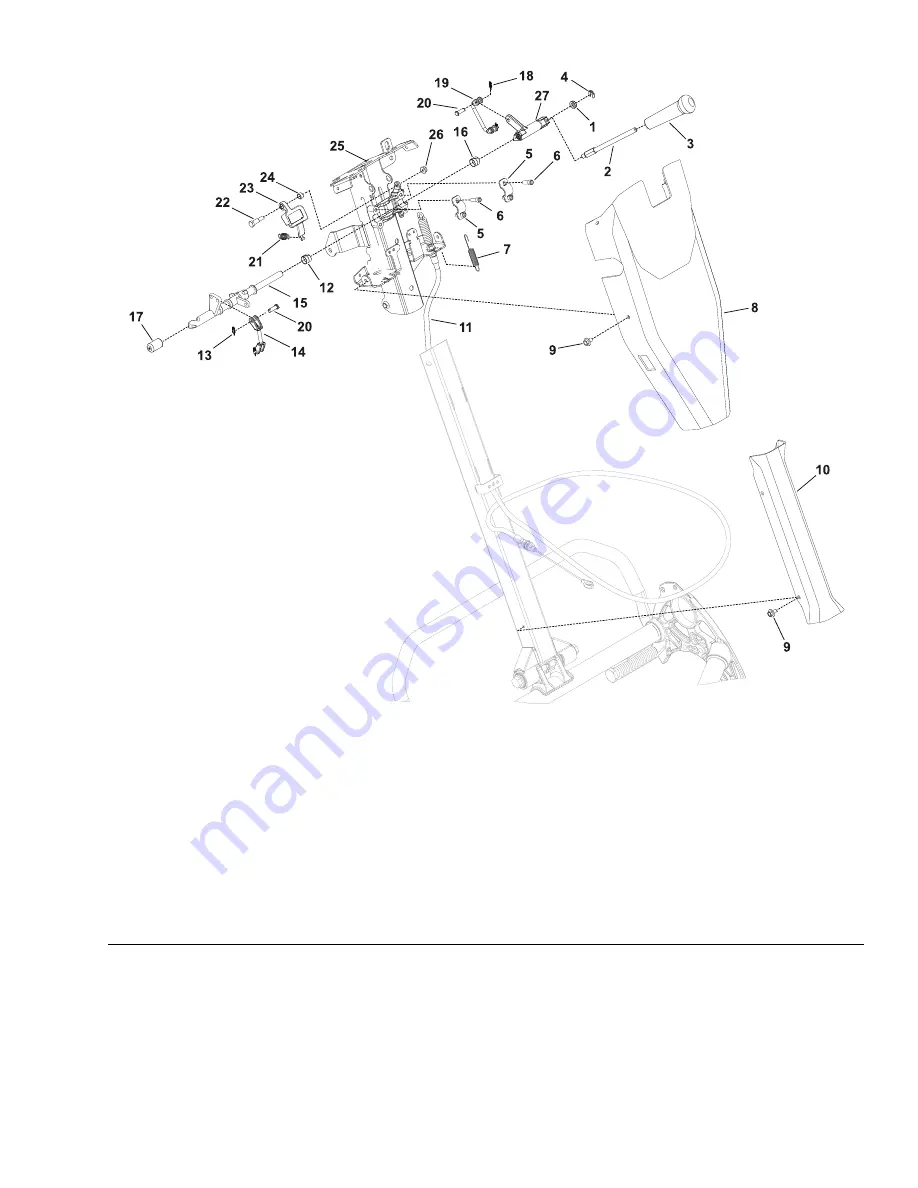
g336962
Figure 82
1.
V-ring seal
10.
Lower handle cover
19.
Clevis connector
2.
Reel lever handle rod
11.
Reel cable
20.
Clevis pin (4 each)
3.
Knob
12.
Split bushing
21.
Extension spring
4.
Retaining ring
13.
Cotter pin clip
22.
Shoulder screw
5.
Control shaft clamp (2 each)
14.
Link assembly
23.
Reel lock lever assembly
6.
Socket head screw (4 each)
15.
Main control shaft
24.
Bail latch spacer
7.
Extension spring (2 each)
16.
Split bushing
25.
Upper receiver weldment
8.
Controls cover
17.
Socket cap
26.
Flange nut
9.
Bolt and washer assembly (8 each) 18.
Cotter pin clip
27.
Reel lever assembly
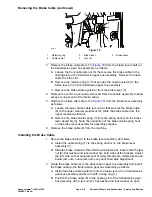
Disassembling the Cutting Unit Drive Lever Assembly
Note:
Refer to
during this procedure.
1. Park the machine on a level surface. Ensure that the key switch is in OFF
position and the traction control is in NEUTRAL.
2. Disconnect the battery pack; refer to
Connecting the Lithium Battery Pack
(page 5–3)
.
Greensmaster
®
e1021/e1026
Page 6–9
Controls, Wheels and Accessories : Service and Repairs
20246SL Rev A
Summary of Contents for 04831
Page 4: ...NOTES NOTES Page 4 Greensmaster e1021 e1026 20246SL Rev A ...
Page 6: ...g340650 Figure 1 Model 04831 shown Preface Page 6 Greensmaster e1021 e1026 20246SL Rev A ...
Page 14: ...Safety Safety and Instructional Decals Page 1 6 Greensmaster e1021 e1026 20246SL Rev A ...
Page 136: ...Electrical System Service and Repairs Page 5 56 Greensmaster e1021 e1026 20246SL Rev A ...
Page 216: ......

