g341864
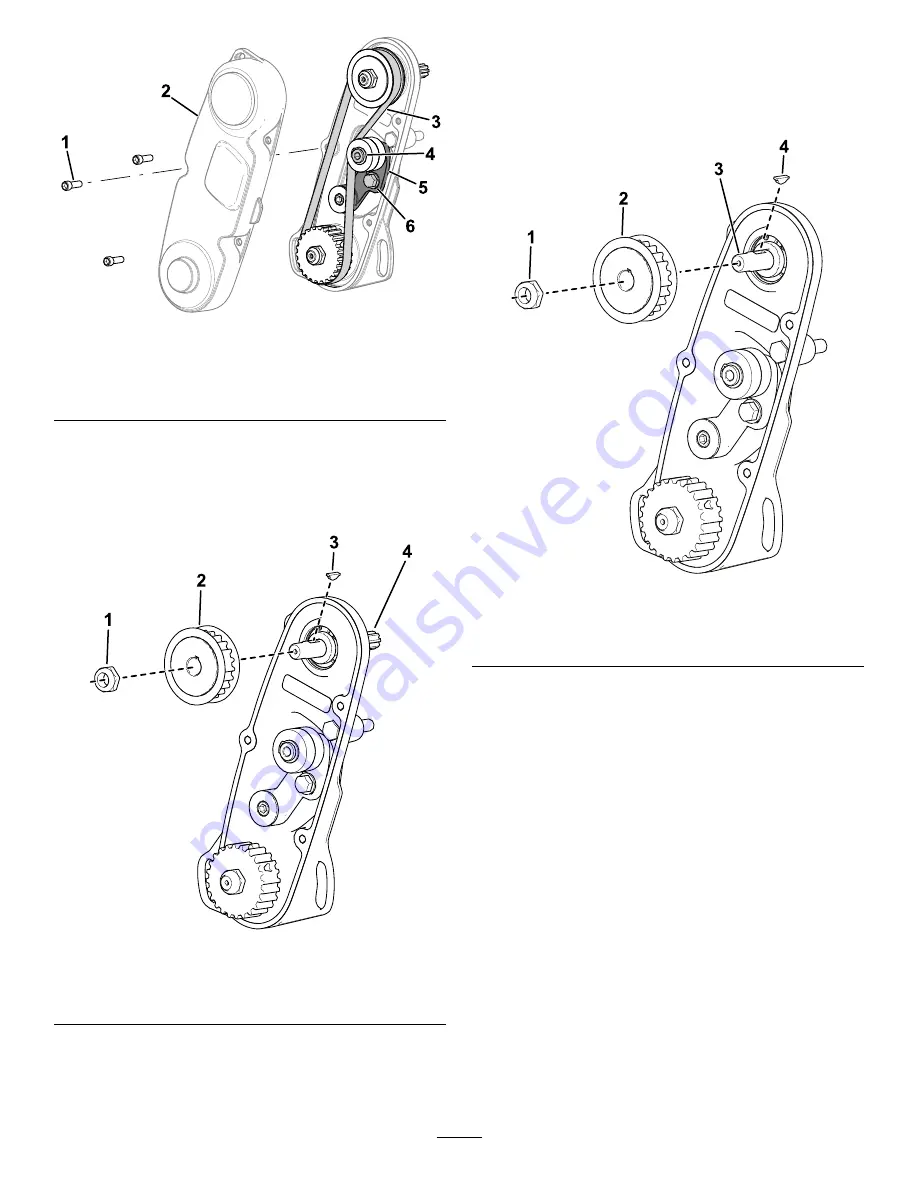
Figure 4
1.
Socket-head screw
4.
Idler-arm internal hex
2.
Belt cover
5.
Idler arm
3.
Belt
6.
Idler-arm bolt
4.
Loosen the idler-arm bolt and rotate the idler
arm (
) to release tension on the belt.
5.
Remove the belt (shown in
).
6.
Remove the nut, pulley, and key (
).
g343494
Figure 5
1.
Nut
3.
Key
2.
Pulley
4.
Existing reel driveshaft
7.
Remove the existing reel driveshaft (
Installing the Reel Driveshaft
1.
Install the new reel driveshaft (included in the
loose-parts bag).
Take care to not damage the seal.
g343495
Figure 6
1.
Nut
3.
New reel driveshaft
2.
Pulley
4.
Key
2.
Install the key into the driveshaft keyway (
3.
Install the pulley (
).
4.
Use the nut to secure the new reel driveshaft to
the assembly (
).
5.
Torque the nut to 37 to 45 N∙m (27 to 33 ft-lb).
6.
Install the belt and tension the belt by applying 4
to 5 N∙m (35 to 40 in-lb) to the idler-arm internal
hex shown in
.
7.
Tighten the idler-arm bolt and use the previously
removed socket-head screws to install the belt
cover.
Adjusting and Installing the
Cutting Unit
1.
Use 4 socket-head screws to install the cutting
unit to the machine (
7


