Installing the Striping Kit
Brackets
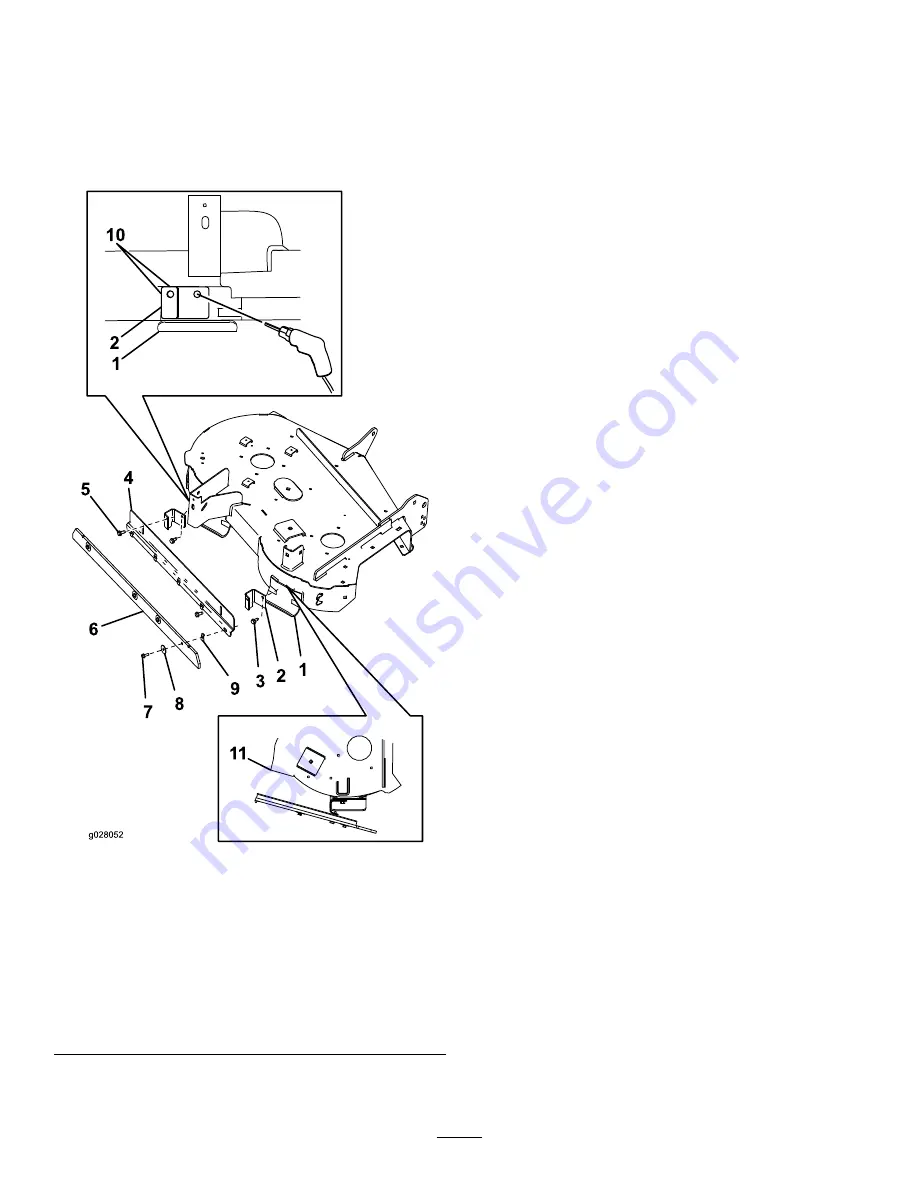
Installing the Mounting Brackets
1.
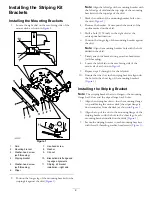
Locate the right skid on the rear-facing side of the
mower deck as shown in
Figure 1
1.
Skid
7.
Hex-head screw
2.
Mounting bracket
8.
Washer
3.
Washer-head screw
(self-threading)
9.
Clip nut
4.
Striping bracket
10.
Bracket/skid left edge and
top edge alignments
5.
Washer-head screw
(self-threading)
11.
Striping kit bracket
installation—right skid
6.
Wiper
2.
Position the longer leg of the mounting bracket for the
striping kit against the skid (
).
Note:
Align the left edge of the mounting bracket with
the left edge of skid and the top edge of the mounting
bracket with the top edge of the skid.
3.
Mark the outline of the mounting bracket hole onto
the skid (
4.
Remove the bracket. Center-punch the center of the
outline marked on the skid.
5.
Drill a hole (9/32 inch) in the right skid at the
center-punched location.
6.
Position the longer leg of the mounting bracket against
the skid.
Note:
Align the mounting bracket hole with the hole
drilled in the skid.
7.
Firmly attach the bracket using a washer-head screw
(self-threading).
8.
Locate the left skid on the rear facing side of the
mower deck as shown in
9.
Repeat steps
through
for the left skid.
10.
Ensure that the slots in the striping bracket align with
the holes in the short leg of the mounting brackets
(
Installing the Striping Bracket
Note:
The striping bracket has two flanges—the mounting
flange has 2 slots and the wiper flange has 4 holes.
1.
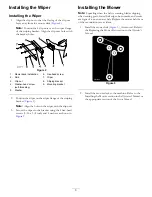
Align the striping bracket so that the mounting flange
is up and facing the mower deck (the wiper flange is
down and away from the deck) as shown in
2.
Align the top of the slot in the mounting flange of the
striping bracket with the hole in the short leg of each
mounting bracket installed on the skids (
3.
Secure the striping bracket to each mounting brackets
with the self-threading, washer-head screws (
).
2


