7
Setup
Note: Determine the left and right sides of the machine
from the normal operating position.
Installing the Handle
1. Align the upper and lower handle sections, and remove
the packing filler between them with a pliers.
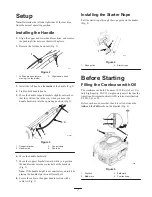
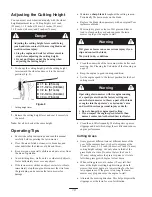
2. Remove the left knob and bolt (Fig. 2).
311
2
1
Figure 2
1.
Left handle knob (before
moving it on the inside)
2.
Right handle knob
3. Install the left knob on the inside of the handle (Fig. 2).
4. Tighten both handle knobs.
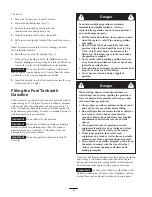
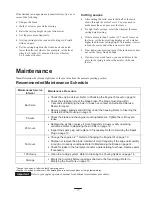
5. Move the handle support brackets slightly outward so
that they will not be in the way when you move the
handle backward into the operating position (Fig. 3).
m-4271
4
1
2
3
Figure 3
1.
Support bracket
2.
Handle stud
3.
Control cable
4.
Cable tie
6. Move the handle backward.
7. Move the support brackets inward while you position
the handle studs into the center hole of the brackets
(Fig. 3).
Note: If the handle height is not satisfactory, adjust it by
placing the handle stud into a different hole.
8. Secure the cable to the upper handle section with a
cable tie (Fig. 3).
Installing the Starter Rope
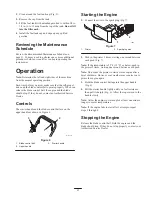
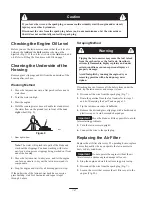
Pull the starter rope through the rope guide on the handle
(Fig. 4).
210
2
1
Figure 4
1.
Rope guide
2.
Starter rope
Before Starting
Filling the Crankcase with Oil
The crankcase can hold 20 ounces (0.59 liters) of oil. Use
only high-quality, SAE 30 weight detergent oil that has the
American Petroleum Institute (API) service classification
SF, SG, SH, or SJ.
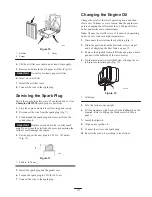
Before each use, ensure that the oil level is between the
Add and the Full marks on the dipstick (Fig. 5).
1626
3
2
1
4
Figure 5
1.
Dipstick
2.
Add mark
3.
Full mark
4.
Fuel tank cap


