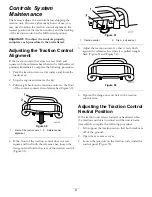
Figure 53
1.
Traction rod
2.
Jam nut
4. Start the traction unit and set the throttle to about
1/3 open position.
When the traction unit is running, you could be
caught and injured in moving parts or burned
on hot surfaces.
Stay away from pinch points, moving parts,
and hot surfaces when adjusting the running
traction unit.
5. If the
left
track moves, lengthen or shorten the
right
traction rod until the track stops moving.
6. If the
right
track moves, lengthen or shorten the
left
traction rod until the track stops moving.
7. Tighten the jam nuts.
8. Close the rear access cover.
9. Stop the engine and lower the traction unit to the
ground.
10. Drive the traction unit in full reverse, checking to
see if the unit tracks straight. If it does not, note
the direction the traction unit veers. Repeat the
adjustment previously described so that it tracks
straight in reverse.
Adjusting the Tracking of the
Traction Control, Full Forward
Position
If the traction unit does not drive straight when you hold
the traction control against the reference bar, complete
the following procedure:
1. Drive the traction unit with the traction control
against the reference bar, noting which direction the
traction unit veers.
2. Release the traction control.
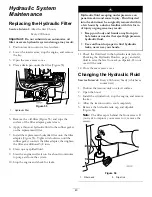
3. If the traction unit veers to the
left
, loosen the
right
jam nut and adjust the tracking set screw on the front
of the traction control (Figure 54).
4. If the traction unit veers to the
right
, loosen the
left
jam nut and adjust the tracking set screw on the
front of the traction control (Figure 54).
Figure 54
1.
Set screw
3.
Stop
2.
Jam nut
5. Repeat steps 1 through 4 until the traction unit drives
straight in the full forward position.
Important:
Ensure the tracking set screws
touch the stops in the full forward position to
avoid over stroking the hydraulic pumps.
42
Summary of Contents for 22319
Page 7: ...Slope Indicator 7...
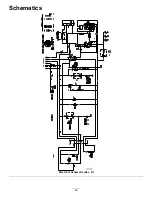
Page 49: ...Schematics G007388 Electrical Schematic Rev B 49...
Page 50: ...Hydraulic Schematic Rev A 50...
Page 51: ...Notes 51...

