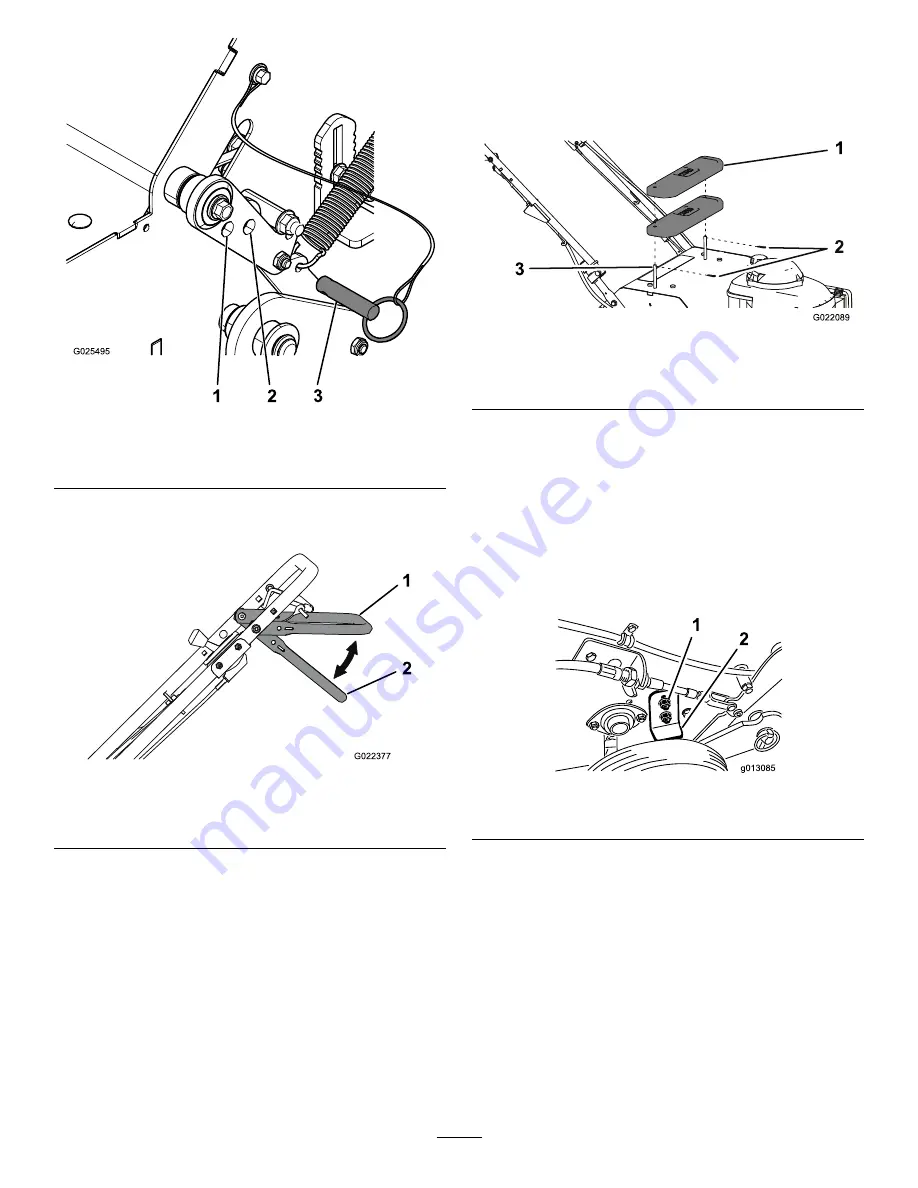
Figure 16
1.
Storage hole
3.
Transport locking pin
2.
Transport hole
3.
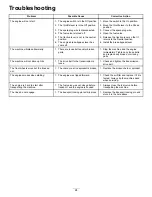
Push the tine-control lever down and forward to raise
the rear wheels and engage the tines.
1
2
G022377
Figure 17
1.
Tine-control lever—disengaged
2.
Tine-control lever—engaged
4.
Drive the machine to aerate the desired area.
5.
When finished, stop the machine and pull the tine
control lever rearward and up to lower the rear wheels
and lifts the tines out of the ground.
Important:
Do not drive the machine across
pavement or other hard surfaces without first
raising the tines. Crossing hard surfaces with the
tines lowered will damage the tines.
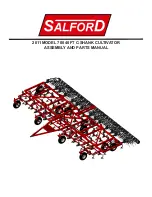
Adding Weight to the Machine
To ensure that the tines penetrate fully into the soil, you can
add weight to the top of the machine. The machine is shipped
with 2 weights and has 2 posts that hold the weights.
1
2
3
G
022089
Figure 18
1.
Weight
3.
Post
2.
Hairpin cotters
Adjusting the Coring Depth
A coring depth of 6.35 cm (2-1/2 inches) is recommended,
but you can change the depth as follows:
1.
Raise the tines, stop the machine, stop the engine, and
disconnect the spark-plug wire.
2.
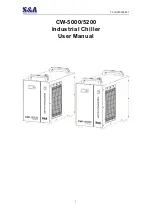
Loosen the nuts securing the wheel stop on the right
side of the machine (Figure 19).
Figure 19
1.
Nuts
2.
Wheel stop
3.
Raise the wheel stop to increase the coring depth, and
lower it to reduce the depth, as required.
4.
Tighten the nuts securely to lock the wheel stop in
place.
5.
Repeat steps 2 through 4 for the wheel stop on the left
side of the machine.
Note:
Set the wheel stops to the same height on each
side.
13


