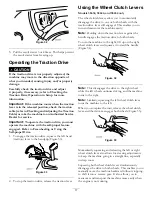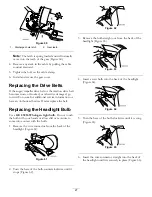
of the machine down so that the front edge of the
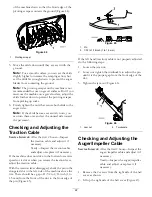
pivoting scraper contacts the ground (Figure 44).
Figure 44
1.
Pivoting scraper
5. Move the skids down until they are even with the
ground.
Note:
For a smooth surface, you can set the skids
slightly higher to increase the scraping action, but
set the skids far enough down to prevent the auger
blades from contacting the ground.
Note:
The pivoting scraper on the machine is not
recommended for use on gravel surfaces. But if you
must use the machine on a gravel surface, adjust the
skids further down to prevent the pivoting scraper
from picking up rocks.
6. Firmly tighten the nuts that secure both skids to the
auger sides.
Note:
If the skids become excessively worn, you
can turn them over and set the unused side toward
the pavement.
Checking and Adjusting the
Traction Cable
Service Interval:
After the first 2 hours—Inspect
the traction cable and adjust it if
necessary.
Yearly—Inspect the traction cable
and adjust or replace it if necessary.
If the machine does not drive in the forward or reverse
speeds or it drives when you release the traction lever,
adjust the traction cable.
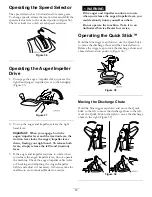
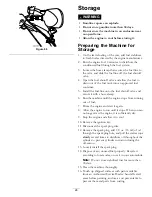
With the traction lever disengaged, check the pin in the
elongated slot in the left side of the machine above the
tire. There should be a gap of 1/32 to 1/16 inch (1 to
1.5 mm) from the front of the slot to the front edge of
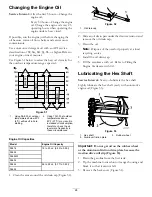
the pin (Figure 45).
Figure 45
1.
Pin
2.
1/32 to 1/16 inch (1 to 1.5 mm)
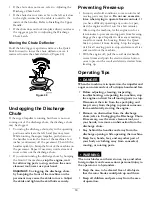
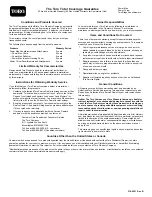
If the left hand (traction) cable is not properly adjusted,
do the following steps:
1. Loosen the jam nut.
2. Loosen or tighten the turnbuckle to adjust the pin
until it is the proper gap from the front edge of the
slot.
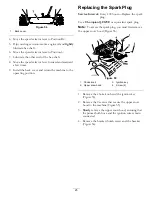
3. Tighten the jam nut (Figure 46).
Figure 46
1.
Jam nut
2.
Turnbuckle
Checking and Adjusting the
Auger/Impeller Cable
Service Interval:
After the first 2 hours—Inspect the
auger/impeller cable and adjust it if
necessary.
Yearly—Inspect the auger/impeller
cable and adjust or replace it if
necessary.
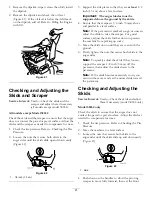
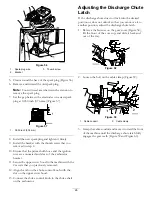
1. Remove the 2 screws from the right side of the belt
cover as shown.
2. Lift up the right side of the belt cover (Figure 47).
22


