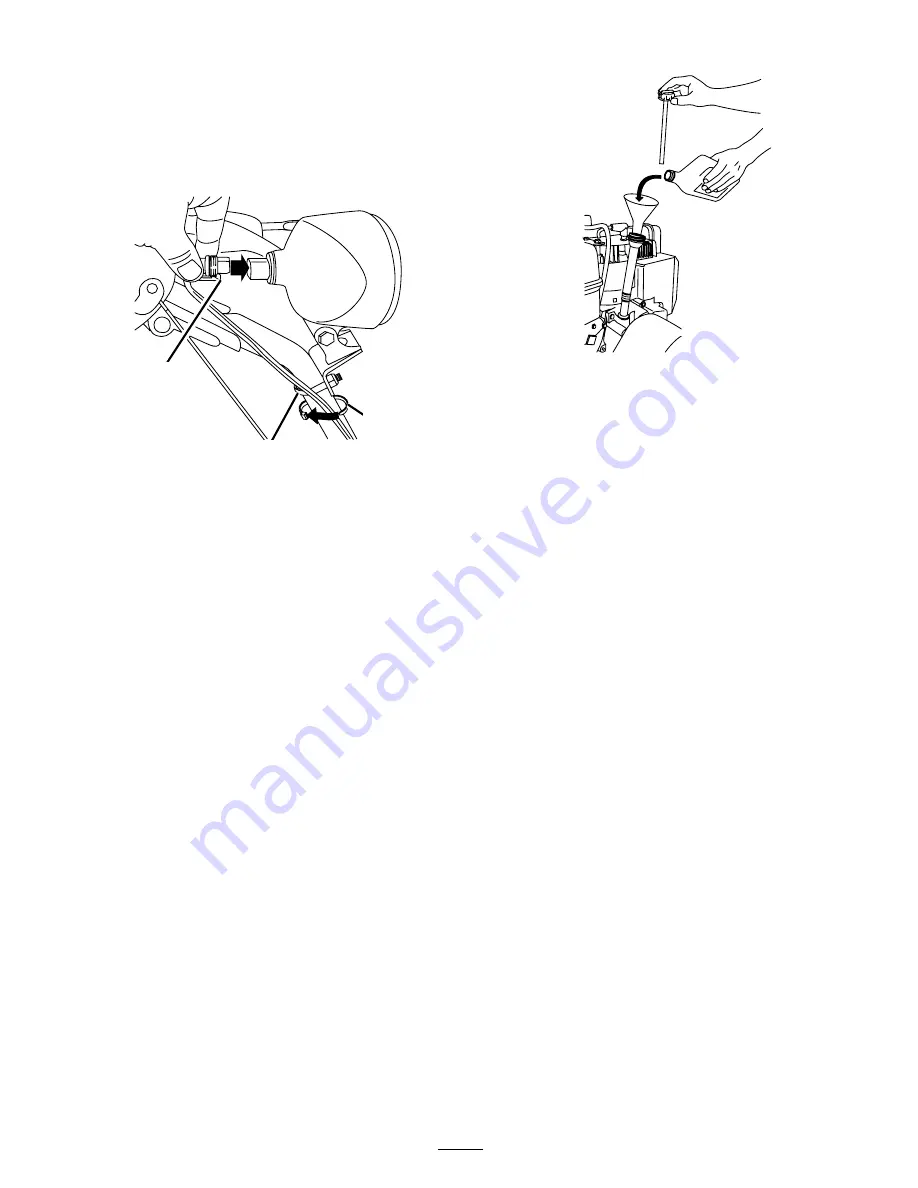
5. Connecting the Wire to the
Headlight
1. Insert the wire connector on the loose end of the wire
straight into the back of the headlight until it is securely
in place (Figure 17).
G000992
1
2
3
Figure 17
1. Plastic clip on wire
connector
3. Cable tie
2. U-bolt
Note:
Ensure that the plastic clip on the wire
connector is on the bottom (Figure 17).
2. Secure a cable tie (from the loose parts bag) around the
wire and the handle about an inch (2.5 cm) below the
U-bolt (Figure 17).
6. Filling the Engine with Oil
Your snowthrower comes with 26 oz. of oil in the engine.
Note:
Before starting the engine, check the oil level and
add oil if necessary.
Max.
fi
ll: 26 oz. (0.77 l), type: automotive detergent oil with
an API service classi
fi
cation of SF, SG, SH, SJ, SL, or higher.
•
For temperatures above 32°F (0°C), use SAE 30W.
•
For temperatures between 0°F and 32°F (-18°C to 0°C),
use SAE 5W30 or SAE 10W.
•
For air temperatures below 0°F (-18°C), use SAE 0W30.
1. Remove the dipstick and
slowly
pour oil into the oil
fi
ll tube to raise the oil level to the Full mark on the
dipstick.
Do not over
fi
ll.
G000993
Figure 18
2. Install the dipstick securely.
Note:
Do not spill oil around the oil
fi
ll tube; oil could
leak onto traction parts and cause the traction to slip.
7. Checking the Tire Pressure
The tires are overin
fl
ated at the factory for shipping. Reduce
the pressure equally in both tires to between 17 and 20 psi
(116 and 137 kPa).
8. Checking the Skids and
Scraper
Refer to Checking and Adjusting the Skids and Scraper in
Maintenance.
9


