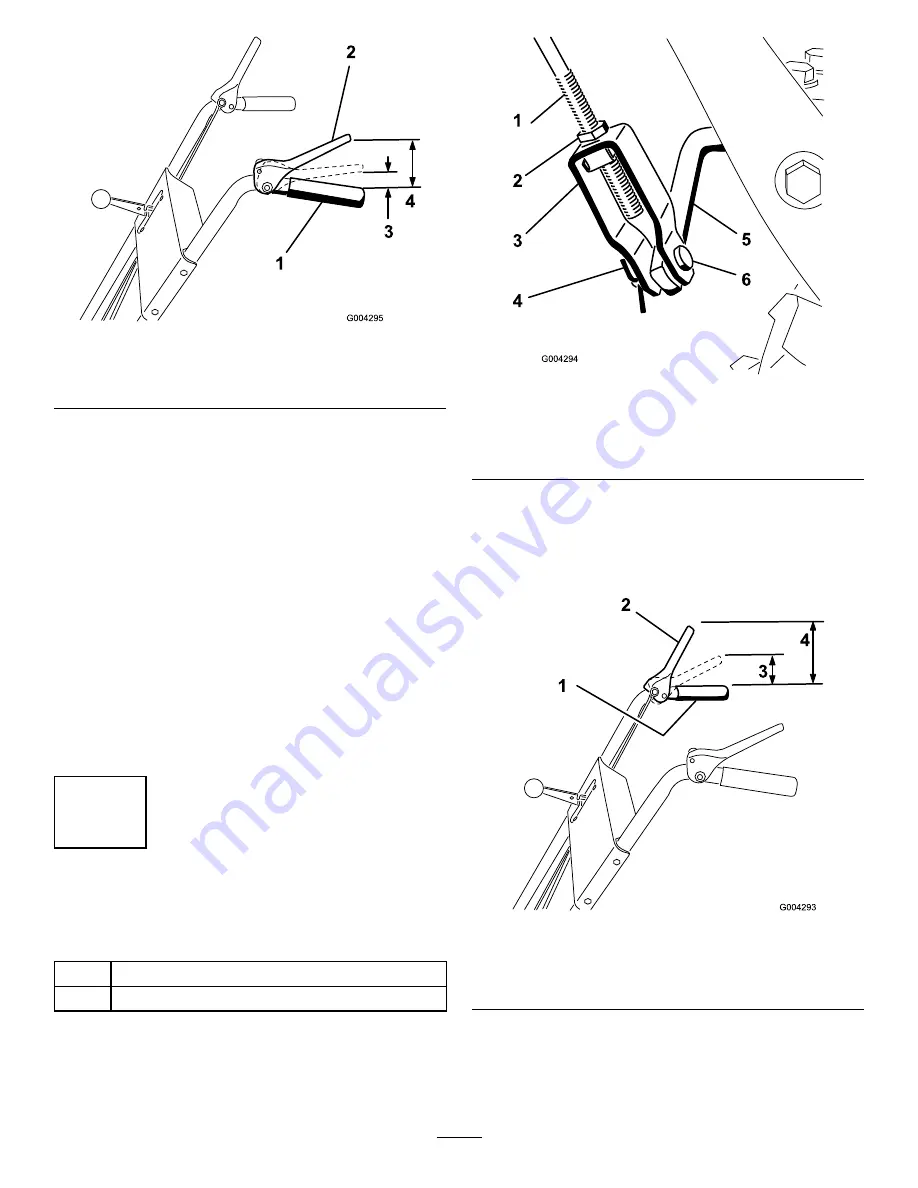
Figure 7
1.
Handgrip
3.
1 to 2 inches (3 to 5 cm)
2.
Traction control lever
4.
4-1/2 inches (11.4 cm)
3.
Tighten the 2 flange nuts until they are finger tight.
4.
Move the speed selector lever (Figure 14) into third
gear.
Note:
If the speed selector lever does not move into
third gear, adjust the speed selector before continuing.
Refer to Adjusting the Speed Selector in Maintenance.
5.
Slowly pull the machine backward while slowly pressing
the traction control lever toward the handgrip.
Note:
The adjustment is correct when the wheels stop
rolling backward and the distance between the top of
the handgrip and the bottom of the traction control
lever is 1 to 2 inches (3 to 5 cm) as shown in Figure 7.
6.
Adjust the 2 flange nuts, if necessary, to obtain the
proper distance between the top of the handgrip and
the bottom of the traction control lever.
7.
Tighten the flange nuts securely.
4
Installing the Auger/ Impeller
Drive Control Linkage
Parts needed for this procedure:
1
Clevis pin
1
Cotter pin
Procedure
1.
Loosen the jam nut above the clevis on the upper
control rod (Figure 8).
Figure 8
1.
Upper control rod
4.
Cotter pin
2.
Jam nut
5.
Lower control rod
3.
Clevis
6.
Clevis pin
2.
Align the holes in the clevis and the lower control rod
and insert the clevis pin (Figure 8).
3.
Check the distance between the top of the handgrip
and the bottom of the auger/impeller drive control
lever (Figure 9).
Figure 9
1.
Handgrip
3.
1 to 2 inches (3 to 5 cm)
2.
Auger/impeller control
lever
4.
5 inches (12.7 cm)
Note:
The distance should be approximately 5 inches
(12.7 cm).
4.
Press the auger/impeller drive control lever slowly
toward the handgrip.
11


