Breaking in a New Sprayer
To provide proper performance and long sprayer life, follow
these guidelines for the first 100 operating hours:
•
Check the fluid and engine oil levels regularly and be alert
for indications of overheating in any component of the
sprayer.
•
After filling the tank, check the tank straps for any play.
Tighten as necessary.
•
After starting a cold engine, let it warm up for about
15 seconds before accelerating.
•
Avoid hard braking situations for the first several hours of
new sprayer break-in operation. New brake linings may
not be at optimum performance until several hours of use
has caused the brakes to become burnished (broken-in).
•
Avoid racing the engine.
•
Refer to the Maintenance section for any special low hour
checks.
Operating the Sprayer
To operate the Multi-Pro Sprayer first fill the spray tank, then
apply the solution to the work area, and finally clean the tank.
It is important that you complete all three of these steps in
succession to avoid damaging the sprayer. For example, do
not mix and add chemicals in the spray tank at night and then
spray in the morning. This would lead to separation of the
chemicals and possible damage to the sprayer components.
CAUTION
Chemicals are hazardous and can cause personal
injury.
•
Read the directions on the chemical labels
before handling the chemicals and follow
all manufacturer recommendations and
precautions.
•
Keep chemicals away from your skin. Should
contact occur, wash the affected area thoroughly
with soap and clean water.
•
Wear goggles and any other protective
equipment recommended by the chemical
manufacturer.
The Multi-Pro Sprayer has been specifically designed to have
high durability in order to give it the long sprayer life you
need. Different materials have been chosen for specific
reasons at different locations on your sprayer to meet this
goal. Unfortunately there is no single material which is
perfect for all foreseeable applications.
Some chemicals are more aggressive than others and each
chemical interacts differently with various materials. Some
consistencies (e.g. wettable powders, charcoal) are more
abrasive and lead to higher wear rates. If a chemical is
available in a formulation that would provide increased life to
the sprayer, use this alternative formulation.
As always, remember to clean your sprayer thoroughly after
all applications. This will do the most to ensure your sprayer
has a long and trouble free life.
Note:
If you have questions or need additional information
regarding the spray control system, refer to the Operators
Manual supplied with the system.
Filling the Fresh Water Tank
Always fill the fresh water tank with clean water before
handling or mixing any chemicals.
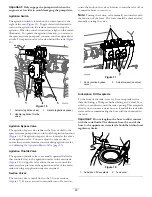
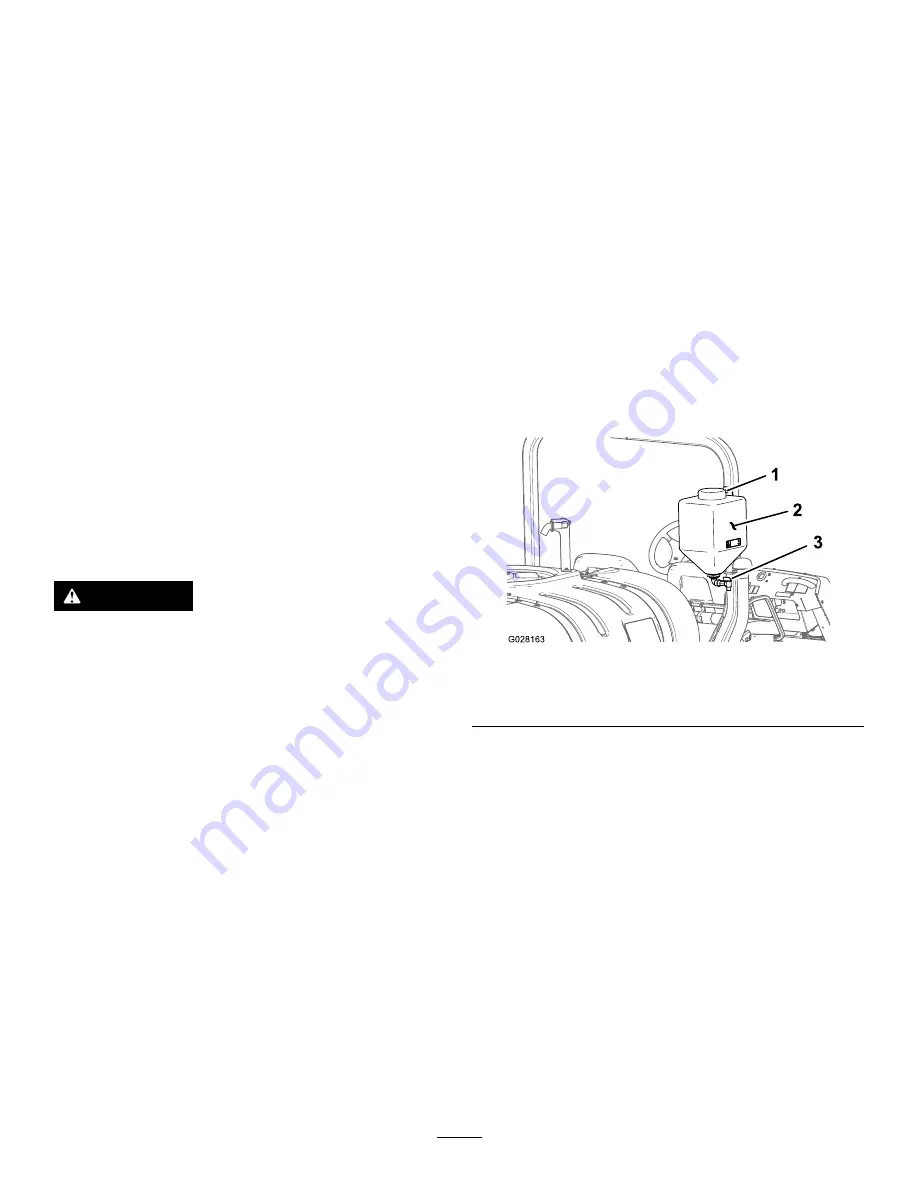
The fresh water tank is located on the ROPS, behind the
passenger seat (
). It supplies a source of fresh water
for you to wash chemicals off of your skin, eyes, or other
surfaces in the case of accidental exposure.
To fill the tank, unscrew the cap on the top of the tank and
fill the tank with fresh water. Replace the cap.
To open the fresh water tank spigot, turn the lever on the
spigot.
Figure 34
1.
Filler cap
3.
Spigot
2.
Fresh water tank
Filling the Spray Tank
Important:
Ensure that the chemicals you will be using
are compatible for use with Viton (see the manufacturer's
label; it should indicate if it is not compatible). Using a
chemical that is not compatible with Viton will degrade
the O-rings in the sprayer, causing leaks.
Important:
The tank markings are for reference only
and cannot be considered accurate for calibration.
Important:
After filling the tank for the first time, check
the tank straps for any play. Tighten as necessary.
1.
Stop the sprayer on a level surface, stop the engine,
and set the parking brake.
2.
Determine the amount of water needed to mix the
amount of chemical you need as prescribed by the
chemical manufacturer.
3.
Open the tank cover on the spray tank.
31

