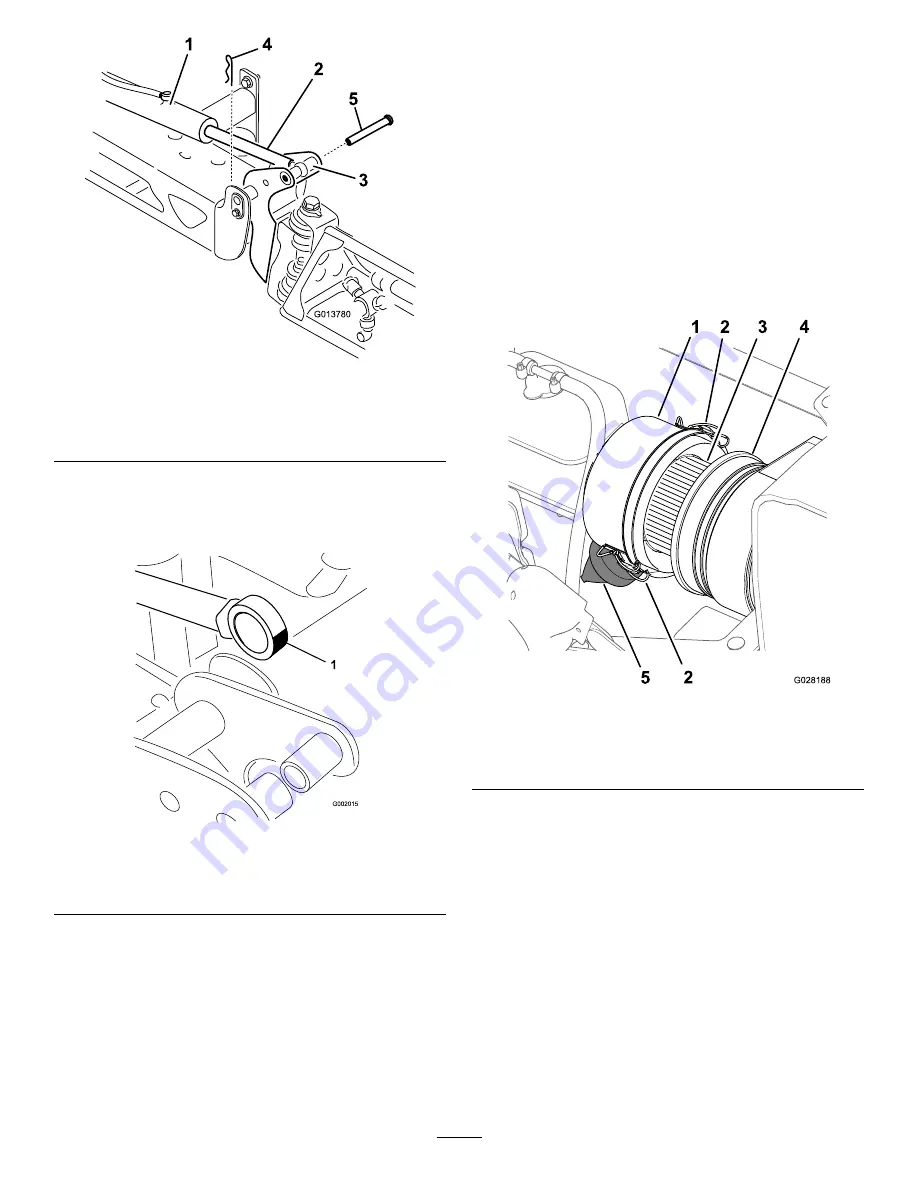
G013780
1
4
2
3
5
Figure 54
1.
Actuator
4.
Cotter
2.
Actuator rod
5.
Pin
3.
Boom pivot pin housing
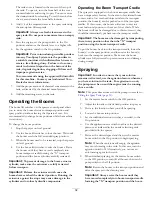
5.
Manipulate the actuator rod bearing end and apply
grease into the bearing (
Note:
Wipe off excess grease.
Figure 55
Right boom
1.
Grease bearing
6.
Lift up on the boom to align the pivot with the actuator
rod.
7.
While holding the boom, insert the pin through both
boom pivot and actuator rod (
8.
With the pin in place, release the boom and secure the
pin with the cotter removed previously.
9.
Repeat the procedure for each actuator rod bearing.
Engine Maintenance
Checking the Air Cleaner
Service Interval:
Before each use or daily Service the air
cleaner more frequently if operating
conditions are extremely dusty or sandy.
1.
Set the parking brake, stop the pump, stop the engine,
and remove the key from the starter switch.
2.
Tilt the passenger seat forward and align the prop rod
into the detent in the prop rod guide slot.
3.
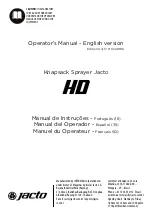
Wipe clean the dust cap and air cleaner body (
Figure 56
1.
Dust cap
4.
Air cleaner body
2.
Latch (dust cap)
5.
Dust valve
3.
Air filter element
4.
Check the air cleaner body for damage that could cause
an air leak (
).
Note:
Replace the dust cap and air cleaner body if
either is damaged.
5.
Squeeze the dust valve to clear it of dirt, dust, and
debris (
6.
Loosen the 2 latches that secure the dust cap to the
air cleaner body.
7.
Check the air filter element for excessive accumulation
of dust, dirt , and debris (
).
Note:
Do not clean the air filter element if it is dirty,
replace the air filter element if it is dirty.
8.
Install the dust cap onto the air cleaner body and secure
the cap with the 2 latches (
43


