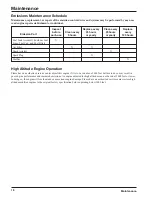
background image

17

Maintenance

3.

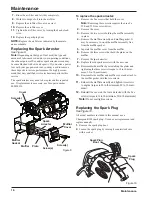
  Remove the spark plug.

4.

  Hand thread the new spark plug, turning it clockwise. 

5.

  Tighten with a socket. (Torque to 170 in.lb. minimum, 

190 in.lb. maximum. 

Do not overtighten).

CAUTION:

Be careful not to cross-thread the spark plug. Cross-

threading will seriously damage the product.

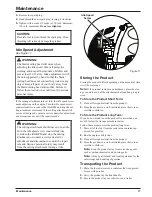
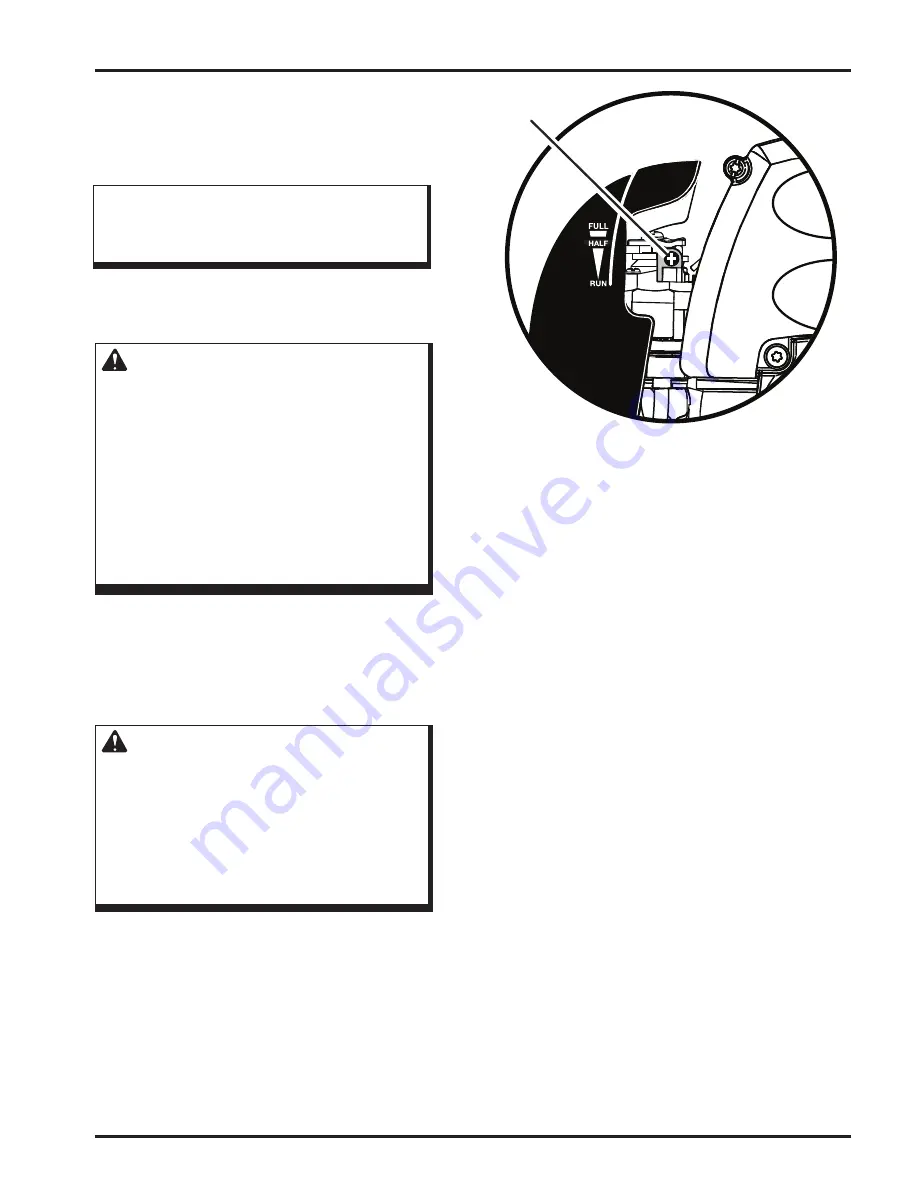
Idle Speed Adjustment

See Figure 11.

WARNING: 

The blade/cutting head will move when 

adjusting the idle speed. Wear all protective 

clothing and keep all bystanders, children, and 

pets at least 50 ft. away. Make adjustments with 

the unit supported by hand so that the blade/

cutting head does not contact the ground or any 

object. Keep all parts of your body away from 

the blade/cutting head and muffler. Failure to 

follow these instructions could result in serious 

personal injury.

If the cutting attachment turns at idle, the idle speed screw 

needs adjusting on the engine. Turn the idle speed screw 

counterclockwise to reduce the idle RPM and stop the cut-

ting attachment movement. If the cutting attachment still 

moves at idle speed, contact a service dealer for adjustment 

and discontinue use until the repair is made.

WARNING: 

The cutting attachment should never turn at idle. 

Turn the idle speed screw counterclockwise 

to reduce the idle RPM and stop the cutting 

attachment, or contact a service dealer for 

adjustment and discontinue use until the repair 

is made. Serious personal injury may result 

from the cutting attachment turning at idle.

Idle Speed 

Screw

Maintenance

Figure 11

Storing the Product

Storing the product differs depending on the amount of time 

it will be in storage.

Note:

 If the product includes an attachment, place the stor-

age cap on the end of the attachment shaft and hang it up to 

store.

To Store the Product Short Term:

1.

  Clean all foreign material from the product.

2.

  Store the product in a well-ventilated place that is inac-

cessible to children.

To Store the Product Long Term:

If you do not intend to use the product for more than one 

month, follow the storage procedures below.

Follow these steps to store the product long term.

1.

  Drain all of the fuel from the tank into a container ap-

proved for gasoline.

2.

  Run the engine until it stops.

3.

  Clean all foreign material from the product.

4.

  Store the product in a well-ventilated place that is inac-

cessible to children.


Note:


Keep the product away from corrosive agents 

such as garden chemicals and de-icing salts.


Note:


Abide by all federal and local regulations for the 

safe storage and handling of gasoline.

Transporting the Product

1.

  Drain the fuel mixture into a container that is approved 

for use with gasoline.

2.

  Carry the product by the front handle.

3.

  Secure the product in your vehicle or on a trailer.

Summary of Contents for 51945

Page 1: ...rench FR and Spanish ES WARNING To reduce the risk of injury the user must read and understand the operator s manual Save this manual Form No 3369 610 Rev A If you have questions concerning your trimm...

Page 2: ...lever to RUN and pull the starter cord If the engine does not start within 5 pulls refer to To Start a Cold Engine later in this manual Flooded Engine Will the engine start If not it may be flooded R...

Page 3: ...12 Fueling and Refueling the Trimmer 12 Oxygenated Fuels 12 Operating the Power Head 13 Blade Thrust 13 Starting the Product 14 Stopping the Product 14 Maintenance 15 18 Cleaning the Product 15 Servi...

Page 4: ...e space below Model No Serial No Read this manual carefully to learn how to operate and maintain your product correctly Reading this manual will help you and others avoid personal injury and damage to...

Page 5: ...your body away from any moving part To avoid hot surfaces never operate the unit with the bottom of the engine above waist level Do not touch area around the muffler or cylinder of the unit these par...

Page 6: ...y gloves when operating the brushcutter and when installing or removing blades Always stop the engine and remove the spark plug wire before attempting to remove any obstruction caught or jammed in the...

Page 7: ...OL NAME EXPLANATION Safety Alert Indicates a potential personal injury hazard Read Operator s Manual To reduce the risk of injury user must read and understand opera tor s manual before using this pro...

Page 8: ...tructions are easily visible to the operator and are located near any area of potential danger Replace damaged or lost labels Part No 940686099 Part No 940964006 Part No 940864003 Product Labels ON ST...

Page 9: ...ts that your are using with this power head Engine The engine is powerful and easy to start It is effectively counterbalanced which allows for less vibration and more durability Ergonomic Design The d...

Page 10: ...duct or create accessories not recommended for use with this product Any such alteration or modification is misuse and could result in a hazardous condi tion leading to possible serious personal injur...

Page 11: ...n indicated by the arrow on the shaft angling the handle toward the throttle trigger 3 Place the front handle along the upper shaft to a position that allows for comfortable operation 4 Place the hand...

Page 12: ...ix unleaded gasoline and 2 cycle engine lubricant in a clean container approved for gasoline DO NOT mix quantities larger than usable in a 30 day period Recommended fuel This engine is certified to op...

Page 13: ...rtial throttle will result in lubricant dripping from the muffler WARNING Always hold the power head and attachment away from the body keeping clearance between the body and the product Any contact wi...

Page 14: ...starter handle sharply until engine attempts to start no more than 4x 5 Set the choke lever to HALF 6 Pull starter handle until engine runs no more than 6 pulls 7 Set the choke lever to RUN NOTE In c...

Page 15: ...r eye protection with side shields marked to comply with ANSI Z87 1 along with hearing protection Head protection may also be required depending on the type of attach ment used and as prescribed in th...

Page 16: ...hold the cover Note Removing these screws requires the use of a T20 and T25 torx screwdriver 2 Remove the cover 3 Remove the two screws holding the muffler assembly in place 4 Remove the muffler asse...

Page 17: ...op the cutting attachment or contact a service dealer for adjustment and discontinue use until the repair is made Serious personal injury may result from the cutting attachment turning at idle Idle Sp...

Page 18: ...nter restore high altitude modified engines to the original factory specification before operating below 2000 feet Maintenance Emissions Maintenance Schedule Maintenance replacement or repair of the e...

Page 19: ...mes This clears excess fuel from the engine Clean and reinstall the spark plug With the trigger fully depressed pull the starter cord 3 times If the engine does not start set the choke lever to FULL a...

Page 20: ...ay contrary to the operat ing instructions as specified in the Operator s Manual This warranty does not apply to any damage to the Gas Power Head that is the result of improper maintenance or to any G...

Page 21: ...s from the date the non road or small off road engine is purchased by the initial purchaser c The warranty on emissions related parts will be interpreted as follows Any warranted part that is not sche...

Page 22: ...Notes...

Page 23: ...ized service dealer To locate your nearest authorized service dealer for this product contact us toll free at 1 866 574 9242 US or 1 866 574 9243 Canada Techtronic Industries North America Inc P O Box...

Reviews: