Maintenance
31
Cutting Blade
To assure a superior quality of cut, keep the blade(s)
sharp. For convenient sharpening and replacement,
you may want to have an extra blade(s).
POTENTIAL HAZARD
•
A blade that is worn or damaged could
break apart and pieces could be thrown at
bystanders or at you as you use the mower.
WHAT CAN HAPPEN
•
Pieces of blade that may be thrown could
seriously injure or kill you or bystanders.
HOW TO AVOID THE HAZARD
•
Periodically inspect the blade for wear and
damage. Immediately install a new blade if
it is worn or damaged.
Inspecting the Blade(s)
1.
Remove the mower; refer to Removing the
Mower, page 32.
2.
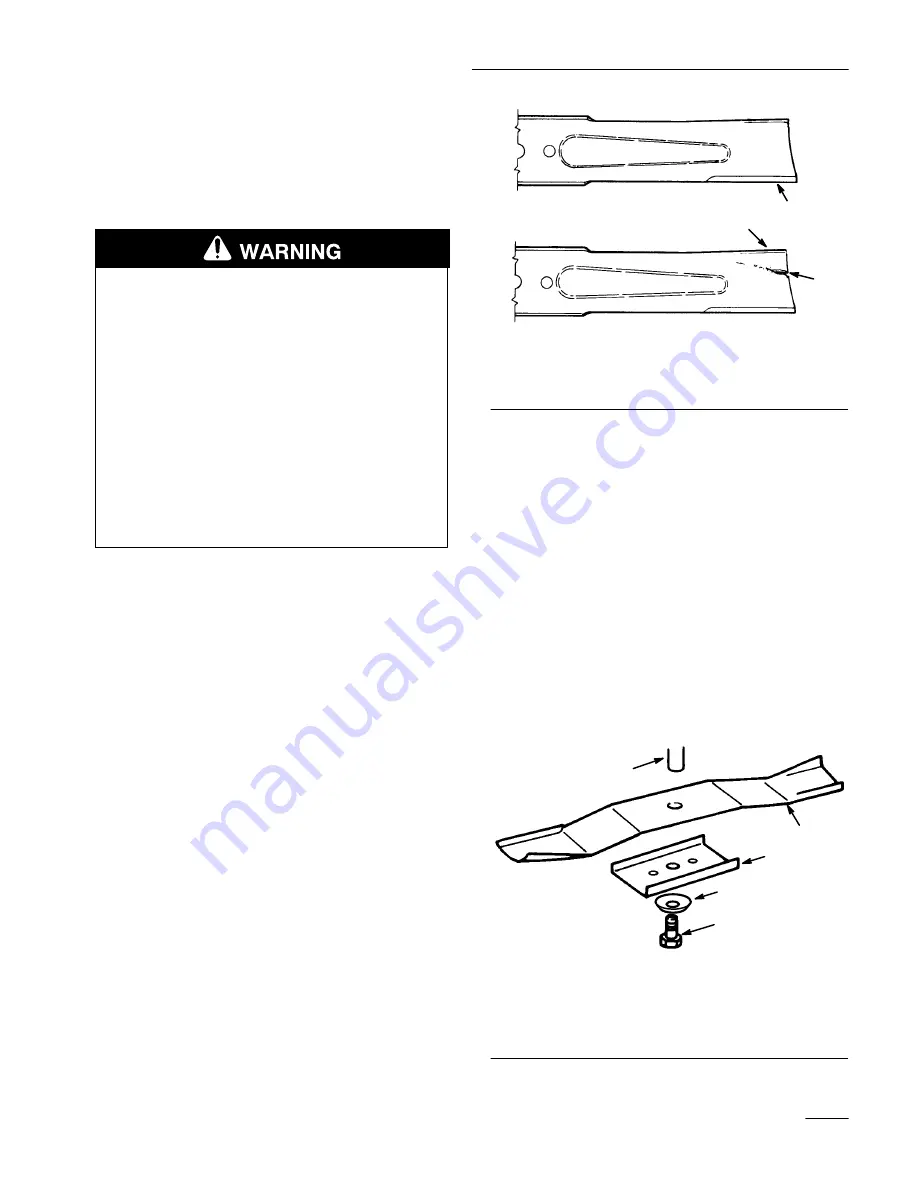
Inspect the cutting edges (Fig. 32). If the edges
are not sharp or have nicks, remove the blade(s)
and sharpen them; refer to Sharpening the
Blade(s), page 32.
3.
Inspect the blade(s), especially the curved area
(Fig. 32). If you notice any damage, wear, or a
slot forming in this area (Fig. 32), immediately
install a new blade.
m–151
1
2
3
Figure 32
1.
Cutting edge
2.
Curved area
3.
Wear/slot forming
Removing the Blade
1.
Remove the mower; refer to Removing the
Mower, page 32.
2.
Carefully tip the mower over.
3.
Remove the bolt (5/8” wrench), curved washer,
retainer and blade (Fig. 33). A block of wood
may be wedged between the blade and the
mower to lock the blade when you are removing
the bolt.
4.
Inspect all parts. If damage is noticed, install
new parts.
m–1886
1
2
3
4
5
Figure 33
1.
Bolt
2.
Retainer
3.
Blade
4.
Spindle
5.
Curved washer
Summary of Contents for 71198
Page 7: ...Safety 5 Slope Chart Read all safety instructions on pages 2 4...
Page 8: ...6...
Page 46: ......
Page 47: ......


