Note:
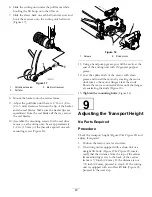
Note: Mounting fasteners for the Greensmaster
3250-D cutting units are included with the cutting units.
1
Installing the Rear Wheel
Parts needed for this procedure:
1
Wheel hub
4
Wheel nuts
1
Wheel
1
Wheel bolt
1
Locknut
2
Spacers
Procedure
1. Mount the wheel hub to the rear wheel rim with 4
mounting nuts (Figure 3). Torque the nuts to 70–90
ft.-lb.
2. Remove the wheel bolt and locknut from the wheel
mounting holes in the rear castor fork (Figure 3).
3. Install the rear wheel into the castor fork. Insert
the wheel bolt into one of the castor fork mounting
holes, install a spacer (supplied in loose parts), and
slide the bolt through the wheel.
4. Install another spacer onto the bolt and route the
bolt through the remaining castor fork mounting
hole.
5. Position the bend of the wheel bolt head under the
bottom edge of the adapter plate (Figure 3). Install
and tighten the locknut to secure the wheel to the
castor fork. Do not overtighten the locknut as the
wheel must rotate freely.
Figure 3
1.
Rear wheel
4.
Rear castor fork
2.
Hub
5.
Wheel bolt
3.
Nut
6.
Spacer (2)
6. Wipe the grease fitting clean on the wheel assembly.
Pump grease into the wheel hub until grease is seen
exiting at both hub bearings. Wipe up excess grease.
2
Mounting the Seat
Parts needed for this procedure:
1
Seat
4
Nut (5/16 inch)
Procedure
Note:
Mount the seat slides in the front set of
mounting holes to gain an additional 3 in. (7.6 cm) in the
forward adjustment, or in the rear mounting holes for
an additional 3 in. (7.6 cm) in the rearward adjustment.
1. Remove the locknuts securing the seat slides to the
plywood shipping base. Discard the locknuts.
2. Connect the wire harness to the seat switch.
3. Secure the seat, seat panel, and seat slides to the
seat support with the locknuts (5/16 in.) (Figure 4)
supplied in the loose parts.
13
Summary of Contents for Greensmaster 3250-D
Page 49: ...Schematics Electrical Schematic Rev B 49 ...
Page 50: ...Hydraulic Schematic Rev C 50 ...
Page 51: ...Notes 51 ...


