g011550
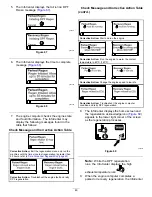
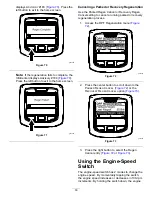
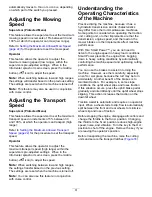
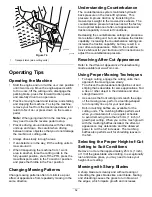
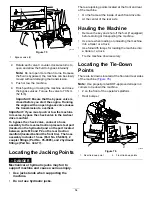
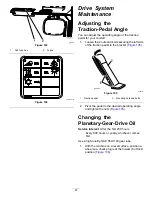
Figure 74
1.
Transport latch (side cutting units)
Operating Tips
Operating the Machine
•
Start the engine and run it at the
HALF IDLE
position
until it warms up. Move the engine-speed switch
to H
IGH IDLE
, lift the cutting units, disengage the
parking brake, press the forward traction pedal,
and carefully drive to an open area.
•
Practice moving forward and reverse, and starting
and stopping the machine. To stop the machine,
remove your foot from the traction pedal and let it
return to N
EUTRAL
or press down on the reverse
pedal.
Note:
When going downhill in the machine, you
may need to use the reverse pedal to stop.
•
Practice driving around obstacles with the cutting
units up and down. Be careful when driving
between narrow objects so that you do not damage
the machine or cutting units.
•
Always drive slowly in rough areas.
•
If an obstacle is in the way, lift the cutting units to
mow around it.
•
When transporting the machine from 1 work
area to another, raise the cutting units to the
fully upward position, shut off the PTO, press the
mow/transport switch to the T
RANSPORT
position,
and place the throttle in the F
AST
position.
Changing Mowing Patterns
Change mowing patterns often to minimize a poor
after-cut appearance from repeatedly mowing in the
same direction.
Understanding Counterbalance
The counterbalance system maintains hydraulic
back pressure on the deck-lift cylinders. This
pressure improves traction by transferring the
mower-deck weight to the mower-drive wheels. The
counterbalance pressure has been set at the factory
to an optimal balance of after-cut appearance and
traction capability in most turf conditions.
Decreasing the counterbalance setting can produce a
more stable cutting unit, but can decrease the traction
capability. Increasing the counterbalance setting can
increase the traction capability, but may result in a
poor after-cut appearance. Refer to the machine
Service Manual
for your traction unit for instructions to
adjust the counterbalance pressure.
Resolving After-Cut Appearance
Refer to the
After-cut Appearance Troubleshooting
Guide
available at www.Toro.com.
Using Proper Mowing Techniques
•
To begin cutting, engage the cutting units, then
approach the mowing area slowly.
•
To achieve the professional straight-line cut and
striping that is desirable for some applications, find
a tree or other object in the distance and drive
straight toward it.
•
As soon as the front cutting units reach the edge
of the mowing area, perform a teardrop-shaped
turn to quickly line up for your next pass.
•
Bolt-in mulching baffles are available for the
cutting units. The mulching baffles perform well
when you maintain turf on a regular schedule
to avoid removing more than 25 mm (1 inch) of
growth per cutting. When you cut too much growth
with the mulching baffles installed, the after-cut
appearance may deteriorate and the observed
power to cut the turf increases. The mulching
baffles also perform well for shredding leaves in
the fall.
Selecting the Proper Height-of-Cut
Setting to Suit Conditions
Remove no more than approximately 25 mm (1 inch),
or 1/3 of the grass blade when cutting. In exceptionally
lush and dense grass, you may need to raise your
height-of-cut setting.
Mowing with Sharp Blades
A sharp blade cuts cleanly and without tearing or
shredding the grass blades like a dull blade. Tearing
and shredding causes the grass to turn brown at
the edges, which impairs growth and increases
52
Summary of Contents for Groundsmaster 4000
Page 85: ...Notes ...

