background image

Summary of Contents for LX466 13AT61RH044

Page 1: ...U 0 LX466 Lawn Tractor Model No 13RT61RH044 Model No 13RT61RH244 Model No 13AT61RH048 Register your product at www Toro com Original Instructions EN 769 03480 11 27 07...

Page 2: ...n the space provided below A sample model plate is also illustrated below You can locate the model plate by looking at the underside of the tractor s seat This information will be necessary to use the...

Page 3: ...ect injury keep bystanders helpers children and pets at least 75 feet from the machine while it is in operation Stop machine if anyone enters the area 6 Thoroughly inspect the area where the equipment...

Page 4: ...sloped or hilly area If the slope is greater than 15 degrees as shown on the slope gauge do not operate this unit on that area or serious injury could result DO 1 Mow up and down slopes not across Ex...

Page 5: ...ering ability are reduced attachment may jack knife and cause tractor to overturn 5 Travel slowly and allow extra distance to stop 6 On slopes the weight of the towed equipment may cause loss of tract...

Page 6: ...stop the engine and remove the ignition key to prevent unintended starting Thoroughly inspect the machine for any damage Repair the damage before starting and operating 10 Never attempt to make adjus...

Page 7: ...ns and heed their warnings If you discover a safety label is scratched damaged or missing order a replacement immediately ROTATING BLADES CAUSE SERIOUS iNJURY OR DEATH DONOT M0WWHEN CHILDREN OROTHERS...

Page 8: ...Y PROTEGER LES YEUX LESGAZ EXPLOSIFS PEUVENT BLESSER OURENDRE AVEUGLE SULFURIC ACID CANCAUSE NO BLINDNESS SPARKS FLAMES SMOKING ELOIGNER SULFURIOUE PEUTCAUSER LESETINCELLESLACEC FE OU LESFLAMMES DESBR...

Page 9: ...or a corner of a building or a fence post 15 Ob I IM C_...

Page 10: ...he negative battery terminal is marked Neg The positive cable heavy red wire is secured to the positive battery terminal with a carriage bolt and hex nut at the factory Make certain that the rubber bo...

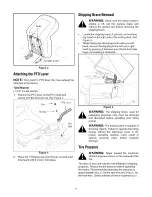
Page 11: ...ith your left hand remove the shipping brace with your right hand by grasping it between your thumb and index finger and rotating it clockwise Figure 5 WARNING The shipping brace used for packaging pu...

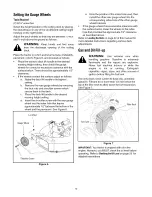
Page 12: ...that leaves approximately 1 2 between the bottom of the wheel and the pavement See Figure 6 LockNut Gauge Wheel 1 Shoulder Screw Figure 6 e Notethe position of the index hole used then install the ot...

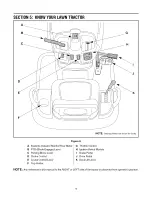
Page 13: ...onitor Hour Meter B PTO Blade Engage Lever C Parking Brake Lever D Choke Control E Cruise Control Lever F Cup Holder G Throttle Control H Ignition Switch Module I Brake Pedal J Drive Pedal K Deck Lift...

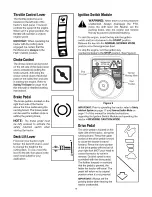
Page 14: ...IgnitionSwitchModule WARNING Never leave a running machine unattended Always disengage the PTO move the shift lever into Neutral set the parking brake stop the engine and remove the key to prevent uni...

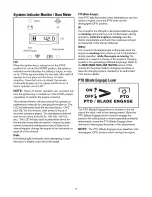
Page 15: ...ight illuminates when attempting to start the tractor s engine press the brake pedal PTO Blade Engage If the PTO light illuminates when attempting to start the tractor s engine move the PTO lever into...

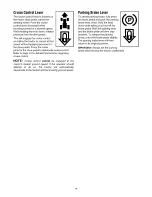
Page 16: ...led instructions regarding cruise control NOTE Cruise control cannot be engaged at the tractor s fastest ground speed If the operator should attempt to do so the tractor will automatically decelerate...

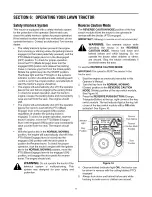
Page 17: ...engine will automatically shut off if the PTO Blade Engage lever is moved into the engaged ON position with the drive pedal in position for Reverse travel To check for proper operation start the tract...

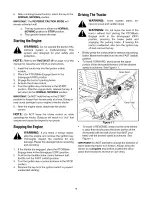
Page 18: ...emove the ignition key Thoroughly inspect the machine for any damage Repair the damage before restarting and operating 1 If the blades are engaged place the PTO Blade Engage lever in the disengaged OF...

Page 19: ...ruise control using one of the following methods Press the brake pedal to disengage the cruise control and stop the tractor Lightly press the drive pedal To change direction when operating with cruise...

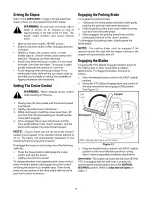
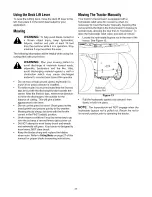
Page 20: ...e to the lawn Do not cut the grass too short Short grass invites weed growth and yellows quickly in dry weather Mowing should always be done with the throttle control in the FAST rabbit position Under...

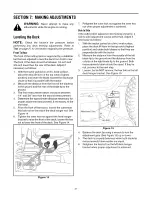
Page 21: ...the tractor loosen the outermost hex lock nut on the end of the deck hanger rod See Figure 14 6 Tighten the inner hex nut against the front hanger bracket to raise the front of the deck loosen the hex...

Page 22: ...re the distance horizontally from the inside of the left rim to the inside of the right rim Note the distance 4 The measurement taken in front of the axle should be between 1 16 and 5 16 less than the...

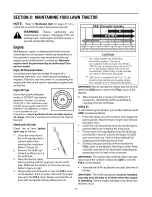
Page 23: ...check the oil level with the dipstick before adding more oil SAE Viscosity Grades __2_ _ 22 32 4 62 8 1_0 _ _0 _0 40 _ 1 0 _0 _0 _0 STARTING TEMPERATURE RANGE ANTICIPATED BEFORE NEXT OIL CHANGE CAUTIO...

Page 24: ...e old oil filter clean around its base to prevent debris from entering the crankcase Grasp the oil filter and remove it from the filter adapter by turning it counterclockwise Make sure the rubber gask...

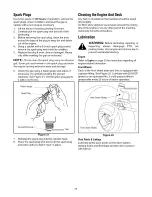
Page 25: ...lace the paper element proceed as follows 1 Loosen the air cleaner cover knobs and remove the cover See Figure 19 Carefully remove air cleaner cartridge and foam precleaner to prevent debris from ente...

Page 26: ...Cleaning the Engine AndDeck Any fuel or oil spilled on the machine should be wiped off promptly Do NOT allow debris to accumulate around the cooling fins of the engine or on any other part of the mac...

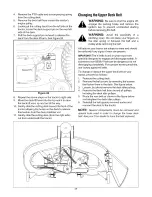
Page 27: ...ing or replacement Protect your hands by using heavy gloves when grasping the blade _ ARNING Periodically inspect the blade adapter and or spindle for cracks or damage especially if you strike a forei...

Page 28: ...f the cable to the positive post of the jumper battery 3 Connect the second negative cable to the negative post of the jumper battery 4 Make the final connection on the engine block of the stalled tra...

Page 29: ...Avoid the possibility of a pinching injury Do not place your fingers on the idler spring or between the belt and a pulley while removing the belt All belts on your tractor are subject to wear and sho...

Page 30: ...dations and add the correct amount for the capacity of the fuel system Fill the fuel tank with clean fresh gasoline Run the engine for 2 3 minutes to get stabilized fuel into the carburetor To empty t...

Page 31: ...very Season Prior to Storing Check Safety Interlock System _ Clean Hood Dash Louvers _ _ Check Engine Oil Level _ Service Air Cleaner _ Change Engine Oil Filter _ _ Clean Battery Terminals _ _ Lube Fr...

Page 32: ...e Choke Control into CHOKE position Move Throttle Choke Control into CHOKE position Fill tank with clean fresh less than 30 days old gas Clean fuel line or replace fuel filter Clean adjust gap or repl...

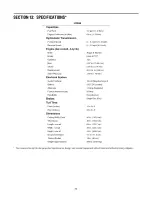
Page 33: ...tem Voltage 12 volt Negative Ground Battery 235 CCA sealed Alternator 15 Amp Regulated Fuse automotive type 20 Amp Headlights Incandescent Brakes Single Disc Dry Turf Tires Front inches 15 x 6 x 6 Rea...

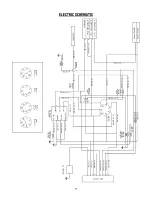
Page 34: ...I _ I C Z N C Z 630 q _ q _ r3 _ IIF ELECTRIC SCHEMATIC lll_ ov r M Ill 34...

Page 35: ...rrantedfor thewarranty period statedabove If the partfails duringthe periodof warrantycoverage the part will berepairedor replacedby MTDConsumerGroupInc accordingto subsection 4 below Anysuchpart repa...

Page 36: ...tomer Care Department ConsumerDivision ToroWarrantyCompany 8111LyndaleAvenueSouth Bloomington MN55420 1196 In the US1 888 384 9942 In Canada1 888 848 4073 or logonto ourWeb siteat www toro com Without...

Reviews: