Routing the Wire Harness
Yanmar Only
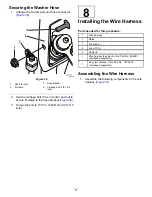
1.
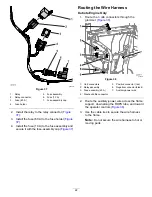
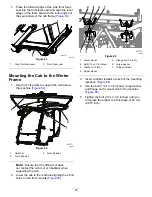
Route the 3 cab connectors through the
grommet (
g032516
Figure 39
1.
Cab connectors
5.
Positive connector (red)
2.
Relay assembly
6.
Negative connector (black)
3.
Fuse assembly (60 A)
7.
Washer-bottle connector
4.
Fuse holder
8.
Auxiliary-power wire
2.
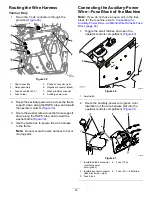
Route the auxiliary-power wire across the frame
support, down along the ROPS tube, and toward
the operator controls (
3.
Route the washer wire across the frame support,
down along the ROPS tube, and toward the
washer bottle (
).
4.
Use the cable ties to secure the wire harness
to the frame.
Note:
Do not secure the wire harness to hot or
moving parts.
Connecting the Auxiliary-Power
Wire—Fuse Block of the Machine
Note:
If you do not have an open slot in the fuse
block for the machine, skip to
Auxiliary-Power Wire—Additional Wire Harness Fuse
Block (page 24)
.
1.
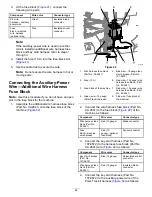
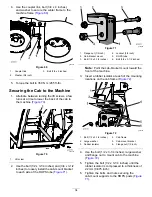
Toggle the swell latches and open the
operator-controls compartment (
g032521
Figure 40
1.
Swell latch
2.
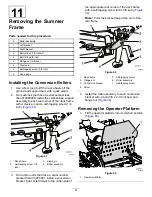
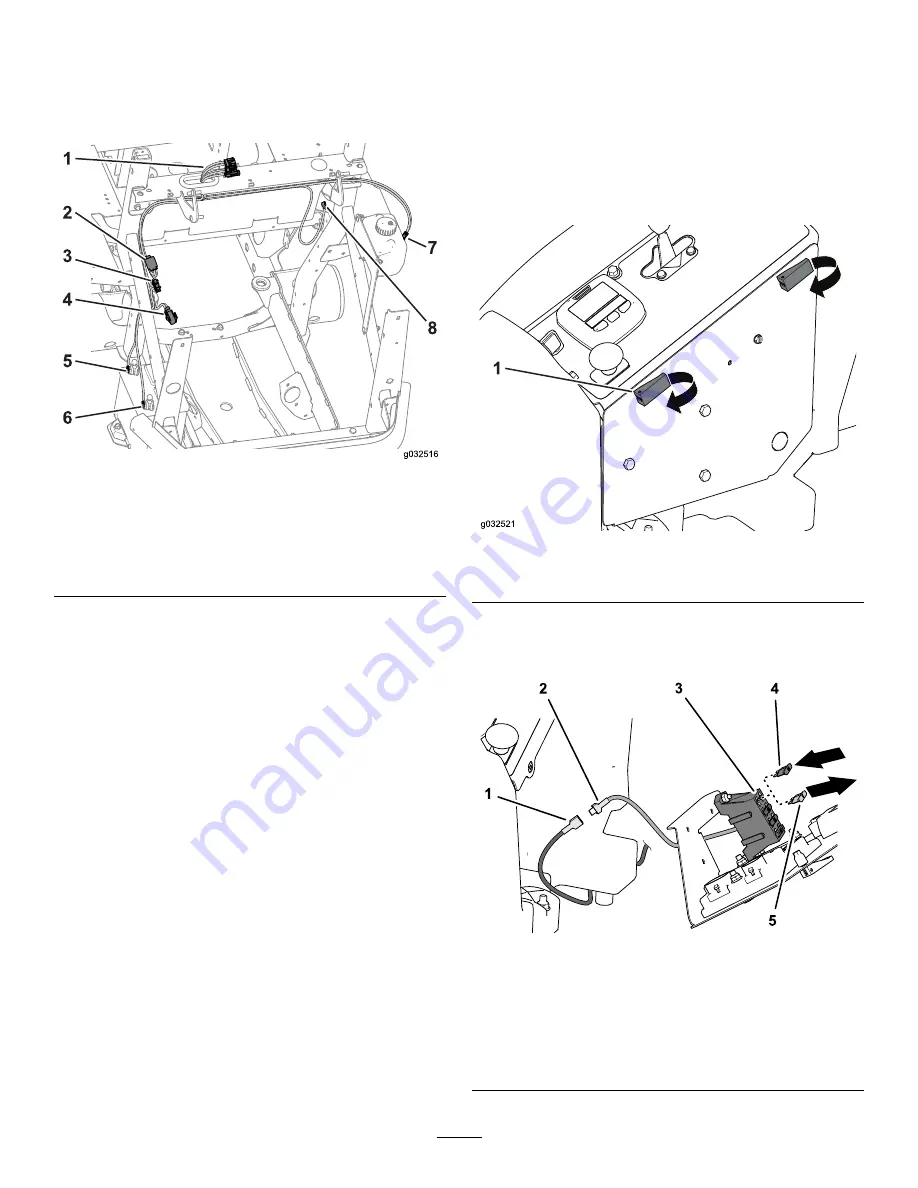
Route the auxiliary-power wire (green color
insulation) of the wire harness (kit) into the
operator-controls compartment (
g233782
Figure 41
1.
Insulated blade connector
(auxiliary-power
wire—green)
4.
Fuse (10 A)
2.
Insulated socket connector
(fuse-block wire—pink)
5.
Fuse (2 A)—if installed
3.
Fuse block
23

