background image

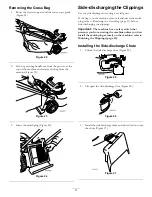
Removing the Side-discharge Chute

To remove the side discharge chute, reverse the steps above.

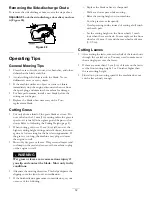
Important:

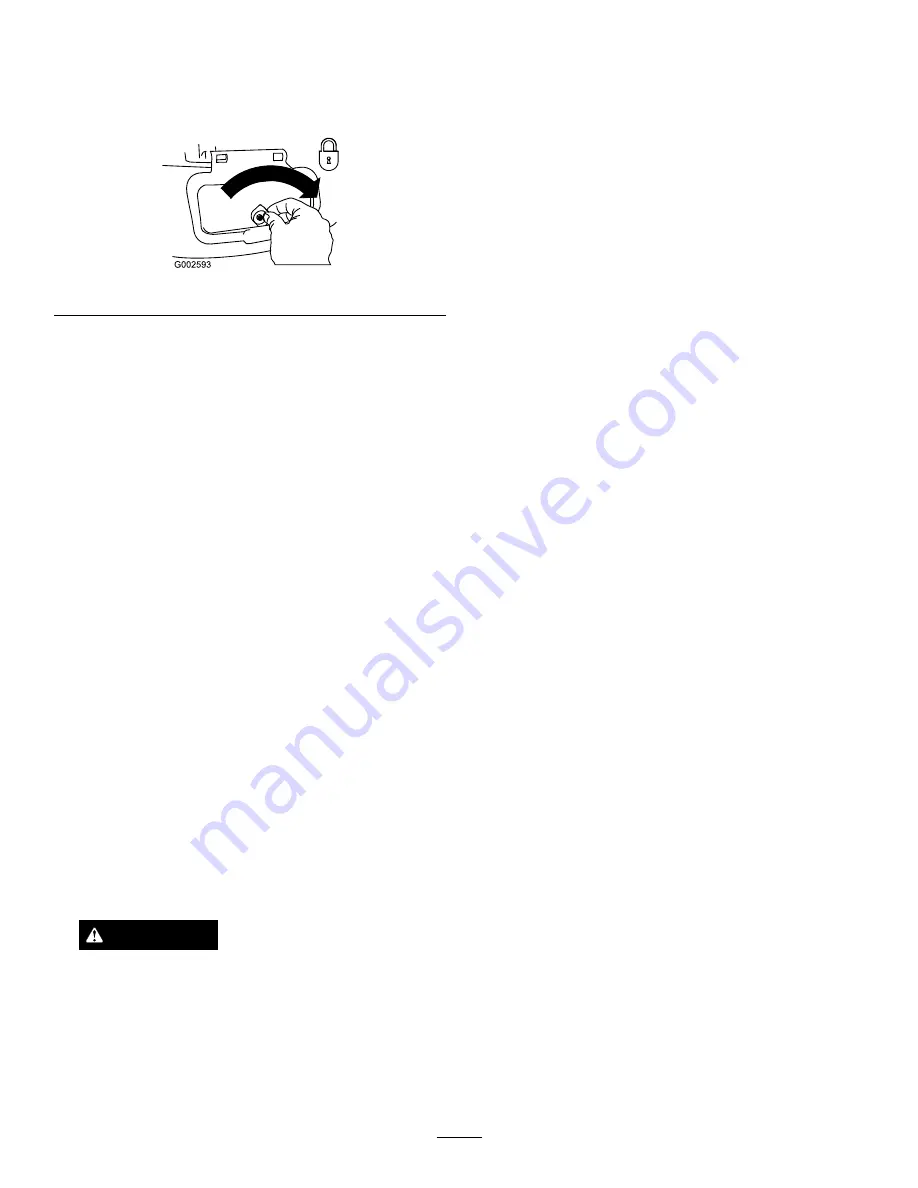
Lock the side-discharge door after you close

it (Figure 28).

Figure 28

Operating Tips

General Mowing Tips

Clear the area of sticks, stones, wire, branches, and other
debris that the blade could hit.

Avoid striking solid objects with the blade. Never
deliberately mow over any object.

If the machine strikes an object or starts to vibrate,
immediately stop the engine, disconnect the wire from
the spark plug, and examine the machine for damage.

For best performance, install a new blade before the
cutting season begins.

Replace the blade when necessary with a Toro
replacement blade.

Cutting Grass

Cut only about a third of the grass blade at a time. Do
not cut below the 51 mm (2 in) setting unless the grass is
sparse or it is late fall when grass growth begins to slow
down. Refer to Adjusting the Cutting Height (page 8).

When cutting grass over 15 cm (6 in) tall, mow at the
highest cutting-height setting and walk slower; then mow
again at a lower setting for the best lawn appearance. If
the grass is too long, the machine may plug and cause
the engine to stall.

Mow only dry grass or leaves. Wet grass and leaves tend
to clump on the yard and can cause the machine to plug
or the engine to stall.

WARNING

Wet grass or leaves can cause serious injury if
you slip and contact the blade. Mow only in dry
conditions.

Alternate the mowing direction. This helps disperse the
clippings over the lawn for even fertilization.

If the finished lawn appearance is unsatisfactory, try one
or more of the following:

Replace the blade or have it sharpened.

Walk at a slower pace while mowing.

Raise the cutting height on your machine.

Cut the grass more frequently.

Overlap cutting swaths instead of cutting a full swath
with each pass.

Set the cutting height on the front wheels 1 notch
lower than the rear wheels. For example, set the front
wheels at 51 mm (2 in) and the rear wheels at 64 mm
(2-1/2 in).

Cutting Leaves

After cutting the lawn, ensure that half of the lawn shows
through the cut leaf cover. You may need to make more
than a single pass over the leaves.

If there are more than 13 cm (5 in) of leaves on the lawn,
set the front cutting height 1 or 2 notches higher than
the rear cutting height.

Slow down your mowing speed if the machine does not
cut the leaves finely enough.

12

Summary of Contents for Recycler 20990

Page 1: ...mportant calls attention to special mechanical information and Note emphasizes general information worthy of special attention Safety Read and understand the contents of this manual before you start the engine The safety alert symbol Figure 2 is used to alert you to potential personal injury hazards Obey all safety messages that follow this symbol to avoid possible injury or death Improperly using...

Page 2: ...accident Do not mow near drop offs ditches or embankments You could lose your footing or balance Children Tragic accidents can occur if the operator is not alert to the presence of children Children are often attracted to the machine and the mowing activity Never assume that children will remain where you last saw them Keep children out of the mowing area and under the watchful care of a responsib...

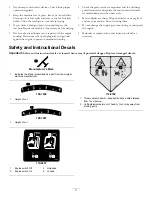
Page 3: ... manufacturer s recommended parts when necessary Mower blades are sharp Wrap the blades or wear gloves and use extra caution when servicing them Do not change the engine governor setting or overspeed the engine Maintain or replace safety and instruction labels as necessary Safety and Instructional Decals Important Safety and instruction decals are located near areas of potential danger Replace dam...

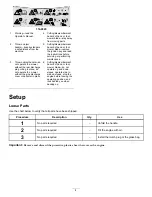
Page 4: ...ag in place do not operate the mower without the side discharge cover or deflector in place 6 Cutting dismemberment hazard of hand or foot mower blade do not operate up and down slopes operate side to side on slopes stop the engine before leaving the operating position and look behind you when backing up Setup Loose Parts Use the chart below to verify that all parts have been shipped Procedure Des...

Page 5: ... Max fill 0 59 l 20 oz type SAE 30 detergent oil with an API service classification of SF SG SH SJ SL or higher Figure 5 3 Wipe off the dipstick end with a clean cloth 4 Insert the dipstick into the oil fill tube and screw it in until it stops 5 Remove the dipstick and read the oil level on the dipstick refer to Figure 5 If the oil level is too low add a small amount of oil slowly to the oil fill ...

Page 6: ...debris at the operator through the rear chute For the switch to detect the presence of the mulch plug the top of the mulch plug lever must lie fully in the bottom of the channel Figure 6 Figure 6 1 Top of mulch plug lever in channel bottom 1 Insert the mulch plug into the machine if it isn t already installed Figure 7 Figure 7 2 Squeeze the button on the lever with your thumb and fully insert the ...

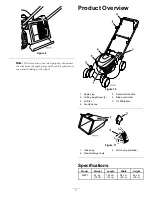
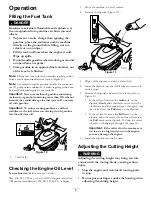
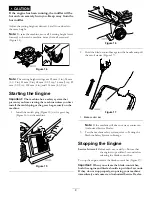
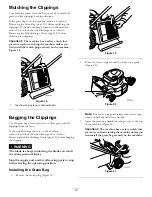
Page 7: ...tunnel Product Overview G019305 Figure 10 1 Spark plug 5 Recoil start handle 2 Cutting height lever 4 6 Blade control bar 3 Air filter 7 Oil fill Dipstick 4 Fuel tank cap Figure 11 1 Grass bag 3 Mulch plug installed 2 Side discharge chute Specifications Model Weight Length Width Height 20990 33 kg 72 lb 145 cm 57 in 56 cm 22 in 99 cm 39 in 7 ...

Page 8: ...2 1 1 cm 1 2 in Checking the Engine Oil Level Service Interval Before each use or daily Max fill 0 59 l 20 oz type SAE 30 detergent oil with an API service classification of SF SG SH SJ SL or higher 1 Move the machine to a level surface 2 Remove the dipstick Figure 13 Figure 13 3 Wipe off the dipstick end with a clean cloth 4 Insert the dipstick into the oil fill tube and screw it in until it stop...

Page 9: ...s bag securely on the machine 1 Install the mulch plug Figure 15 or the grass bag Figure 16 on the machine Figure 15 Figure 16 2 Hold the blade control bar against the handle and pull the recoil starter Figure 17 G019308 Figure 17 1 Blade control bar Note If the machine still does not start contact an Authorized Service Dealer 3 Test the machine safety system refer to Testing the Machine Safety Sy...

Page 10: ...t to collect grass and leaf clippings from the lawn If the side discharge chute is on the machine remove it and lock the side discharge door refer to Removing the Side discharge Chute page 12 before bagging the clippings WARNING The blade is sharp contacting the blade can result in serious personal injury Stop the engine and wait for all moving parts to stop before leaving the operating position I...

Page 11: ...bag is on the machine remove it and insert the mulch plug refer to Removing the Grass Bag page 11 before side discharging the clippings Important The machine has a safety switch that prevents you from starting the machine unless you first install the mulch plug securely on the machine refer to Mulching the Clippings page 10 Installing the Side discharge Chute 1 Unlock the side discharge door Figur...

Page 12: ... If the grass is too long the machine may plug and cause the engine to stall Mow only dry grass or leaves Wet grass and leaves tend to clump on the yard and can cause the machine to plug or the engine to stall WARNING Wet grass or leaves can cause serious injury if you slip and contact the blade Mow only in dry conditions Alternate the mowing direction This helps disperse the clippings over the la...

Page 13: ...intenance procedures Preparing for Maintenance 1 Stop the engine and wait for all moving parts to stop 2 Disconnect the spark plug wire from the spark plug Figure 29 before performing any maintenance procedure Figure 29 3 After performing the maintenance procedure s connect the spark plug wire to the spark plug Important Before tipping the machine to change the oil or replace the blade allow the f...

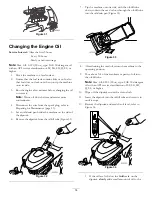
Page 14: ...e the machine on the side of the dipstick 6 Remove the dipstick from the oil fill tube Figure 32 Figure 32 7 Tip the machine onto its side with the oil fill tube down to drain the used oil out through the oil fill tube into the oil drain pan Figure 33 G019342 Figure 33 8 After draining the used oil return the machine to the operating position 9 Pour about 3 4 of the crankcase capacity of oil into ...

Page 15: ...onal injury Wear gloves when servicing the blade 1 Disconnect the spark plug wire from the spark plug refer to Preparing for Maintenance page 13 2 Tip the machine onto its side with the air filter up 3 Use a block of wood to hold the blade steady Figure 35 Figure 35 4 Remove the blade saving all mounting hardware Figure 35 5 Install the new blade and all mounting hardware Figure 36 Figure 36 Impor...

Page 16: ...stops When you can no longer start the engine it is sufficiently dry 5 Disconnect the wire from the spark plug 6 Remove the spark plug add 30 ml 1 oz of oil through the spark plug hole and pull the starter rope slowly several times to distribute oil throughout the cylinder to prevent cylinder corrosion during the off season 7 Loosely install the spark plug 8 Tighten all nuts bolts and screws 9 Cha...

Page 17: ...bag is not attached to the machine remove the discharge plug and install the grass bag 4 Start the engine 5 While the engine is running lift up the upper right rear corner of the grass bag until the wire bag frame at the upper right front of the grass bag is completely out of the right hand slot Figure 40 The engine should stop Note The right hand slot houses a safety interlock switch Important Do...

Page 18: ...Notes 18 ...
Page 19: ...ion Toro Collects Toro Warranty Company Toro respects your privacy In order to process your warranty claim and contact you in the event of a product recall we ask you to share certain personal information with us either directly or through your local Toro company or dealer The Toro warranty system is hosted on servers located within the United States where privacy law may not provide the same prot...

Page 20: ...use or abuse and failure or repair required due to rust or corrosion are not covered This warranty includes the cost of parts and labor but you must pay transportation costs Warranty may be denied if the hour meter is disconnected altered or shows signs of being tampered with Owner Responsibilities You must maintain your Toro Product by following the maintenance procedures described in the Operato...

Reviews: