Repairs
Clutch Replacement
(Reelmaster 216)
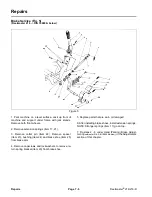
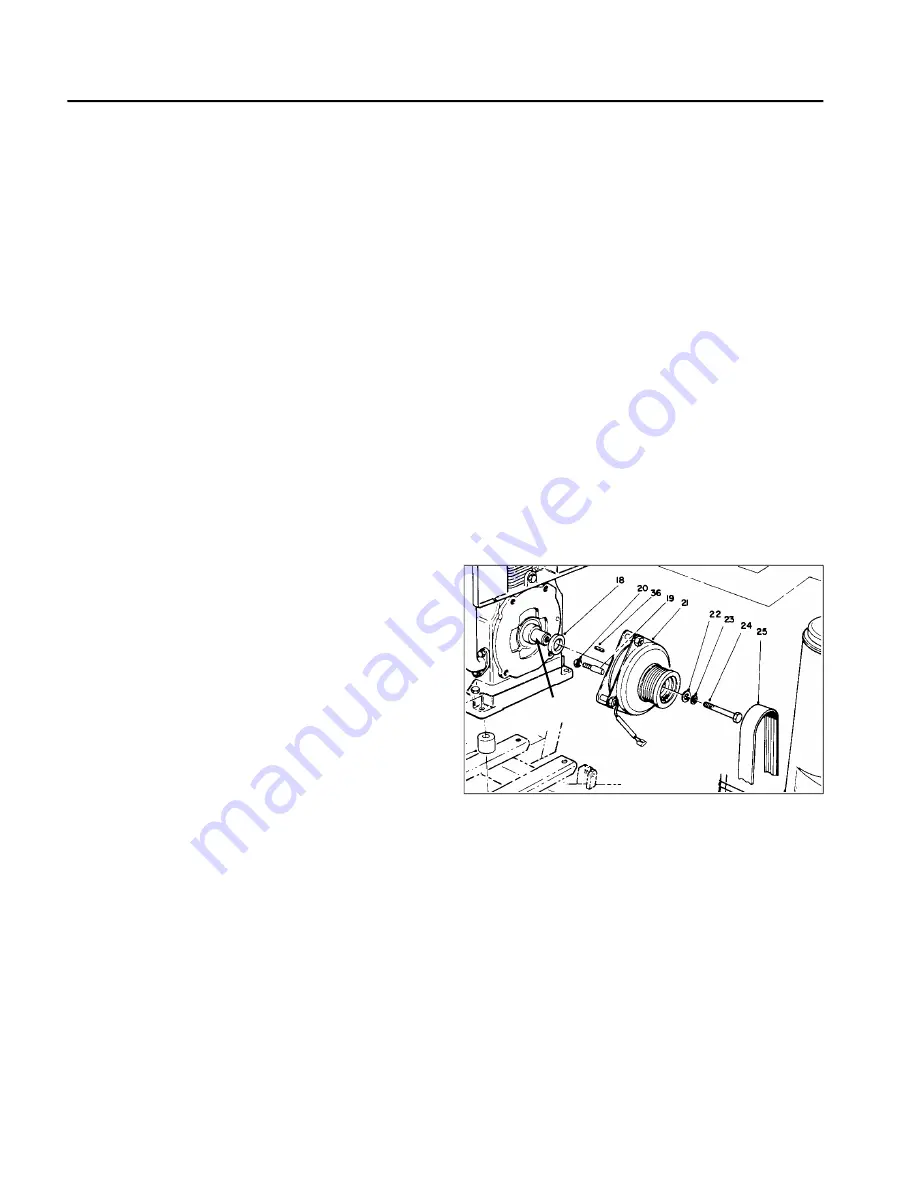
(Fig. 7)
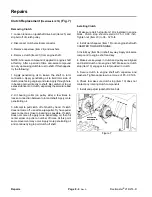
Removing Clutch
1. Loosen tension on jackshaft drive belt (Item 25) and
slip belt off of clutch pulley.
2. Disconnect clutch electrical connector.
3. Remove capscrew (Item 24) and washers.
4. Remove clutch (Item 21) from engine shaft.
NOTE: Anti-seize compound is applied to engine shaft
at factory. After a period of time anti-seize compound
can dry up causing clutch to rust to shaft. If this happens
try the following:
1. Apply penetrating oil to loosen the shaft to rotor
connection. Apply penetrating oil to field rotor side of
clutch (side facing engine) and also apply through hole
in bearing carrier directly to shaft. Be careful not to get
excess lubricant on clutch, especially the armature and
rotor.
2. Hit bearing collar (on pulley side) a few times to
loosen connection between rotor and shaft. Apply more
penetrating oil.
3. Attempt to pull clutch off of shaft by hand. If clutch
does not come off, use a three-jaw puller. Try have puller
jaws connect as close to bearing as possible. If clutch
does not come off, apply more penetrating oil, then hit
center screw on puller a number of times. At this point
some movement may occur. Apply more penetrating oil
and continue trying to pull clutch off shaft.
Installing Clutch
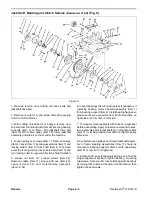
1. Make sure clutch stop (Item 19) is installed in engine
block. Clutch stop should extend 0.75
±
0.03 inch.
Tighten nut (Item 20) to 38 - 32 ft-lb.
2. Install clutch spacer (Item 18) onto engine shaft with
CHAMFER TOWARD ENGINE.
3. Install key (Item 36) in shaft keyway. Apply anti-seize
compound to engine shaft and key.
4. Make sure keyways in clutch and pulley are aligned
and install clutch onto engine shaft. Make sure clutch
stop (Item 19) engages in slot provided in clutch.
5. Secure clutch to engine shaft with capscrew and
washers. Tighten capscrew to a torque of 85 - 90 ft-lb.
6. Check to make sure clutch stop (Item 19) does not
contact any rotating clutch components.
7. Install and adjust jackshaft drive belt.
anti-seize
compound
Figure 7
Repairs
Page 8 - 4
Rev. A
Reelmaster
®
216/216-D
Summary of Contents for reelmaster 216
Page 2: ...This page is blank ...
Page 4: ...This page is blank ...
Page 8: ...Safety Instructions Page 1 4 Reelmaster 216 216 D ...
Page 12: ...Torque Specifications Page 2 4 Rev B Reelmaster 216 216 D ...
Page 26: ...Adjustments Page 4 4 Reelmaster 216 216 D ...
Page 40: ...Troubleshooting Page 5 14 Reelmaster 216 216 D ...
Page 42: ...Troubleshooting Page 5 16 Reelmaster 216 216 D ...
Page 72: ...Repairs Page 5 46 Reelmaster 216 216 D ...
Page 75: ...Reelmaster 216 S N 10001 19999 Reelmaster 216 216 D Page 6 3 Wiring Schematics ...
Page 76: ...Reelmaster 216 S N 20001 Up Wiring Schematics Page 6 4 Reelmaster 216 216 D ...
Page 77: ...Reelmaster 216 D Reelmaster 216 216 D Page 6 5 Wiring Schematics ...
Page 114: ...Repairs Page 7 8 Reelmaster 216 216 D ...
Page 124: ...Repairs Page 8 10 Reelmaster 216 216 D ...
Page 143: ...This page is blank ...

