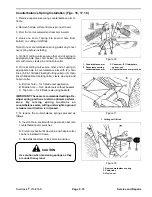
Installing Cutting Units (Fig. 12)
(Floating Cutting Units)
1. Slide a thrust washer onto lift arm pivot rod.
2. Slide cutting unit carrier frame onto pivot rod and
secure with a flat washer, lockwasher and capscrew.
Figure 12
1. Thrust washer
2. Carrier frame
3. Flat washer, lockwasher, capscrew
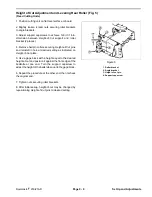
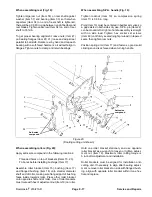
Installing Cutting Units (Fig. 13)
(Fixed Cutting Units)
1. Slide a thrust washer onto lift arm pivot rod.
2. Slide cutting unit support onto pivot rod and secure
with a flat washer, lockwasher, and capscrew.
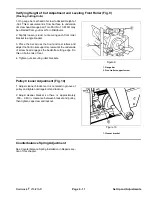
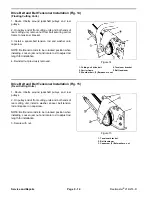
3. Front cutting units should be parallel to front wheels.
To adjust, loosen capscrews securing supports to cut
ting units, adjust cutting units until parallel, then, re
tighten screws.
Figure 13
1. Thrust washer
2. Cutting unit support
3. Flat washer, lockwasher, capscrew
Reelmaster
®
216/216-D
Page 9 - 13
Service and Repairs
Summary of Contents for reelmaster 216
Page 2: ...This page is blank ...
Page 4: ...This page is blank ...
Page 8: ...Safety Instructions Page 1 4 Reelmaster 216 216 D ...
Page 12: ...Torque Specifications Page 2 4 Rev B Reelmaster 216 216 D ...
Page 26: ...Adjustments Page 4 4 Reelmaster 216 216 D ...
Page 40: ...Troubleshooting Page 5 14 Reelmaster 216 216 D ...
Page 42: ...Troubleshooting Page 5 16 Reelmaster 216 216 D ...
Page 72: ...Repairs Page 5 46 Reelmaster 216 216 D ...
Page 75: ...Reelmaster 216 S N 10001 19999 Reelmaster 216 216 D Page 6 3 Wiring Schematics ...
Page 76: ...Reelmaster 216 S N 20001 Up Wiring Schematics Page 6 4 Reelmaster 216 216 D ...
Page 77: ...Reelmaster 216 D Reelmaster 216 216 D Page 6 5 Wiring Schematics ...
Page 114: ...Repairs Page 7 8 Reelmaster 216 216 D ...
Page 124: ...Repairs Page 8 10 Reelmaster 216 216 D ...
Page 143: ...This page is blank ...


