Adjustments
Carburetor Adjustments
Lack of power accompanied by black sooty exhaust
smoke is usually caused by a rich carburetor setting.
Since a dirty air cleaner element causes the same
conditions, check it before adjusting carburetor.
High RPM Setting
3600
±
100
Low RPM Setting
1200
±
100
IMPORTANT: Check to make sure the choke is op
erating correctly before the carburetor is adjusted.
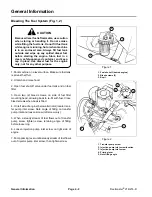
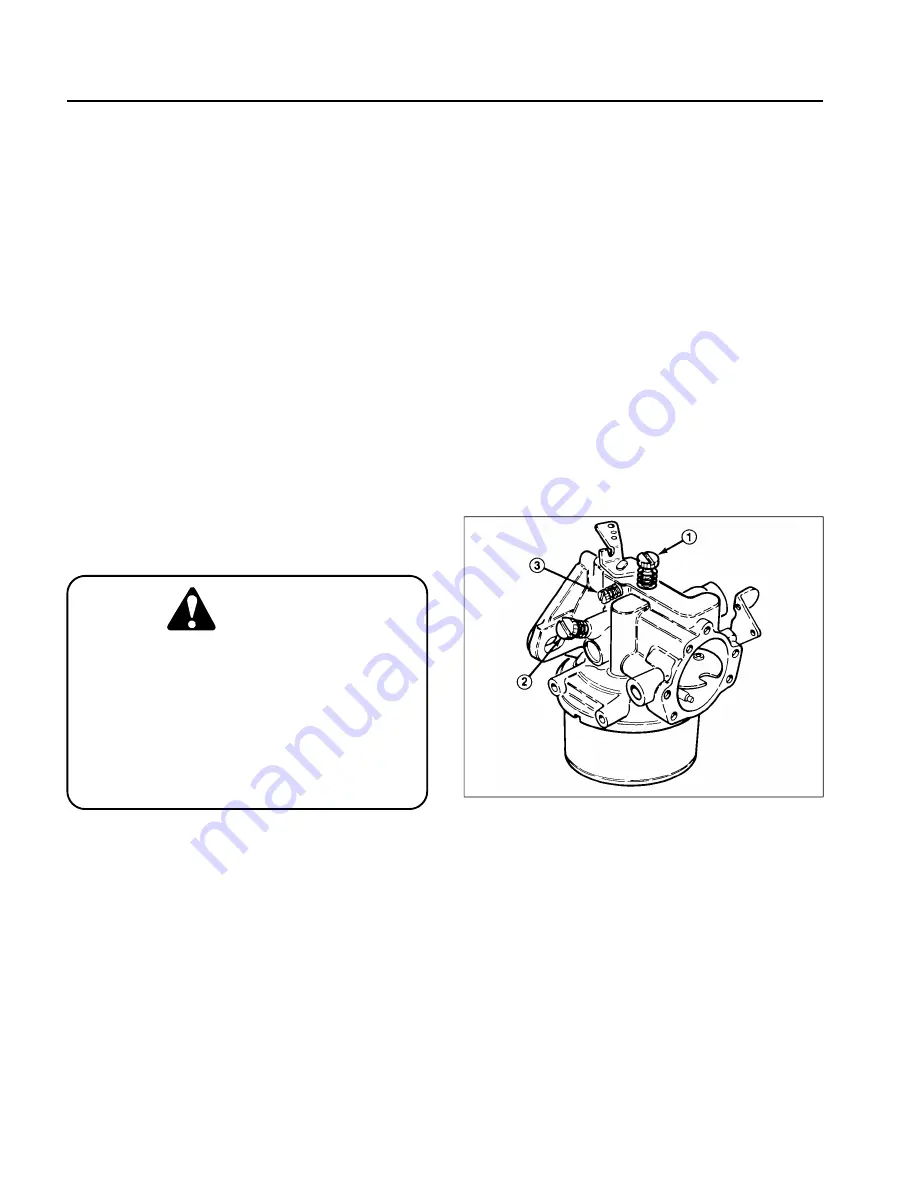
1. Main fuel screw – Close screw by gently rotating it
clockwise.
IMPORTANT: Do not close the screw too tight be
cause the screw will likely be damaged.
2. Rotate – open – the main fuel screw 3-1/2 turns
counterclockwise.
3. Idle fuel adjusting screw – Close screw by gently
rotating it clockwise. Open screw by rotating it 2-1/2
turns counterclockwise.
Engine must be running so final adjustment
of the carburetor can be performed. To guard
against possible personal injury, keep hands,
feet, face and other parts of the body away
from the muffler, other hot parts of the engine,
and other moving or rotating parts of the
engine. Assure reel switch is in DISENGAGE
position and cutting units are on the shop
floor. Also engage parking brake.
IMPORTANT: Do not close the screw too tightly
CAUTION
because the screw will likely be damaged.
Note: These settings are approximate - however, the
settings will allow engine to be starter so carburetor can
be fine tuned – steps 4 - 7.
4. Start engine and let it run for 5 to 10 minutes at half
throttle to warm up. Engine must be warm before mak
ing final adjustments.
5. Move throttle to TRANSPORT position. Turn main
fuel screw in until speed decreases and note position of
screw. Now turn screw out – the engine speed may first
increase, then it will decrease as screw is turned. Note
the position of screw when engine speed starts to
decrease. Set the screw at the midpoint of the two
positions noted.
6. To adjust idle fuel adjusting screw, follow same pro
cedure as for main fuel but more throttle to IDLE after 5
to 10 minute warm up and make adjustment.
7. Idle Speed Setting – Run engine at half-throttle for 5
to 10 minutes to warm up. Move throttle to IDLE and set
engine speed to 1200 RPM by turning the idle speed
adjusting screw clockwise or counterclockwise.
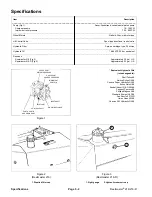
Figure 2
1. Main fuel screw
2. Idle fuel adjusting screw
3. Idle speed screw
Adjustments
Page 3 - 2
Reelmaster
®
216/216-D
Summary of Contents for reelmaster 216
Page 2: ...This page is blank ...
Page 4: ...This page is blank ...
Page 8: ...Safety Instructions Page 1 4 Reelmaster 216 216 D ...
Page 12: ...Torque Specifications Page 2 4 Rev B Reelmaster 216 216 D ...
Page 26: ...Adjustments Page 4 4 Reelmaster 216 216 D ...
Page 40: ...Troubleshooting Page 5 14 Reelmaster 216 216 D ...
Page 42: ...Troubleshooting Page 5 16 Reelmaster 216 216 D ...
Page 72: ...Repairs Page 5 46 Reelmaster 216 216 D ...
Page 75: ...Reelmaster 216 S N 10001 19999 Reelmaster 216 216 D Page 6 3 Wiring Schematics ...
Page 76: ...Reelmaster 216 S N 20001 Up Wiring Schematics Page 6 4 Reelmaster 216 216 D ...
Page 77: ...Reelmaster 216 D Reelmaster 216 216 D Page 6 5 Wiring Schematics ...
Page 114: ...Repairs Page 7 8 Reelmaster 216 216 D ...
Page 124: ...Repairs Page 8 10 Reelmaster 216 216 D ...
Page 143: ...This page is blank ...


