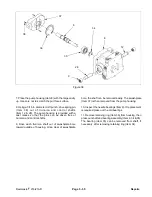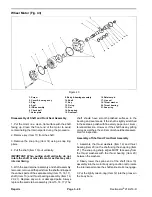
Figure 40
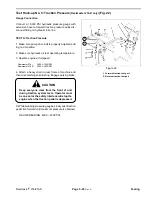
6. Install new pins through swashplate and shaft. Use
8. The swashplate should swing freely in the pump
two (2) pins in control shaft (Item 28), installing first pin
housing to 150
°
each side of center.
until second pin can be started, then driving in both pins
together until the last pin is 1/4 inch below swashplate.
7. Install one (1) pin in trunnion shaft (Item 12), driving
it in until it is 1/4 inch below swashplate.
Reelmaster
®
216/216-D
Page 5 - 37
Repairs
Summary of Contents for reelmaster 216
Page 2: ...This page is blank ...
Page 4: ...This page is blank ...
Page 8: ...Safety Instructions Page 1 4 Reelmaster 216 216 D ...
Page 12: ...Torque Specifications Page 2 4 Rev B Reelmaster 216 216 D ...
Page 26: ...Adjustments Page 4 4 Reelmaster 216 216 D ...
Page 40: ...Troubleshooting Page 5 14 Reelmaster 216 216 D ...
Page 42: ...Troubleshooting Page 5 16 Reelmaster 216 216 D ...
Page 72: ...Repairs Page 5 46 Reelmaster 216 216 D ...
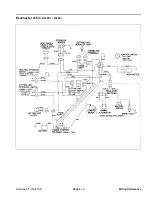
Page 75: ...Reelmaster 216 S N 10001 19999 Reelmaster 216 216 D Page 6 3 Wiring Schematics ...
Page 76: ...Reelmaster 216 S N 20001 Up Wiring Schematics Page 6 4 Reelmaster 216 216 D ...
Page 77: ...Reelmaster 216 D Reelmaster 216 216 D Page 6 5 Wiring Schematics ...
Page 114: ...Repairs Page 7 8 Reelmaster 216 216 D ...
Page 124: ...Repairs Page 8 10 Reelmaster 216 216 D ...
Page 143: ...This page is blank ...

