Verify Interlock System Operation
The purpose of the interlock system is to prevent the
engine from cranking or starting unless the traction
pedal is in NEUTRAL and the cutting unit engagement
switch is DISENGAGED. In addition, the engine will stop
when the cutting unit engagement switch is engaged or
traction pedal is depressed with the operator off the
seat.
The interlock switches are for the operator’s
protection, so do not disconnect them. Check
operation of the switches daily to assure in
terlock system is operating. If a switch is
defective, replace it before operating. Regard
less if switches are operating properly or not,
replace them every two years to assure maxi
mum safety. do not rely entirely on safety
switches - use common sense!
CAUTION
To check interlock system operation:
1. Move machine to a wide open area free of debris and
bystanders. Raise cutting units and stop engine. En
gage parking brake.
2. Sit on seat. Move Reel Drive switch to ENGAGE
position. Try to start engine. If engine cranks, there may
be a malfunction in interlock system. Repair immedi
ately. If engine does not crank, proceed to step 3.
3. Sit on seat. Depress traction pedal in forward and
reverse directions while trying to start engine. If engine
cranks while pedal is in forward or reverse position,
there may be a malfunction in interlock system. Repair
immediately. If engine does not crank, proceed to
step 4.
4. With cutting units in raised position, sit on seat and
start engine. Move Reel Drive switch to ENGAGE posi
tion. Lower cutting units to ground. Cutting unit reels
should start turning when cutting units are lowered.
Raise cutting units and verify that they stop. If they do
not stop, there may be a malfunction in interlock system.
Repair immediately. If cutting units stop, proceed to
step 5.
5. While sitting on seat with cutting units in raised
position and engine running, move Reel Drive switch to
ENGAGE position. Hold on to steering wheel and raise
up off of seat. Engine should stop. If engine does not
stop, there is a malfunction in interlock system. Repair
immediately. If engine stops, seat switch is operating
correctly.
Reelmaster
®
216/216-D
Page 6 - 13
Troubleshooting
(Reelmaster 216)
Summary of Contents for reelmaster 216
Page 2: ...This page is blank ...
Page 4: ...This page is blank ...
Page 8: ...Safety Instructions Page 1 4 Reelmaster 216 216 D ...
Page 12: ...Torque Specifications Page 2 4 Rev B Reelmaster 216 216 D ...
Page 26: ...Adjustments Page 4 4 Reelmaster 216 216 D ...
Page 40: ...Troubleshooting Page 5 14 Reelmaster 216 216 D ...
Page 42: ...Troubleshooting Page 5 16 Reelmaster 216 216 D ...
Page 72: ...Repairs Page 5 46 Reelmaster 216 216 D ...
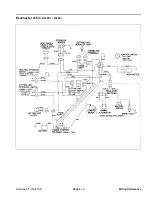
Page 75: ...Reelmaster 216 S N 10001 19999 Reelmaster 216 216 D Page 6 3 Wiring Schematics ...
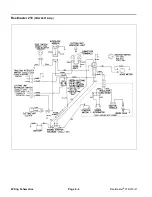
Page 76: ...Reelmaster 216 S N 20001 Up Wiring Schematics Page 6 4 Reelmaster 216 216 D ...
Page 77: ...Reelmaster 216 D Reelmaster 216 216 D Page 6 5 Wiring Schematics ...
Page 114: ...Repairs Page 7 8 Reelmaster 216 216 D ...
Page 124: ...Repairs Page 8 10 Reelmaster 216 216 D ...
Page 143: ...This page is blank ...

