background image

Safety

4

machine speeds should be kept low on
slopes and during tight turns;

stay alert for bumps and hollows and other
hidden hazards;

never mow across the face of the slope,
unless the lawn mower is designed for this
purpose.

6. Use care when pulling loads or using heavy

equipment.

Use only approved drawbar hitch points.

Limit loads to those you can safely control.

Do not turn sharply. Use care when revers-
ing.

Use counterweight(s) or wheel weights
when suggested in the instruction handbook.

7. Watch out for traffic when crossing or near road-

ways.

8. Stop the blades rotating before crossing surfaces

other than grass.

9. When using any attachments, never direct dis-

charge of material toward bystanders nor allow
anyone near the machine while in operation .

10. Never operate the lawn mower with defective

guards, shields or without safety protective
devices in place.

11. Do not change the engine governor settings or

overspeed the engine. Operating the engine at
excessive speeds may increase the hazard of per-
sonal injury.

12. Before leaving the operator’s position:

• 

disengage the power take-off and lower the
attachments;

• 

change into neutral and set the parking
brake;

• 

stop the engine and remove the key.

13. Disengage the drive to attachments when trans-

porting or not in use.

14. Stop the engine and disengage the drive to the

attachment

before refueling;

before removing the grass catcher;

before making height adjustments unless the
adjustment can be made from the operator’s
position.

before clearing blockages;

before checking, cleaning or working on the
lawnmower;

after striking a foreign object.  Inspect the
lawnmower for damage and make repairs
before restarting and operating the equip-
ment.

15. Reduce the throttle setting during engine runout

and, if the engine is provided with a shutoff
valve, turn the fuel off at the conclusion of mow-
ing.

Maintenance and Storage

1.

Keep all nuts, bolts and screws tight to be sure
the equipment is in safe working condition.

2.

Never store the equipment with petrol in the tank
inside a building where fumes may reach an open
flame or spark.

3.

Allow the engine to cool before storing in any
enclosure.

4.

To reduce the fire hazard, keep the engine,
silencer, battery compartment and petrol storage
area free of grass, leaves, or excessive grease.

5.

Check the grass catcher frequently for wear or
deterioration.

6. Replace worn or damaged parts for safety.

7. If the fuel tank has to be drained, this should be

done outdoors.

8. Be careful during adjustment of the machine to

prevent entrapment of the fingers between mov-
ing blades and fixed parts of the machine.

9. On multi-bladed machines, take care as rotating

one blade can cause other blades to rotate.

Summary of Contents for REELMASTER 2300-D

Page 1: ...OPERATOR S MANUAL FORM NO 3318 232 GB Rev B MODEL NO 03422TE 70001 UP MODEL NO 03427TE 70001 UP REELMASTER 2300 D 2600 D Traction Unit The Toro Company 1997 ...

Page 2: ...odel and serial number for the traction unit is on a plate that is mounted on the left front frame member The model and serial number for the cutting unit is on a plate that is mounted on the top front of the center cutting unit Use model and serial number in all correspondence and when ordering parts To order replacement parts from an authorized TORO Distributor supply the following information 1...

Page 3: ...g open sandals 2 Thoroughly inspect the area where the equipment is to be used and remove all objects which may be thrown by the machine 3 WARNING Petrol is highly flammable Store fuel in containers specifically designed for this purpose Refuel outdoors only and do not smoke while refueling Add fuel before starting the engine Never remove the cap of the fuel tank or add petrol while the engine is ...

Page 4: ...when trans porting or not in use 14 Stop the engine and disengage the drive to the attachment before refueling before removing the grass catcher before making height adjustments unless the adjustment can be made from the operator s position before clearing blockages before checking cleaning or working on the lawnmower after striking a foreign object Inspect the lawnmower for damage and make repair...

Page 5: ...ments of identical machines per 84 538 EEC This unit has a sound power level of 98 dB A 1pW based on measurements of identical machines per pro cedures outlined in Directive 79 113 EEC and amend ments Vibration Levels This unit has a vibration level of 5 0 m s2 at the poste rior based on measurements of identical machines per ISO 5349 procedures This unit does not exceed a vibration level of 0 5 m...

Page 6: ...glement implement input drive line Fingers or hand entangle ment chain drive Runover back over relevant machine to appear in dashed box Machine tipping riding mower Machine rollover ROPS relevant machine to appear in dashed box Stored energy hazard kickback or upward motion Hot surfaces burns to fingers or hands Hand arm entanglement belt drive Thrown or fly ing objects whole body exposure Thrown ...

Page 7: ... Slow Continuous variable linear Volume empty Volume full Machine travel direction forward rearward Control lever operating direction dual direction Control lever operating direction multiple direction Clockwise rotation Counter clock wise rotation Grease lubrication point Oil lubrication point Lift point Jack or support point Draining emptying Engine lubricat ing oil Engine lubricating oil pressu...

Page 8: ... 4 Wheel drive Power Take Off Power Take Off rotational speed Reel cutting element Reel cutting element height adjustment Traction Above working temperature range Drilling Manual metal arc welding Manual 0356 Water pump 0626 Keep dry 0430 weight Do not dispose in the garbage CE logo Engine coolant pressure Engine coolant f ilter Engine lubricating oil pressure Engine intake combustion air Engine i...

Page 9: ...n tires 20 x 10 8 tubeless 4 ply rating Rear steering tire and tube 20 x 8 8 2 ply rating Demountable front rims Recommended tire pressure 97 138 kPa front tires and 55 69 kPa rear tire Frame The frame consists of formed steel welded steel and steel tubing components Tricycle vehicle with 3 wheel traction drive and rear wheel steering Steering Pinion and sector gear with solid drag link to rear st...

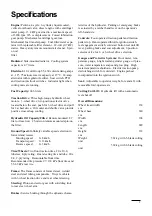
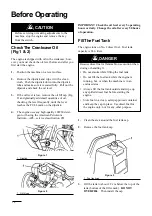
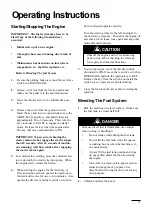
Page 10: ...ry 5 operating hours or daily Change the oil after every 50 hours of operation FillThe FuelTank The engine runs on No 2 diesel fuel Fuel tank capacity is 24 6 liters 1 Clean the area around the fuel tank cap 2 Remove the fuel tank cap Figure 3 1 Fuel tank cap 3 Fill the tank to about 2 5 cm below the top of the tank bottom of the filler neck DO NOT OVERFILL Then install the cap 10 Before Operating...

Page 11: ... The machine s system is filled at the factory with approximately 12 5 liters of fluid However check the level of hydraulic fluid before you first start the engine and daily thereafter Group 1 Hydraulic Fluid Recommended for ambient temperatures consistently below 37 C ISO type 46 68 anti wear hydraulic fluid Mobil Mobil Fluid 424 Shell Donax TD Amoco Amoco 1000 Conoco Power Tran 3 International H...

Page 12: ...ufficient 3 If the oil level is not at the center of the gauge remove the cap from the hydraulic oil reservoir and slowly fill the reservoir with Mobil 424 or equivalent hydraulic oil until the level reaches the center of the sight gauge DO NOT OVERFILL Figure 6 1 Hydraulic reservoir cap 2 Sight Gauge IMPORTANT To prevent system contam ination clean the top of the hydraulic oil con tainers before ...

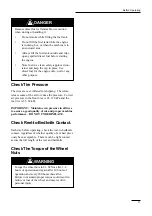
Page 13: ...ife CheckTheTorque of the Wheel Nuts 13 Before Operating Because diesel fuel is flammable use caution when storing or handling lt Do not smoke while filling the fuel tank Do not fill the fuel tank while the engine is running hot or when the machine is in an enclosed area Always fill the fuel tank outside and wipe up any spilled diesel fuel before starting the engine Store fuel in a clean safety ap...

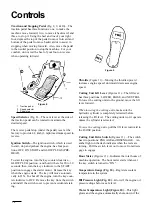
Page 14: ...ts The key will move automati cally to ON To shut off the engine turn the key coun terclockwise to OFF Remove the key from the switch and install the switch cover to prevent accidental start ing Figure 9 Throttle Figure 11 Moving the throttle upward increases engine speed downward decreases engine speed Cutting Unit Lift Lever Figures 11 The lift lever has three positions LOWER RAISE and NEUTRAL T...

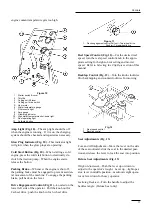
Page 15: ...he lever Drive Engagement Control Fig 11 Located on the lower left side of the operator Pull the knob out for 2 wheel drive push the knob in for 3 wheel drive Figure 11 1 Deck engagement control Pull out Two wheel drive Push in Three wheel drive Reel Speed Control Fig 12 For the desired reel speed turn the reel speed control knob to the appro priate setting for height of cut setting and mower spee...

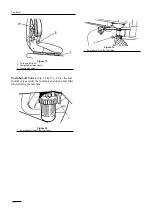
Page 16: ...er 3 Inclining backrest Fuel Shut off Valves Fig 14 15 Close the fuel shutoff valves under the fuel tank and on the fuel filter when storing the machine Figure 14 1 Fuel shut off under the fuel tank Figure 15 1 Fuel shut off on the fuel filter 16 Controls ...

Page 17: ...ne for the first time or after an engine overhaul operate the machine in forward and reverse for one to two minutes Also operate the lift lever and the reel drive switch to be sure all parts operate correctly Turn the steering wheel to the left and right to check steering response Then shut the engine off and check for oil leaks loose parts and any other noticeable malfunctions 7 To stop the engin...

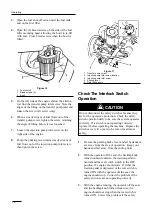
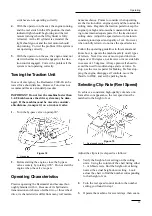
Page 18: ...ing lever 5 Note fitting angle CheckThe Interlock Switch Operation 1 Be sure the parking brake is set and all bystanders are away from the area of operation Keep your hands and feet away from the cutting units 2 With the operator off the seat the backlap knob turned counterclockwise the traction pedal in neutral and the reel switch switch in the OFF position the engine should start If either the t...

Page 19: ...er from many turf mainte nance machines Points to consider when operating are the traction drive engine speed and the load on the cutting units Regulate the traction pedal to keep the engine rpm high and somewhat constant while mow ing to maintain adequate power for the traction and cutting units Adjust the speed selector to maintain constant ground speed and quality of cut However when on hilly t...

Page 20: ...he fully up position move the traction pedal stop from under the pedal to allow full traction pedal travel and place the throttle control FAST While operating on slopes and uneven terrain always reduce speed and use extreme caution before turning to reduce risk of tipping or losing control Watch carefully for and avoid holes in the terrain sud den drop off s and other hidden hazards To prevent cos...

Page 21: ...ling air intake gasoline models are kept free of dirt or grass clippings After cleaning it is recommended the machine be inspected for possible hydraulic fluid leaks damage or wear to the hydraulic and mechanical components the cutting units be checked for sharpness and cor rect reel to bedknife adjustment 21 Operating ...

Page 22: ...the head bolts and adjust the valves Check the engine RPM idle and full throttle Service the air filter Replace the fuel filter Replace the hydraulic filter Torque the wheel lug nuts Change the engine oil filter Check the traction belt s tension Inspect the air filter dust cap and burp valve Lube all grease fittings Change engine oil Check engine belt tension Every 400 hours Every 200 hours Every ...

Page 23: ...g shaft 2 Fig 21 lift arms 3 Fig 22 rear lift cylinder pivot Fig 24 traction pedal pivot Fig 25 Also apply grease to slots in cylinder support Fig 26 Figure 20 23 Fluid Type Capacity Change Fluid Change Filter Filter Part No Engine oil SAE 10W30 CD 3 0 l 50 hours 100 hours 85 4930 Hyd circuit oil Mobil 424 12 5 l 400 hours 200 hours 54 0110 Fuel filter 200 hours Perkins 130366040 Air cleaner Clean...

Page 24: ...Figure 21 Figure 22 Figure 23 Figure 24 Figure 25 Figure 26 24 Maintenance ...

Page 25: ...id knocking the filter against the air cleaner s body 3 Inspect the filter and discard it if it is damaged Do not was or reuse a damaged filter Washing Method 1 Prepare a solution of filter cleaner and water and soak the filter element about 15 minutes 2 After soaking the filter for 15 minutes rinse it with clear water 3 Dry the filter element using warm flowing air no hotter than 71 C or allow th...

Page 26: ...of operation and after that every 250 hours of operation or yearly whichever comes first Use a genuine Toro oil filter for replacement The hydraulic fluid must be changed every 500 hours of operation or yearly whichever comes first 1 Park the machine on a level surface lower the cutting units set the parking brake and turn the engine off 2 If only the filter is to be changed remove the reservoir c...

Page 27: ...ening Reel Rotary Mowers Manual Form No 80 300PT NOTE For a better cutting edge run a file across the front face of the bedknife when the lapping operation is completed This will remove any burrs or rough edges that may have built up on the cutting edge MODEL AND SERIAL NUMBER The mower has two identification numbers a model number and a serial number The two numbers are stamped into a plate that ...

Page 28: ...dge with a vertical surface such as a tree building pole etc T h i s i s a 1 5 S l o p e T h i s i s a 2 0 S l o p e Example Compare the slop with the folded edge Fold along the appropriate line 15 and 20 Slope Chart ...

Page 29: ......

Reviews: