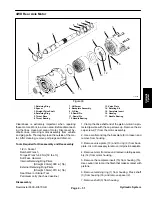
Reelmaster 6500–D/6700–D
Page 4 – 45
Hydraulic System
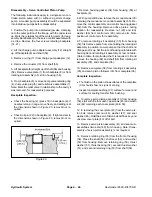
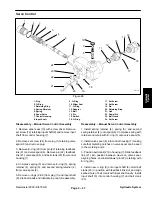
Housing Inspection:
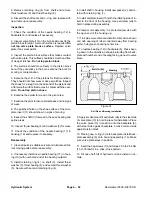
Check the bearing (57) (press fit) in housing (58). If
needles remain in cage, move freely, and setting at
the dimension shown in figure 24, removal not re-
quired.
Figure 24
15. To remove cradle sub–assembly (39), remove the
two cap screws (38) retaining cradle inside housing.
Move the cradle sub–assembly back–and–forth to re-
lease dowel bushings (40) and remove cradle sub–as-
sembly from housing.
16. Remove button head cap screw (32) to remove
bushing from cradle.
Bushing Inspection:
Inspect bushing (37) for contamination embedment
within coating of bushing surface coming in contact
with camplate (36).
17. Remove all plugs (61) from housing.
18. Discard the shaft seal (54), gaskets (34, 42, 62), and
o–rings from all assemblies. Replace with new seals
upon reassembly.
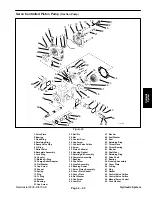
Reassembly – Servo Controlled Piston Pump
1. All parts should be cleaned and critical moving parts
lubricated before reassembly.
2. If necessary, press new bearing in housing to dimen-
sion shown in Figure 24 with the numbered end of bear-
ing outward.
3. Install the two new seal sub–assemblies (49) into the
servo piston cavity of housing (58).
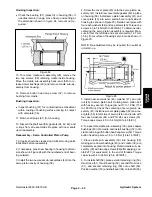
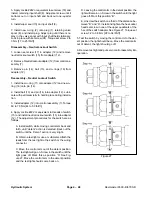
4. Screw the cover plate (43) onto the servo piston as-
sembly (41). Install new cover plate gasket (42) in place
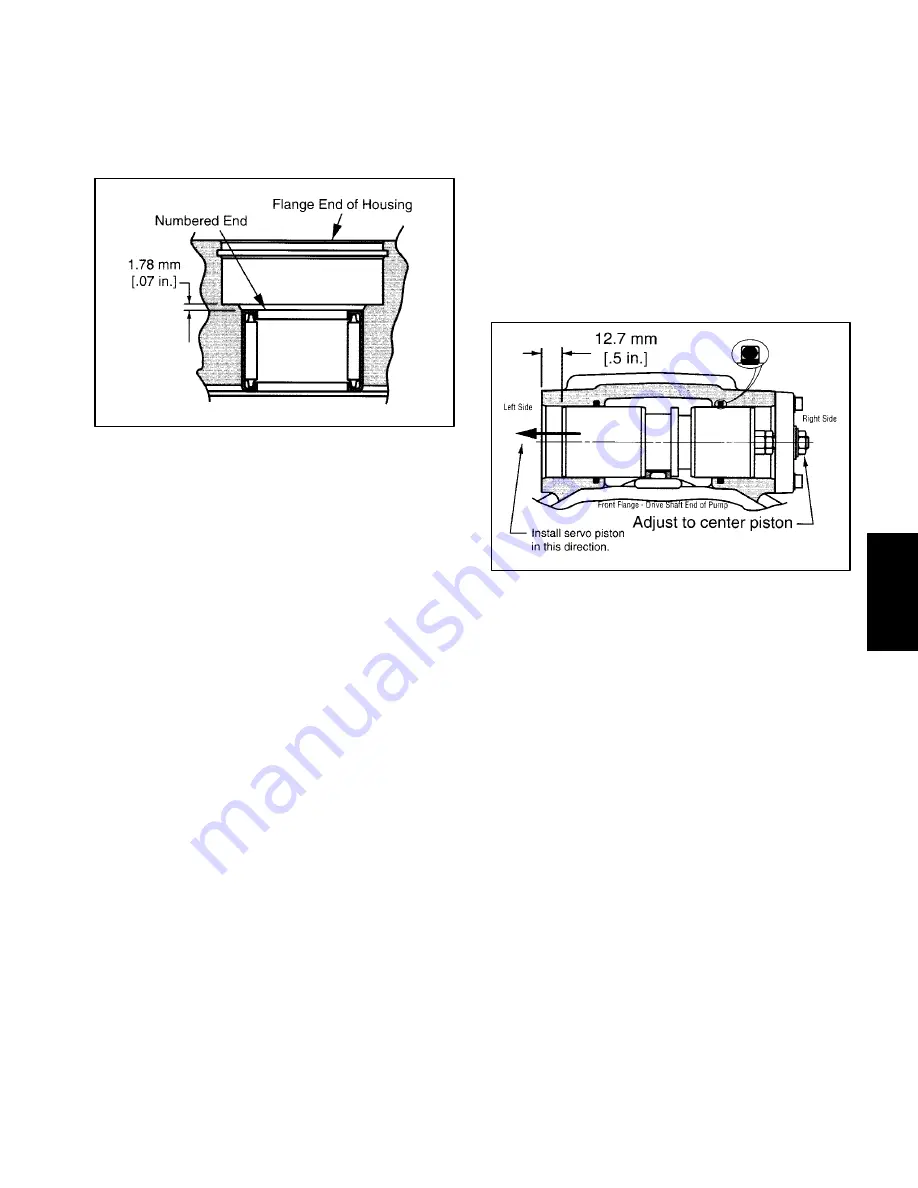
on housing (58). Install servo piston assembly (41) and
cover plate (43) into servo piston bore in right side of
housing (as shown in Figure 25). Retain cover plate with
four each washers (44) and cap screws (45). Torque cap
screws 4.5 to 5.4 Nm [40 to 48 Ibf
S
in.]. To obtain neutral,
centering the servo piston assembly is required. Mea-
sure in from the left side and set servo piston 12.7 mm
[.5 in.] from surface of housing servo bore as shown in
Figure 25.
NOTE: Re–adjustment may be required for neutral at
unit start–up.
Figure 25
5. Install new seal washer (48), washer (47), and jam
nut (46) to servo piston bolt. Holding servo piston bolt
with hex key wrench. Torque jam nut 17 to 18 Nm [150
to 160 Ibf
S
in]. Check the centering of servo piston as-
sembly (41). Install new cover plate gasket (42) and cov-
er plate (59) to left side of servo piston and retain with
four each washers (44) and #10–24 cap screws (45).
Torque cap screws 4.5 to 5.4 Nm [40 to 48 Ibf
S
in.].
6. To assemble cradle sub–assembly (39), press dowel
bushings (40) into cradle and install bushing (37) onto
cradle retaining with button head cap screw (32). Torque
button head cap screw 1.6 to 1.8 Nm [14 to 16 Ibf
S
ft.]
7. Place cradle sub–assembly (39) into housing (58)
making sure dowel bushings (40) and cradle (39) are
completely seated into housing. Retain cradle sub–as-
sembly (39) with two cap screws (38) after applying Loc-
tite #277 (or equivalent) to the end of threads. Torque
cap screws 34 to 38 Nm [25 to 28 Ibf
S
ft.].
8. To install shaft (56), place exterior retaining ring (50),
thrust race (51), thrust bearing (52), second thrust race
(51), and second retaining ring (50) onto shaft (56).
Position washer (53) and shaft seal (54) onto shaft (56).
Hydraulic System
Summary of Contents for REELMASTER 6500 D
Page 2: ...Reelmaster 6500 D 6700 D ...
Page 4: ...Reelmaster 6500 D 6700 D ...
Page 10: ...Reelmaster 6500 D 6700 D Page 1 6 Safety ...
Page 12: ...Reelmaster 6500 D 6700 D Page 2 2 Product Records and Manuals Equivalents and Conversions ...
Page 20: ...Rev C Reelmaster 6500 D 6700 D Page 2 10 Product Records and Manuals ...
Page 24: ...Rev C Reelmaster 6500 D 6700 D Page 2 14 Product Records and Manuals ...
Page 86: ...Engine Page 3 62 Reelmaster 6500 D 6700 D ...
Page 202: ...Reelmaster 6500 D 6700 D Page 5 8 2 Electrical System Rev C This page is intentionally blank ...
Page 226: ...Reelmaster 6500 D 6700 D Page 5 26 6 Electrical System Rev B This page is blank ...
Page 276: ...Reelmaster 6500 D 6700 D Page 6 22 Axles Planetaries and Brakes ...
Page 300: ...Reelmaster 6500 D 6700 D Page 7 24 Cutting Units Rev B Model 03853 Model 03854 Model 03855 ...

