Rev. B
Reelmaster 6500–D/6700–D
Page 5 – 26
Electrical System
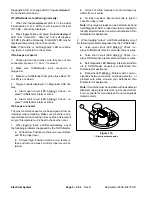
4. Turn the key switch to the ON position, but do not start
machine.
Note: The red text on the overlay decal refers to input
switches and the green text refers to outputs.
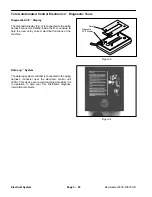
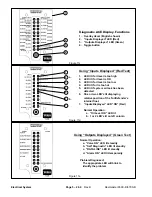
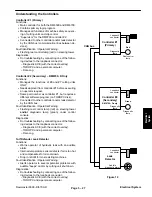
5. The “outputs displayed” LED, on lower right column
of Diagnostic ACE, should be illuminated. If “inputs dis-
played” LED is illuminated, press the toggle button, on
Diagnostic ACE, to change LED to “outputs displayed”.
Note: It may be necessary to toggle between “inputs dis-
played” and “outputs displayed” several times to do the
following step. To toggle back and forth, press toggle
button once. This may be done as often as required. DO
NOT HOLD BUTTON.
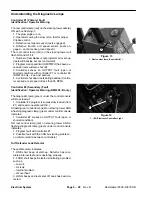
6. Sit on the seat and attempt to operate the desired
function of the machine. The appropriate output LED’s
should illuminate to indicate that the ECU is turning on
that function. (Refer to the list on page 21 to be certain
of the specified output LED’s.
Note: If any output LED is blinking, this indicates an
electrical problem with that OUTPUT. Repair / replace
defective electrical parts immediately. To reset a blinking
LED, turn the key switch “OFF”, then back “ON”.
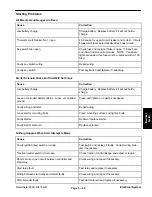
If no output LED’s are blinking, but the correct output
LED’s do not illuminate, verify that the required input
switches are in the necessary positions to allow that
function to occur. Verify correct switch function.
If the output LED’s are on as specified, but the machine
does not function properly, this indicates a non–electri-
cal problem. Repair as necessary.
Note: Due to electrical system constraints, the output
LED’s for “START”, “PREHEAT” and “ETR/ALT” may not
blink even though an electrical problem may exist for
those functions. If the machine problem appears to be
with one of these functions, be certain to check the elec-
trical circuit with a volt / ohm meter to verify that no elec-
trical problem exists to these functions.
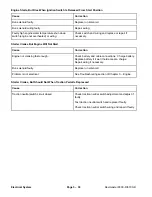
If each input switch is in the correct position and func-
tioning correctly, but the output LED’s are not correctly
illuminated, this indicates an ECU problem. If this oc-
curs, contact your Toro Distributor for assistance.
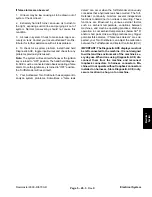
IMPORTANT: The Diagnostic ACE displays must not
be left connected to the machine. It is not designed
to withstand the environment of the machine’s ev-
ery day use. When done using Diagnostic ACE, dis-
connect them from the machine and reconnect
loopback connectors to harness connectors. Ma-
chine will not operate without loopback connectors
installed on harnesss. Store Diagnostic ACE in dry,
secure location in shop, not on machine.
Fault Memory and Retrieval
If the Controller senses a fault on one of the output so-
lenoids, it will flash the machines diagnostic Lamp
(Reel Control lamp or green Diagnostic lamp under con-
sole) and store the fault into the Controllers (ECU)
memory. The fault can then be retrieved and viewed with
the Diagnostic ACE hand held tool or a lap top/PC at
anytime. The Controller will store one (1) fault at a time
and will not store another different fault until the first fault
is cleared.
Retrieving Stored Faults
1.
Rotate ignition key to Off position.
2.
Connect the Hand held Diagnostic Tool to the de-
sired Controller Loopback Connector (use the proper
overlay).
3.
Move the Joystick to the Raise position and hold.
4.
Rotate ignition key to On position, and continue to
hold the Joystick in Raise position until the top left Diag-
nostic Tool light comes on (approx. 2 seconds).
5.
Release the Joystick to the center position.
6.
Hand held Tool will now playback the fault retained
in the Controller memory.
IMPORTANT: The display will show eight (8) individual
records with the fault displayed on the 8th record. Each
record will be displayed for 10 seconds. Be sure to have
the
Diagnostic Tool display on Outputs to see fault.
The Problem circuit will be flashing. Records will repeat
until key is turned off. Unit will not start in this mode.
Clearing the Fault Memory
(Diagnostic Tool not required)
1.
Rotate ignition key to Off position.
2.
Turn Backlap Switch to the Front or Rear Backlap
position.
3.
Turn the Reel Control Switch to Enable position.
4.
Move the Joystick to the Raise position and hold.
5.
Turn the ignition key to On, and continue to hold the
Joystick in the Raise position until the Reel Control
Lamp starts to flash (approx. 2 seconds).
6.
Release the Joystick and turn the Key Off. Memory
is now cleared.
7.
Turn the Backlap Switch to Off and Enable Switch to
Disable position.
Summary of Contents for REELMASTER 6500 D
Page 2: ...Reelmaster 6500 D 6700 D ...
Page 4: ...Reelmaster 6500 D 6700 D ...
Page 10: ...Reelmaster 6500 D 6700 D Page 1 6 Safety ...
Page 12: ...Reelmaster 6500 D 6700 D Page 2 2 Product Records and Manuals Equivalents and Conversions ...
Page 20: ...Rev C Reelmaster 6500 D 6700 D Page 2 10 Product Records and Manuals ...
Page 24: ...Rev C Reelmaster 6500 D 6700 D Page 2 14 Product Records and Manuals ...
Page 86: ...Engine Page 3 62 Reelmaster 6500 D 6700 D ...
Page 202: ...Reelmaster 6500 D 6700 D Page 5 8 2 Electrical System Rev C This page is intentionally blank ...
Page 226: ...Reelmaster 6500 D 6700 D Page 5 26 6 Electrical System Rev B This page is blank ...
Page 276: ...Reelmaster 6500 D 6700 D Page 6 22 Axles Planetaries and Brakes ...
Page 300: ...Reelmaster 6500 D 6700 D Page 7 24 Cutting Units Rev B Model 03853 Model 03854 Model 03855 ...

