Pre-Maintenance
Procedures
Maintenance Safety
•
Before repairing the machine do the following:
– Disengage the drives.
– Engage the parking brake.
– Shut off the engine and remove the key.
– Disconnect the spark-plug wire.
•
Park the machine on a level surface.
•
Clean grass and debris from the cutting unit,
drives, mufflers, and engine to help prevent fires.
•
Clean up oil or fuel spills.
•
Do not allow untrained personnel to service the
machine.
•
Use jack stands to support the machine and/or
components when required.
•
Carefully release pressure from components with
stored energy.
•
Disconnect the battery or remove the spark-plug
wire before making any repairs. Disconnect the
negative terminal first and the positive terminal
last. Connect the positive terminal first and
negative last.
•
Use care when checking the blades. Wrap the
blade(s) or wear thickly padded gloves, and use
caution when servicing them. Only replace blades;
do not straighten or weld them.
•
Keep your hands and feet away from moving
parts. If possible, do not make adjustments with
the engine running.
•
Keep all parts in good working condition
and all hardware tightened, especially the
blade-attachment bolts. Replace all worn or
damaged decals.
•
Never interfere with the intended function of a
safety device or reduce the protection provided
by a safety device. Check their proper operation
regularly.
•
To ensure optimum performance and continued
safety certification of the machine, use only
genuine Toro replacement parts and accessories.
Replacement parts and accessories made by
other manufacturers could be dangerous, and
such use could void the product warranty.
•
Check the parking brake operation frequently.
Adjust and service as required.
Releasing the Mower-Deck
Curtain
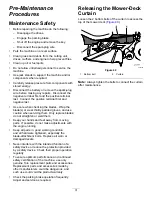
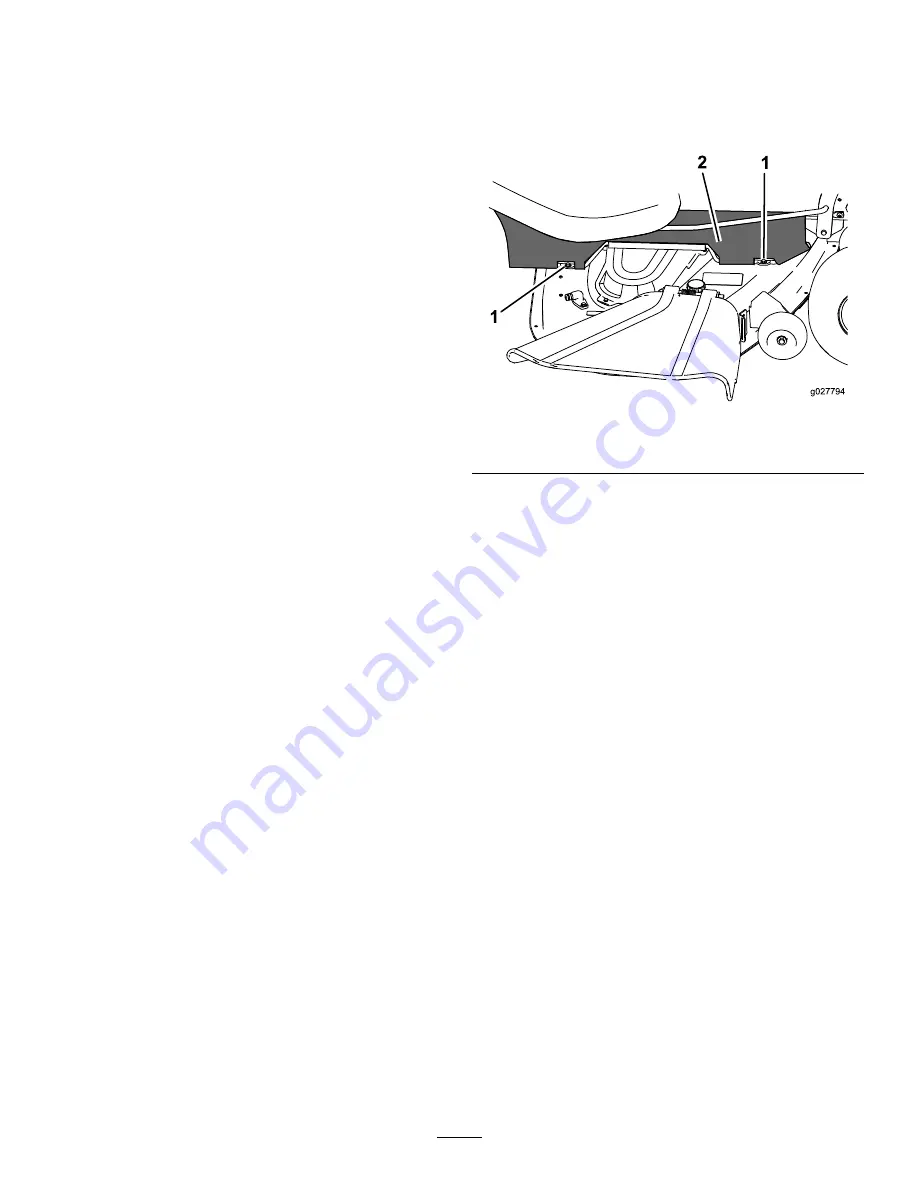
Loosen the 2 bottom bolts of the curtain to access the
top of the mower deck (
g027794
Figure 40
1.
Bottom bolt
2.
Curtain
Note:
Always tighten the bolts to connect the curtain
after maintenance.
31
Summary of Contents for TimeCutter HD X4850
Page 54: ...Schematics g203461 Electrical Diagram Rev A 54 ...
Page 55: ...Notes ...

