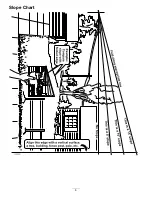
4-1/2 in (1
15 mm)
4 in. (102 mm)
3-1/2 in (89 mm)
3 in (76 mm)
2-1/2 in (64 mm)
2 in ( 51 mm)
1-1/2 in (38 mm)
4-1/2 in (1
15 mm)
4 in (102 mm)
3-1/2 in (89 mm)
3 in (76 mm)
2-1/2 in (64 mm)
2 in ( 51 mm)
1-1/2 in (38 mm)
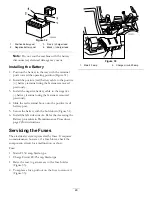
G005312
4.5
1
2
4
3.5
3
2.5
2
1.5
Figure 15
1.
Height-of-cut lever
2.
Height-of-cut positions
Positioning the Seat
The seat can move forward and backward. Position the
seat where you have the best control of the machine
and are most comfortable.
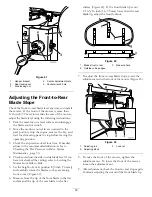
1. Raise the seat and loosen the adjustment knob just
enough that seat can move (Figure 16).
Important:
Make sure that the spacers stay
in place when loosening the knob to move the
seat. Loss of the spacers can result in damage
to the seat.
G005061
1
Figure 16
1.
Adjustment knob
2. Move the seat to the desired position and tighten
the knob.
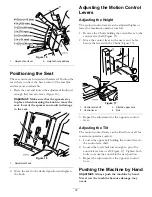
Adjusting the Motion Control
Levers
Adjusting the Height
The motion control levers can be adjusted higher or
lower for maximum operator comfort.
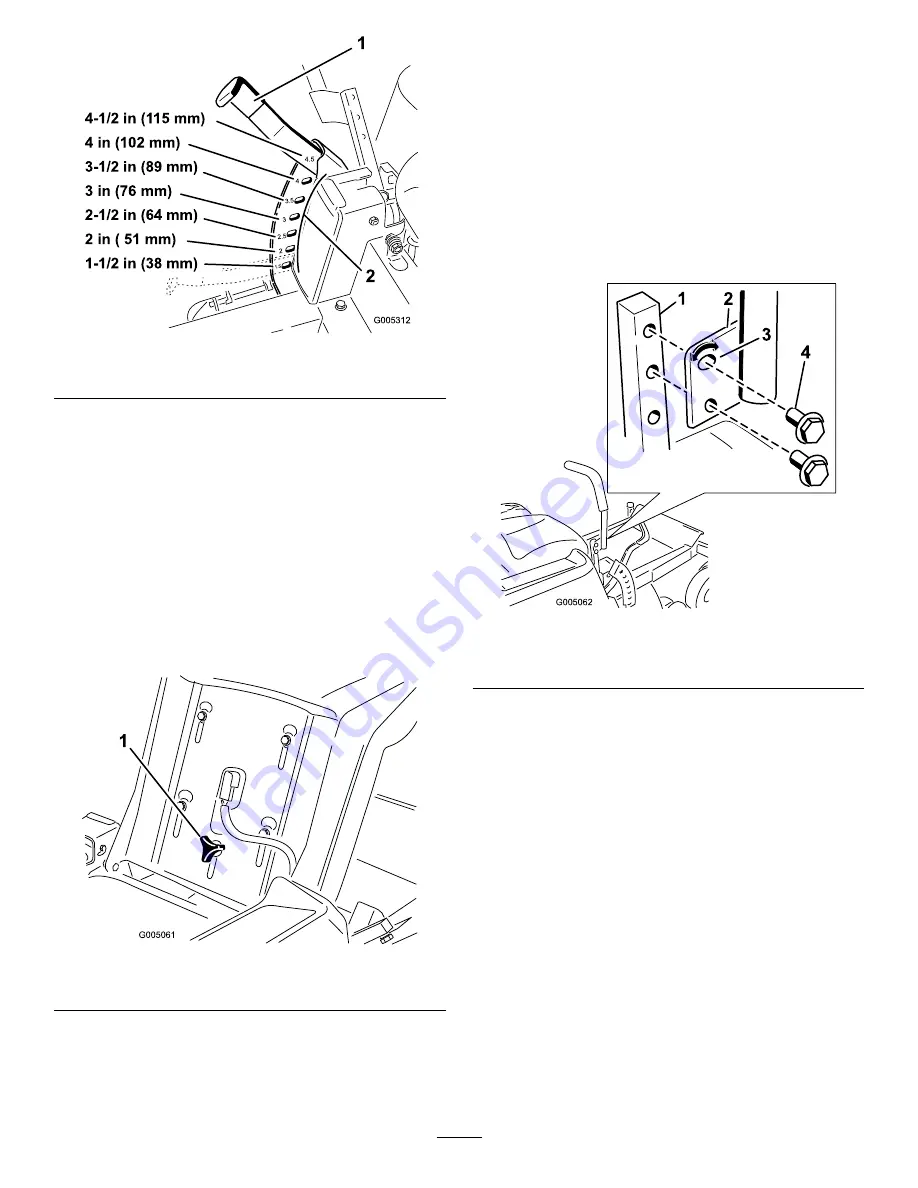
1. Remove the 2 bolts holding the control lever to the
control arm shaft (Figure 17).
2. Move the control lever to the next set of holes.
Secure the lever with the 2 bolts (Figure 17).
G005062
1
2
3
4
Figure 17
1.
Control arm shaft
3.
Slotted, upper hole
2.
Control lever
4.
Bolt
3. Repeat the adjustment for the opposite control
lever.
Adjusting the Tilt
The motion control levers can be tilted fore or aft for
maximum operator comfort.
1. Loosen the upper bolt holding the control lever to
the control arm shaft.
2. Loosen the lower bolt just enough to pivot the
control lever fore or aft (Figure 17). Tighten both
bolts to secure the control in the new position.
3. Repeat the adjustment for the opposite control
lever.
Pushing the Machine by Hand
Important:
Always push the machine by hand.
Never tow the machine because damage may
occur.
18

