wait for all moving parts to stop before leaving
the operating position.
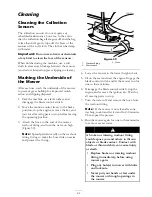
3. Remove the engine hood.
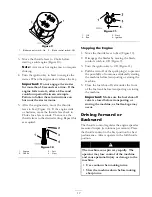
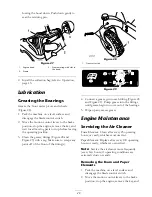
4. Clean around the air cleaner to prevent dirt
from getting into the engine and causing
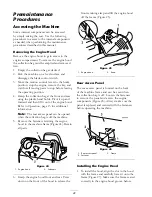
damage. Pull up on the air cleaner cover handle
and rotate it toward the engine (Figure 30).
Remove the air cleaner cover.
Figure 30
1. Air cleaner cover
2. Air cleaner cover handle
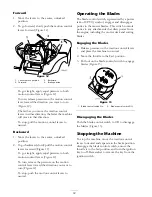
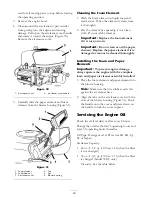
5. Carefully slide the paper element and foam
element from the blower housing (Figure 31).
Figure 31
1. Paper element
4. Tab
2. Foam element
5. Slot
3. Air cleaner cover
6. Blower housing
Cleaning the Foam Element
1. Wash the foam element in liquid soap and
warm water. When the element is clean, rinse
it thoroughly.
2. Dry the element by squeezing it in a clean
cloth. Do not oil the element.
Important:
Replace the foam element
if it is torn or worn.
Important:
Do not clean or oil the paper
element. Replace the paper element if it is
damaged or cannot be cleaned thoroughly.
Installing the Foam and Paper
Elements
Important:
To prevent engine damage,
always operate the engine with the complete
foam and paper air cleaner assembly installed.
1. Place the foam element and paper element into
the blower housing.
Note:
Make sure that the rubber seal is flat
against the air cleaner base.
2. Align the tabs on the air cleaner cover with the
slots of the blower housing (Figure 31). Hook
the handle onto the cover and press down on
the handle to lock the cover in place.
Servicing the Engine Oil
Check the oil level daily or after every 8 hours.
Change the oil after the first 5 operating hours and
every 50 operating hours thereafter.
Oil Type: Detergent oil (API service SG, SH, SJ,
SL or higher)
Crankcase Capacity:
•
48 oz./1-1/2 qt. (1400 cc/1.4 l) when the filter
is not changed;
•
56 oz./1-3/4 qt. (1700 cc/1.7 l) when the filter
is changed (Model 74433 only)
Viscosity: See the table below.
30
Summary of Contents for TimeCutter ZD420
Page 8: ...Slope Chart 8 ...
Page 49: ...Schematics Electrical Diagram Rev A 49 ...
Page 50: ......
Page 51: ......
Page 52: ......

