13
Operation
Note: Determine the left and right sides of the machine
from the normal operating position.
Think Safety First
Please carefully read all of the safety instructions and
decals in the safety section. Knowing this information
could help you, your family, pets or bystanders avoid
injury.
Controls
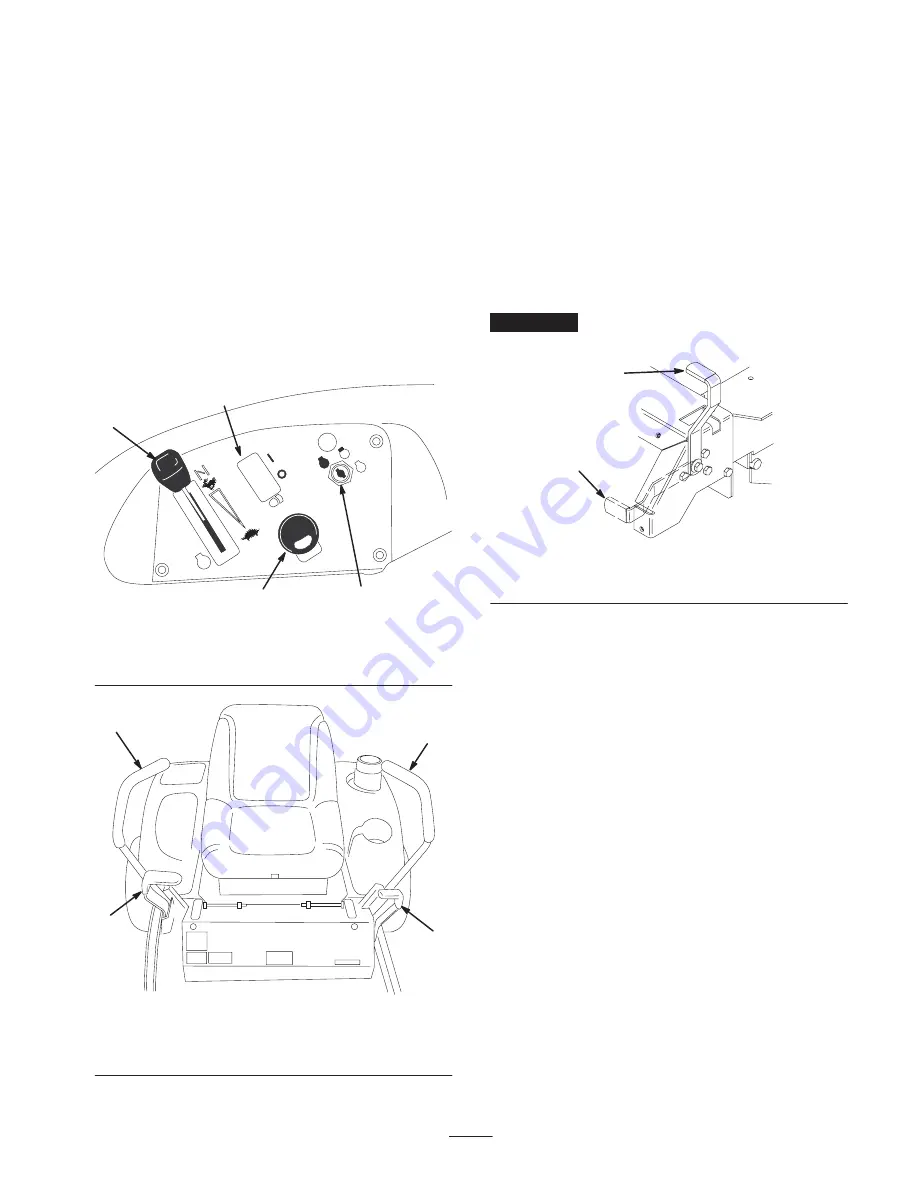
Become familiar with all of the controls (Fig. 2 and 3)
before you start the engine and operate the machine.
m–5135
1
2
3
4
Figure 2
1.
Ignition switch
2.
Throttle/Choke
3.
Power take off (PTO)
4.
Headlights—optional
m–5134
1
1
2
3
Figure 3
1.
Motion control lever
2.
Parking brake lever
3.
Height-of-cut lever
Parking Brake
Always set the parking brake when you stop the machine or
leave it unattended.
Setting the Parking Brake
1. Move the motion control levers (Fig. 3) out to the
neutral lock position.
2. Pull back and up on the parking brake lever to set the
parking brake (Fig. 4). The parking brake lever should
stay firmly in the Engaged position.
Important
Do not engage the parking brake while the
machine is moving. Damage to the drive system may occur.
1
2
m–4121
Figure 4
1.
Parking brake—On
2.
Parking brake—Off
Releasing the Parking Brake
Push forward and down on the parking brake lever to
release the parking brake (Fig. 4).
Starting and Stopping the
Engine
Starting
1. Sit down on the seat and move the motion controls to
neutral locked position.
2. Set the parking brake; refer to Setting the Parking
Brake, page 13.
Summary of Contents for Z16-44 TimeCutter
Page 6: ...6 ...
Page 7: ...7 Slope Chart ...
Page 8: ...8 ...
Page 11: ...11 104 8014 1 Parking brake 104 5091 104 8088 ...
Page 38: ...38 ...
Page 39: ...39 ...


