48
Incorrect battery cable routing could damage the
machine and cables causing sparks. Sparks can
cause the battery gasses to explode, resulting in
personal injury.
•
Always Disconnect the negative (black) battery
cable before disconnecting the positive (red)
cable.
•
Always Reconnect the positive (red) battery
cable before reconnecting the negative (black)
cable.
Warning
1. Disengage the power take off (PTO), set the parking
brake, and turn the ignition key to off. Remove the key.
2. Tilt seat up.
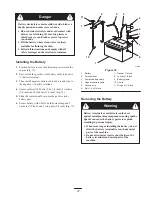
3. First disconnect the negative battery cable and ground
wire from the negative (–) battery terminal (Fig. 72).
4. Slide the red terminal boot off the positive (red) battery
terminal. Then remove positive (red) battery cable
(Fig. 72).
5. Remove both wing nuts (1/4 inch) securing the battery
clamp (Fig. 72).
6. Remove the battery.
Adding Water to the Battery
The best time to add distilled water to the battery is just
before you operate the machine. This lets the water mix
thoroughly with the electrolyte solution.
1. Remove the battery from the machine.
2. Clean the top of the battery with a paper towel.
Note: Never fill the battery with distilled water while the
battery installed in the machine. Electrolyte could be
spilled on other parts and cause corrosion.
3. Remove the vent caps from the battery (Fig. 71).
4. Slowly pour distilled water into each battery cell until
the level is up to the upper line (Fig. 71) on the battery
case.
Important
Do not overfill the battery because
electrolyte (sulfuric acid) can cause severe corrosion and
damage to the chassis.
5. Wait five to ten minutes after filling the battery cells.
Add distilled water, if necessary, until the electrolyte
level is up to the upper line (Fig. 71) on the battery
case.
6. Reinstall battery vent caps.
Charging the Battery
Charging the battery produces gasses that can
explode.
Never smoke near the battery and keep sparks and
flames away from battery.
Warning
Important
Always keep the battery fully charged
(1.265 specific gravity). This is especially important to
prevent battery damage when the temperature is below
32
°
F (0
°
C).
1. Remove the battery from the chassis; refer to Removing
the Battery, page 47.
2. Check the electrolyte level; refer to Checking
Electrolyte Level, page 46.
3. Make sure the filler caps are installed in battery. Charge
battery for 10 to 15 minutes at 25 to 30 amps or 30
minutes at 4–6 amps.
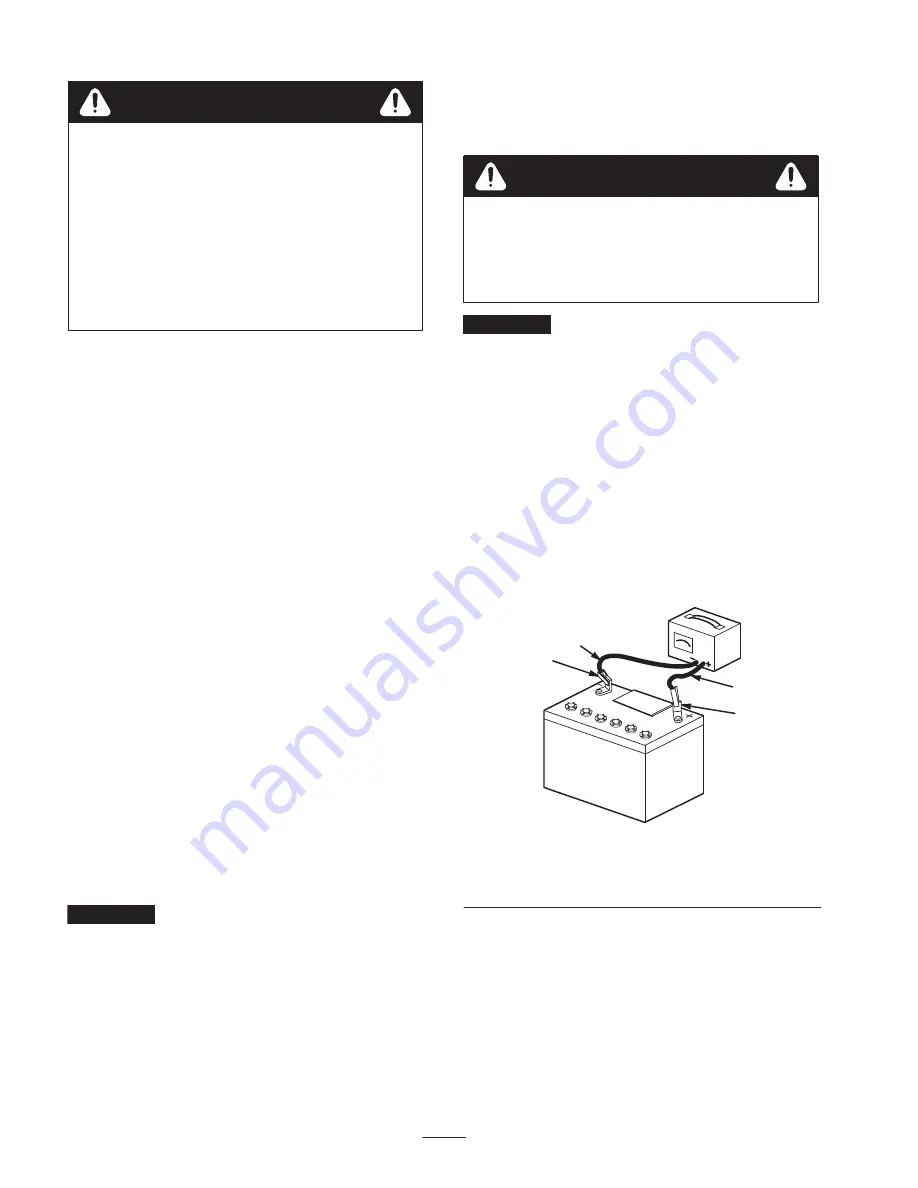
4. When the battery is fully charged, unplug the charger
from the electrical outlet, then disconnect the charger
leads from the battery posts (Fig. 73).
4
1
2
3
m–4970
Figure 73
1.
Positive Battery Post
2.
Negative Battery Post
3.
Red (+) Charger Lead
4.
Black (–) Charger Lead
5. Install the battery in the machine and connect the
battery cables; refer to Installing the Battery on page 47.
Note: Do not run the machine with the battery
disconnected, electrical damage may occur.
Summary of Contents for Z287L Z Master
Page 6: ...6 Slope Chart ...
Page 7: ...7 ...
Page 12: ...12 103 2433 106 6571 106 6570 ...
Page 55: ...55 ...

