15
5)
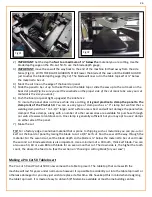
With the side fence wings still clamped to the straight edge, slide the other wing lock up to the side fence wing
and tighten the wing lock bolt.
(Fig F2) (NOTE: There are 2 wing locks in total that must be tightened).
Remove the “C” clamps and the straight edge
from the side fence. Move the side fence wings back and
forth a few times. Then lock the side fence wings into the wing locks and tighten the thumb screw of
the wing lock to firmly hold the side fence wings in place. Check to be sure the side fence wings are still
in alignment with each other by placing the straight edge against the side fence wings.
6)
You can further fine tune for square to the saw blade by clamping the straight edge to the wings as
before and loosen only both wing locking bolts. For slight adjustments you can square the wings to the
saw blade. Then slide the wing locks back up to the wings and tighten the wing lock bolts that hold the
wing lock assy to the clamp rail of the Pro-Cut 50 frame.
7)
Now that the side fence is exactly square to the saw blade, check to be sure the saw blade is running
“true”.
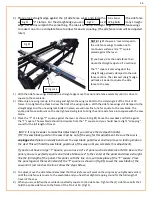
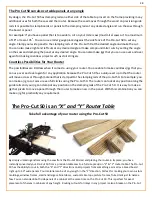
Show in Fig. 8g
, the saw bade is “not true” and adjustment
is required.
To adjust the saw blade for “
true
”,
loosen the (4) bolts that fasten the saw to the insert plate. With the
bolts loose
and the “T” Square in place
against the side fence, move the saw until the flat of the saw
blade is flat to the “T” Square, bring
ing
the saw blade to “True”. Tighten the saw mounting bolts.
This completes the set-up and alignment procedure. You should make a few test cuts to test your
set-up.
Fig 8g
Saw blade is
not flat to the
“T” square


