Troubleshooting
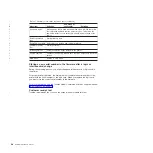
Table 22 contains common steps to identify and resolve problems. For the latest
troubleshooting guidance and symptom-fix tip information, go to the Knowledgebase
located on the Toshiba Global Commerce Solutions support website at
www.toshibagcs.com/support.
This site contains additional information that is gathered from field experience, and
might not have been available at the publishing date of this document.
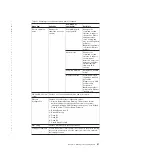
Table 22. Troubleshooting
If the problem is...
Then do this...
Printer-ready indicator is off.
v
Check the power to the printer.
v
If connected to a system using the RS-485 communication port, check that
the system is turned on and that cable 7 is connected.
v
If using the RS-232 communication port, Ethernet communication, or a USB
port with a power brick, check that the brick power supply is connected to the
printer and plugged into an AC power source.
v
If using USB communication with a powered USB cable, check that the
system is turned on.
Printer-ready indicator is blinking.
v
Check that the customer receipt station has paper loaded correctly. Close the
cover and push the Customer Receipt Feed button to feed a small amount of
paper.
v
Check that the paper door is closed.
v
Verify that the cutter does not have an error.
v
If connected using Ethernet, verify that the main logic card supports Ethernet.
If Ethernet is not supported, a message is printed out (only applicable to
firmware 14.00; no message is printed for earlier versions). You must change
to another interface or replace the main logic card.
Customer receipt station is feeding
paper, but is not printing.
v
Ensure that the paper roll is not upside down. Go to “Loading and replacing
the paper roll” on page 35.
v
Clean the printhead. See “Cleaning the thermal printhead” on page 37.
Firmware will not update to an
earlier version
v
Paper Out Sensor Type 1 will
only work with 9.x firmware or
later
v
Ethernet Communications will
only work with 14.00 firmware or
later
v
On an Ethernet printer, verify the firmware file is greater than 14.00.
v
Paper out sensor Type 1 will only work with 9.x firmware or later.
v
Perform an online test to determine which sensor type you have.
Paper out sensor is not working
v
Check printer firmware level by performing an offline test.
v
If firmware is an earlier version than 9.x and the paper ready light stays green
when the paper is out, update the firmware to 9.x or later.
v
Perform the paper out sensor test in the offline menu.
Ethernet printer not printing
v
Check that the Ethernet cable is plugged into the printer and the LEDs are lit.
v
Check that the printer has an IP address by running an offline test.
v
Check the network that the printer is connected to.
Ethernet printer not printing logos
v
Make sure the logo has been downloaded via the configurations utility or that
the application downloads the logo via UPOS.
v
See “Ethernet Configuration” on page 6 for more information.
Chapter 4. Running tests and diagnostics
49
|
|
|
|
|
|
|
|
|
|
|
|
|
|
|
||
|
|
||
|
|
Summary of Contents for 1NA
Page 2: ......
Page 8: ...vi SureMark Hardware Service ...
Page 10: ...viii SureMark Hardware Service ...
Page 12: ...x SureMark Hardware Service ...
Page 16: ...xiv SureMark Hardware Service ...
Page 18: ...xvi SureMark Hardware Service ...
Page 46: ...28 SureMark Hardware Service ...
Page 56: ...38 SureMark Hardware Service ...
Page 88: ...70 SureMark Hardware Service ...
Page 90: ...Assembly 1 Models 1NR 1NA and 1ND 1 2 3 4 5 7 6 72 SureMark Hardware Service ...
Page 92: ...Assembly 1 continued 74 SureMark Hardware Service ...
Page 108: ...90 SureMark Hardware Service ...
Page 109: ......
Page 110: ...G362 0565 05 ...


